• Skip to main content
  • Skip to header left navigation
  • Skip to header right navigation
  • Skip to after header navigation
  • Skip to site footer
  • Start Here
    • About
    • Contact
    • Media Kit
  • Blog
    • All Posts
    • Natalie
    • Taylor
    • Carissa
All Things with Purpose

All Things with Purpose

RV Renovations and Family Travel

  • Shop
    • Amazon Storefront
    • My Online Store
  • At Home
    • Crafts & Sewing
      • Doll Clothes
    • Decor & DIY
    • Homeschooling
    • Lifestyle
    • Parties & Seasonal Celebrations
    • Recipes
  • RV Renovating
    • Renovated RVs For Sale
    • How To
    • Tours
  • ON THE GO
    • Theme Parks
      • Ride Guides
      • Universal Studios
      • Disney World
      • SeaWorld Orlando
      • Cedar Point
    • Travel Tips
    • Camping
    • Cruises
    • Florida
    • Michigan
    • California
    • Hawaii
    • NYC
  • Popular Posts
    • How To Paint RV Walls
    • How Much Does it Cost to Renovate an RV
    • Basic Dress Pattern for American Girl Dolls
    • Our Favorite Spots in Northern Michigan
Home › Blog › Lace Crown Tutorial

Lace Crown Tutorial

Sarah Lempon November 13, 2012(updated June 6, 2018)2K+
The Girl Inspired
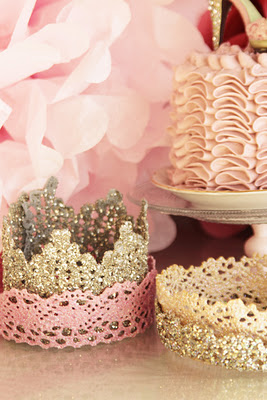
I originally stumbled upon these adorable lace crowns on Pinterest. I followed to the link to thegirlinspired.com and found her tutorial to be very helpful! The only thing is, I like to use what I have on hand. I had lace, spray paint and glitter, but not the fabric stiffener she used. I did however, have an old bottle of Mod Podge. I am also not very patient when it comes to craft projects, and I didn’t like that   the lace took overnight to dry between steps. I improvised! Here’s what I did:
What you need


  • Wide strips of lace cut to size (I did some to fit my daughter’s head and some to fit her dolls)
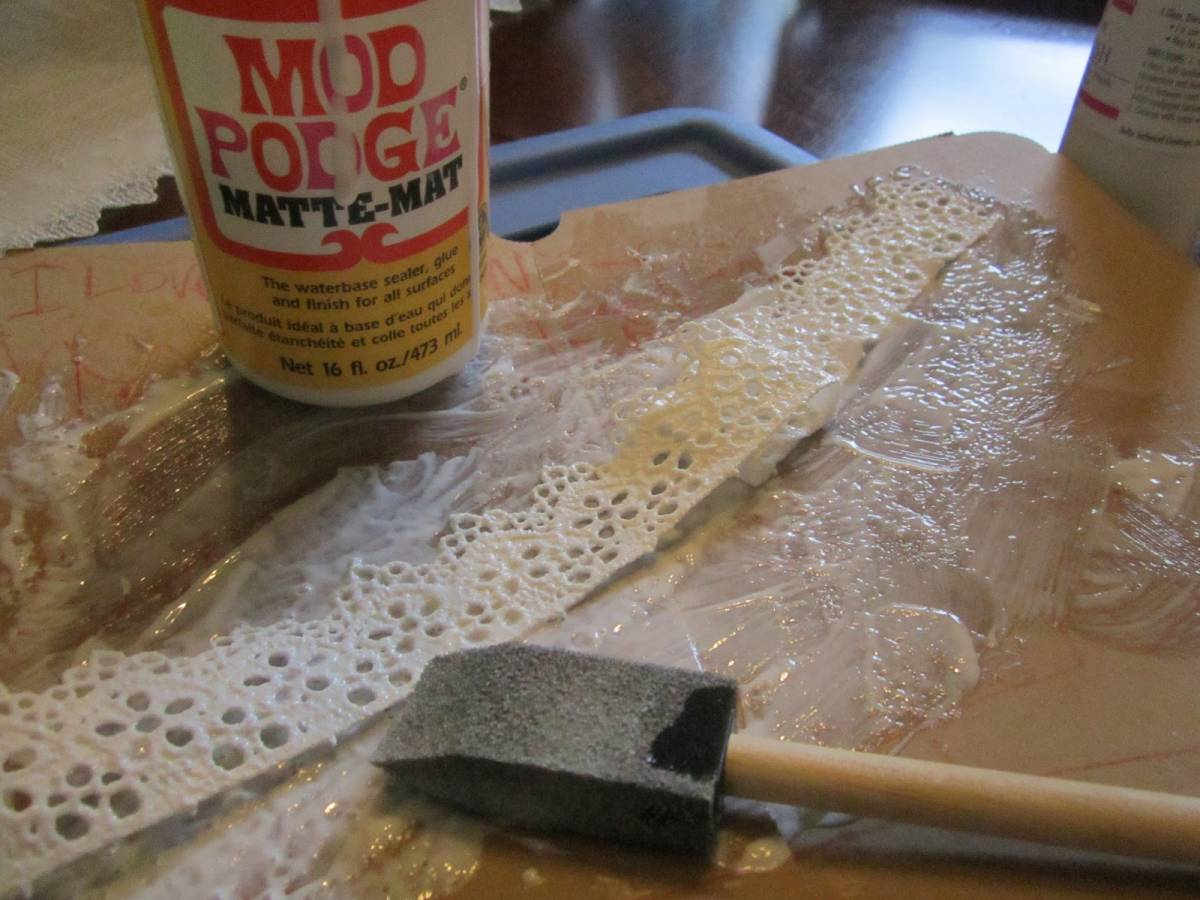
  • Mod Podge or Elmer’s Glue
  • Foam brush
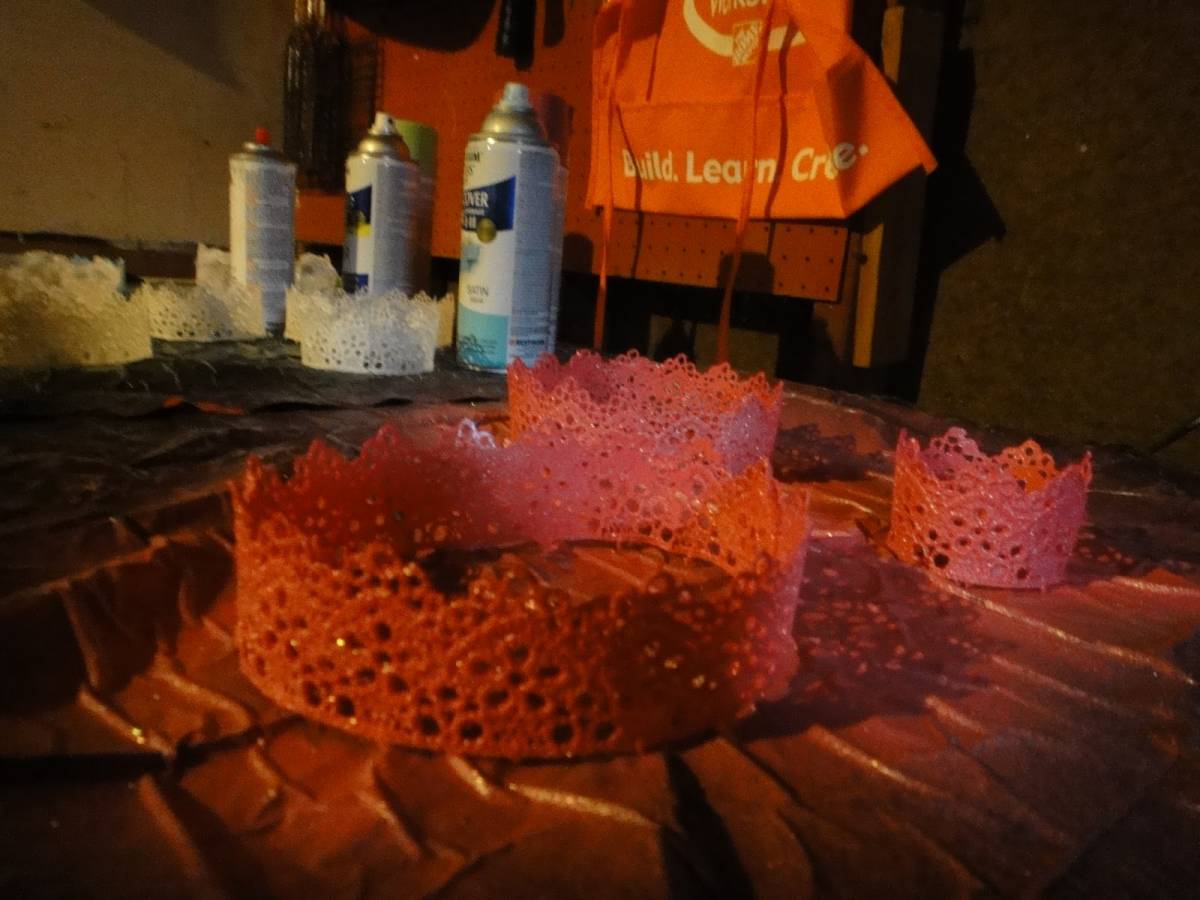
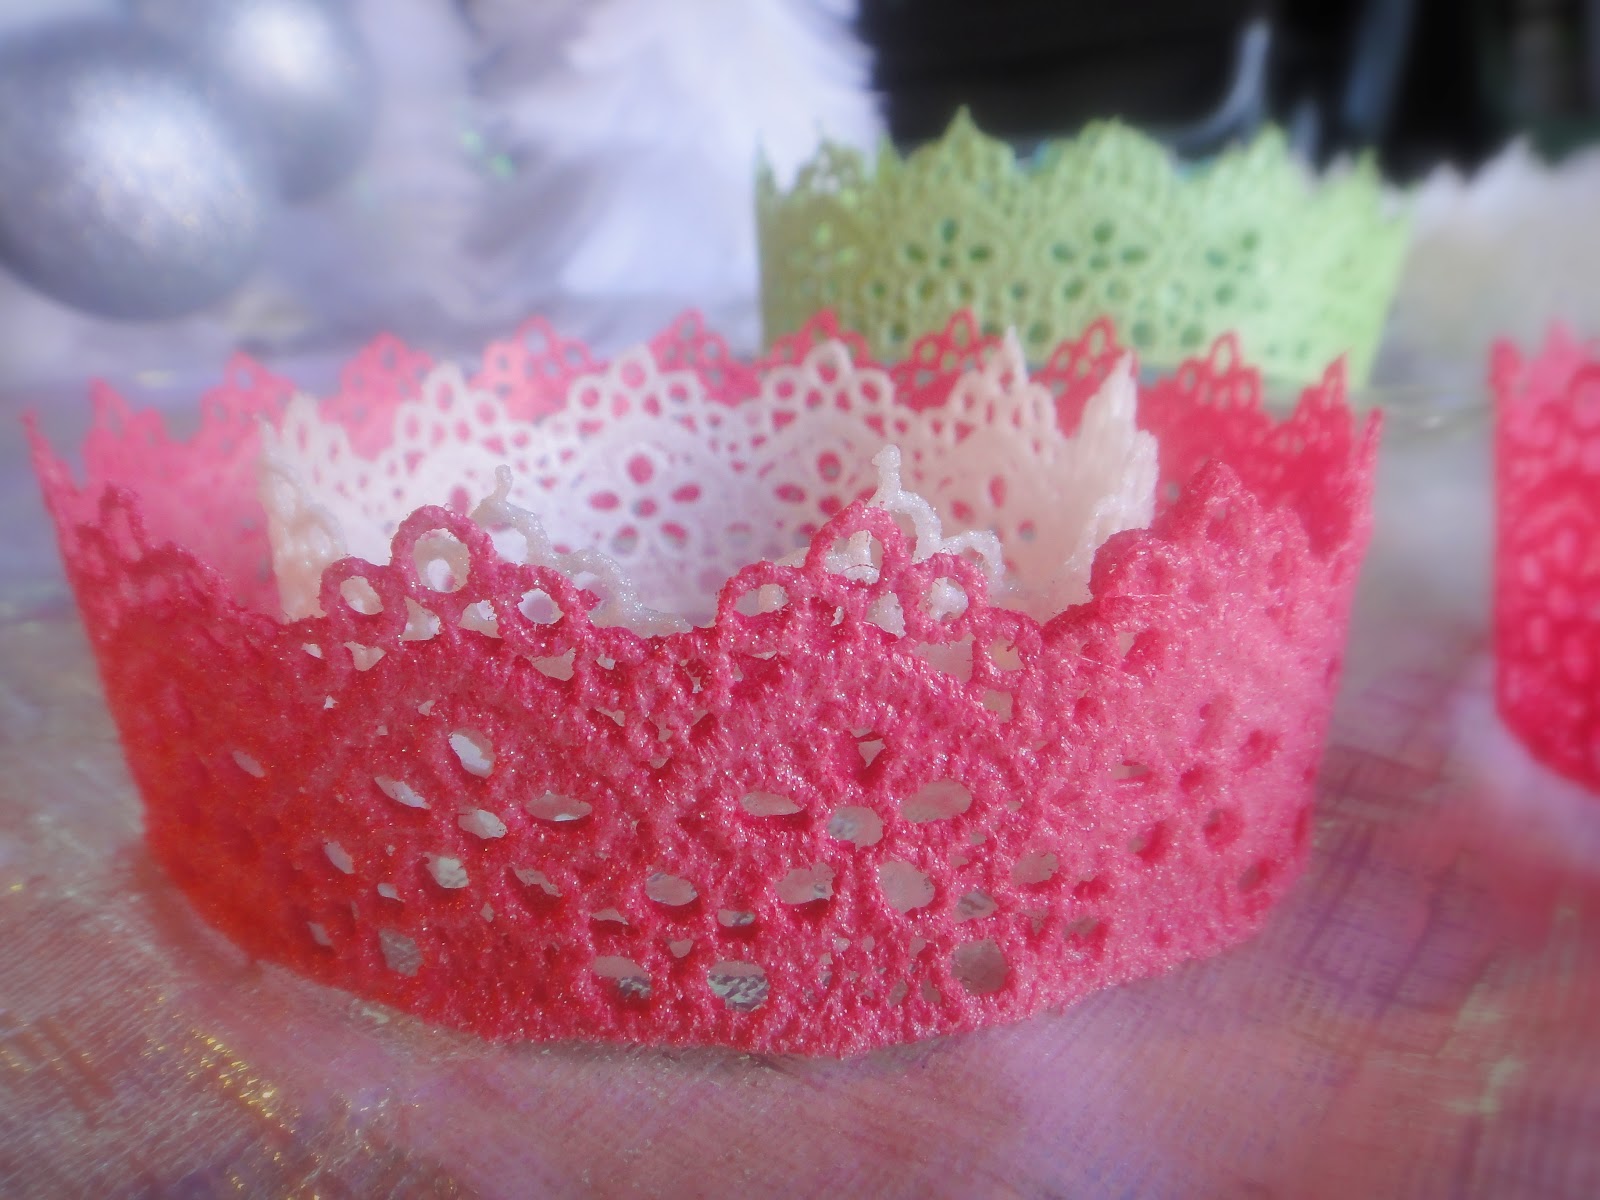
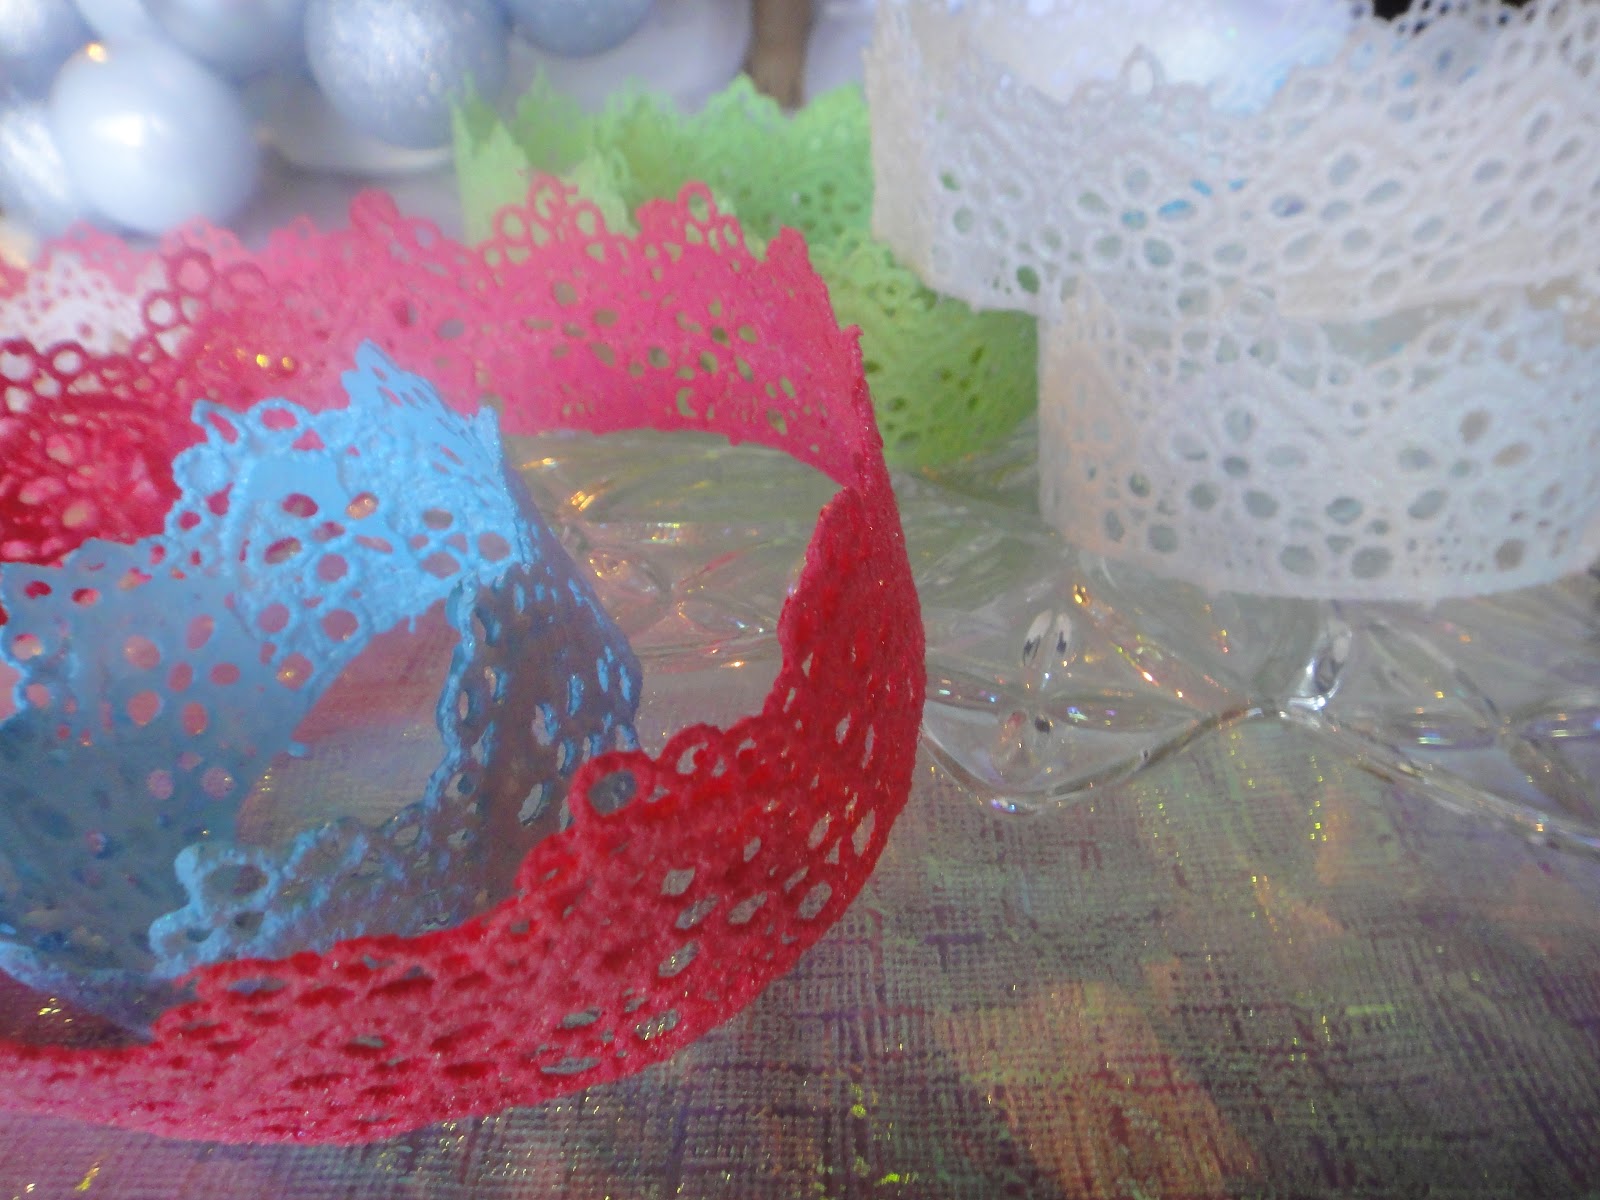
  • Spray paint in desired colors
  • Spray glitter or regular glitter
  • Glue gun
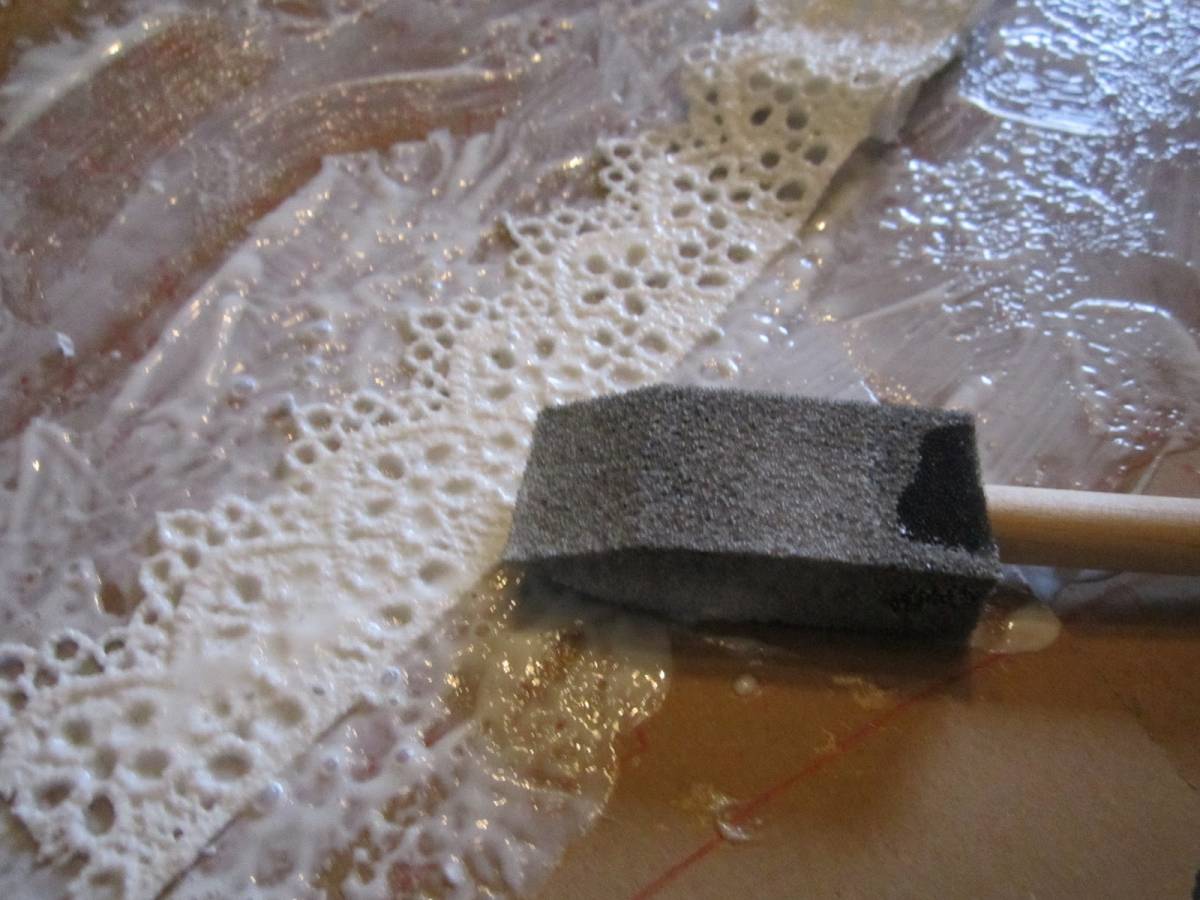
I laid out each piece of lace and covered both sides in a healthy dose of the Mod Podge. I then transferred them directly to a cookie sheet to dry, being careful to lay them out smooth and flat.


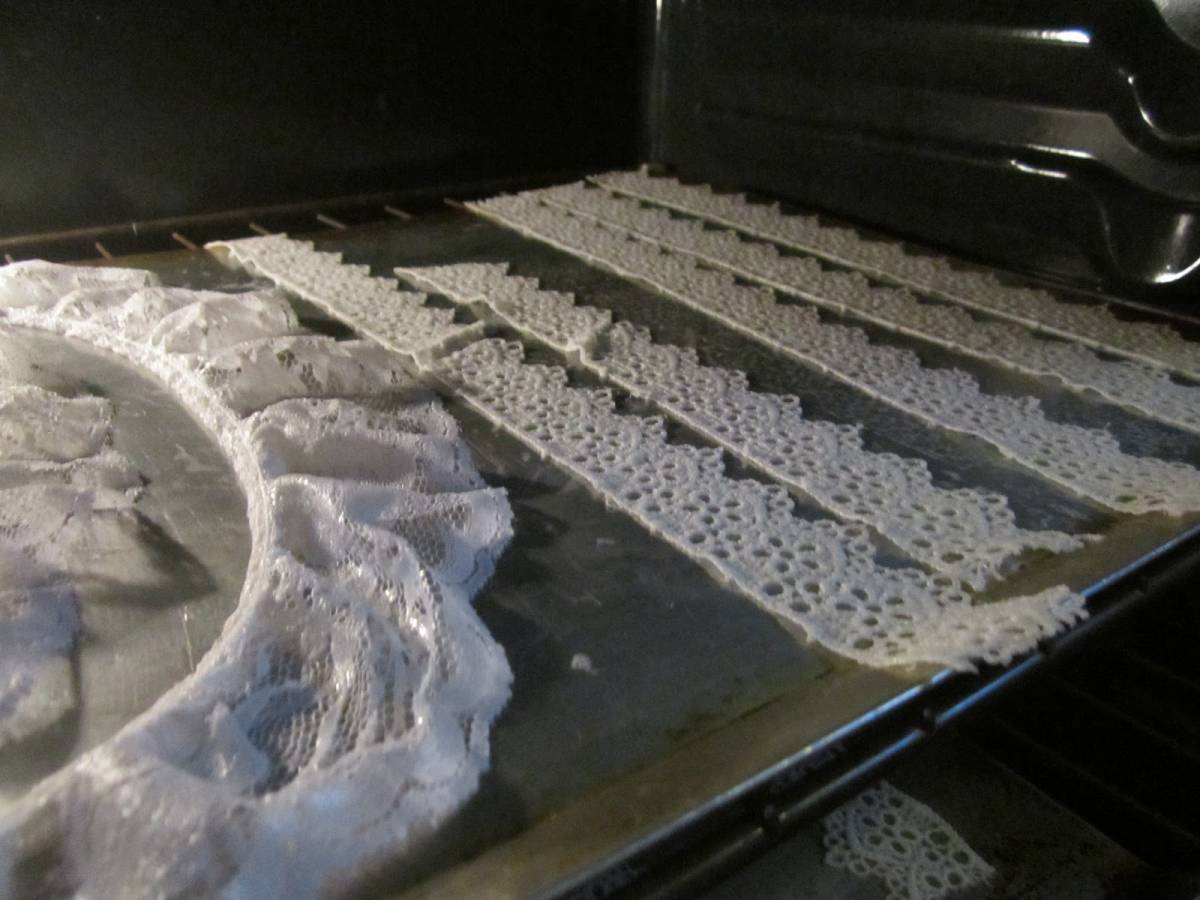
The thing I didn’t like about the original tutorial was having to wait for them to dry overnight. Since I had just had the oven on anyway, I thought I’d give that a shot! I kept the oven at about 200 degrees and let them harden in there for a couple hours. It worked great! They were stiff, yet bendable in no time. Just watch out, the fumes can be pretty stinky!


As you can see, I used a couple different kinds of lace. The ruffled stuff did not turn out as well. Hot glue the ends together and spray paint or spray with glitter.

Beautiful!

We Link Up with These Great Parties
Category: Crafts & SewingTag: birthday
FacebookPinShares494

About Sarah Lemp

Sarah Lemp is the owner and content creator at allthingswithpurpose.com and motorcitymouse.com. She has published 3 books, including an Amazon best-selling book on RV renovations. Sarah has worked personally with large brands like Meta, Disney and HGTV, sharing family travel tips and budget lifestyle content. Sarah is originally from Michigan, but now resides in Florida with her husband, Jay and their 5 kids. Sarah thrives on small budgets and can scale any size project to fit the means. She renovates ugly RVs and loves seeing old things become new. Sarah is a huge supporter of family travel because of the team-building impact it can have, and ability to cultivate an appreciation for other cultures and walks of life.

Reader Interactions

Comments

  1. Brooklyn Bingham

    August 12, 2013 at 9:25 pm

    Would it work to mod podge and let it dry overnight instead of baking it?

    Reply
    • Sarah Lemp

      August 13, 2013 at 2:51 pm

      yes it would! i was just impatient and wanted faster results :)

      Reply
  2. Jennifer Pilgrim

    May 16, 2013 at 3:17 pm

    Great craft! This looks like the perfect project for me to do with my niece when she visits.

    Xo,

    Jenn Pilgrim @ The Newlywed Pilgrimage

    Reply
  3. Jennifer Schmitz

    May 16, 2013 at 3:13 am

    This is such a cute idea! Even for us grown up girls and our parties! LOL :)

    Thanks for sharing. I may use this idea for my bridal shower.

    Jennifer @ Decorated Chaos

    Reply
  4. Anonymous

    November 16, 2012 at 5:12 pm

    I love this…I will be making these for AnnaBelle for her second birthday. Thanks for sharing.

    Reply

Leave a Reply Cancel reply

Your email address will not be published. Required fields are marked *

Recipe Rating (Optional)


Sidebar

Hey, Friend!

We’re a big family on a small budget and we want to help YOU save money on your next Disney vacation! We’re excited to partner with Get Away Today for discount tickets, hotels and vacation packages. Click the link below or call 1-855-GET-AWAY and tell them I sent you!

Get Started
discount disney tickets

Follow on Instagram

follow me on instagram

MORE ABOUT SARAH

Sarah is a second generation homeschooling mom. Originally from Michigan, she now lives with her husband Jay and 5 kids in Florida. They love staying active as a family and going on trips in their renovated RV. Sarah loves to sing, make pretty things and eat pizza.

COPYRIGHT & DISCLOSURE

All content on this site is copyright Sarah Lemp. Many of my posts contain affiliate links. If you click on an affiliate link and buy something, I may receive a small commission. Read more on my DISCLOSURE PAGE.

  • Facebook
  • Instagram
  • Pinterest
  • YouTube
  • TikTok
  • Amazon
  • My Account
  • Media Kit
  • Privacy Policy

Copyright © 2025 · All Things with Purpose · All Rights Reserved · Powered by Mai Theme