This post was sponsored by Cutting Edge Stencils. I received a stenciling kit from Cutting Edge Stencils. All opinions are my own.
The Plan
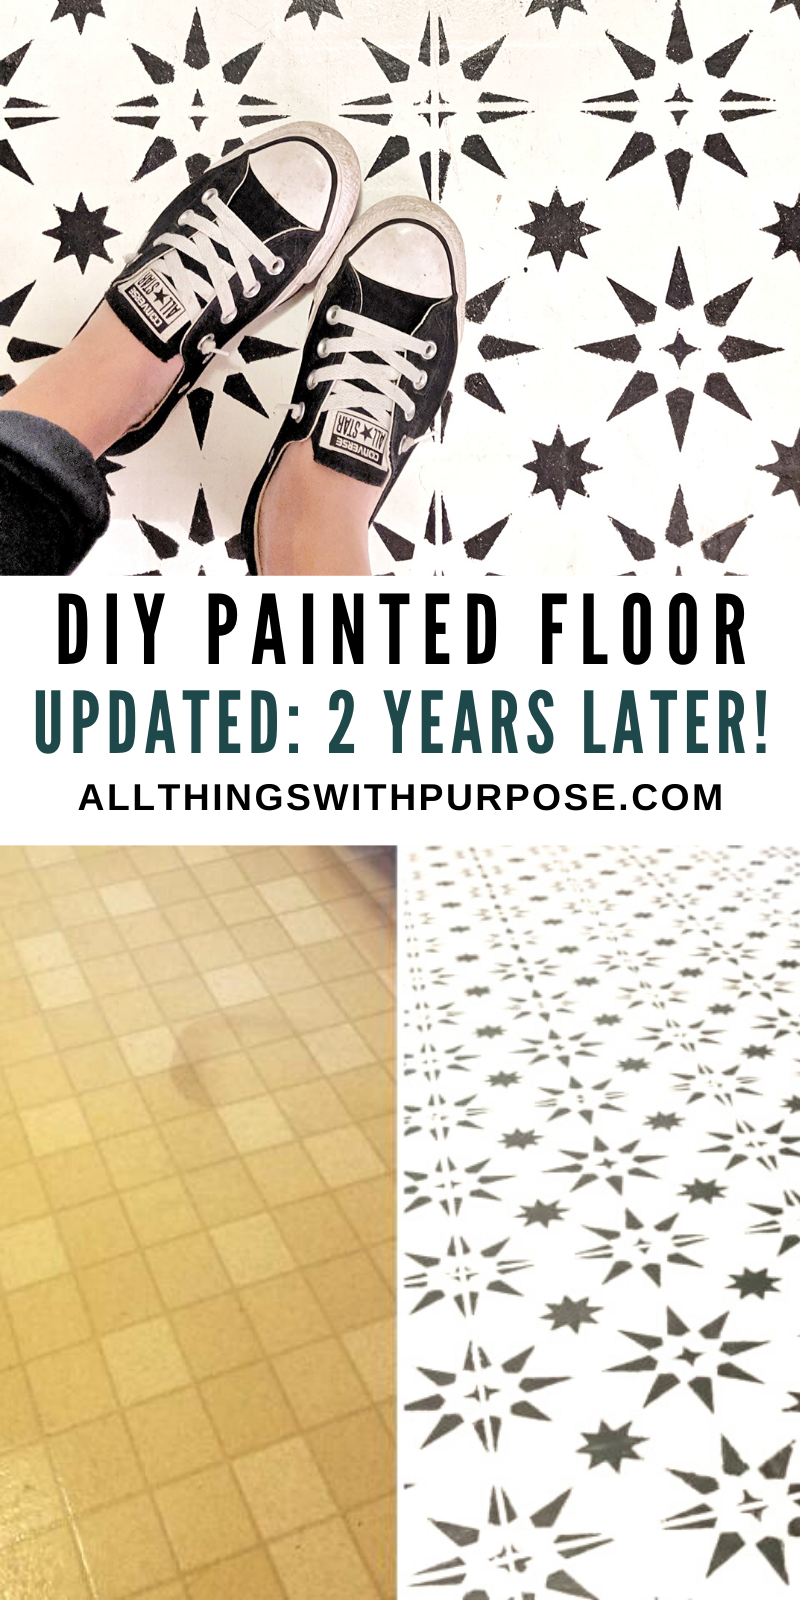
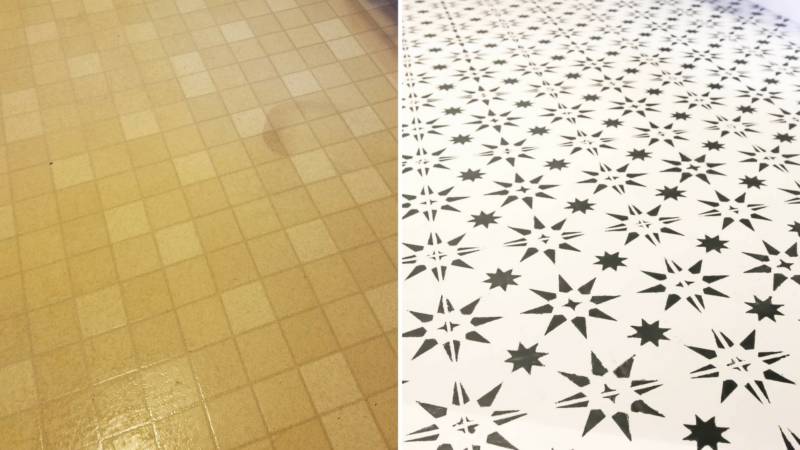
As part of the laundry room upgrading I started working on a few months back, I knew something had to be done with the old linoleum floor. It was in great shape (aside from the ugliness of course). The same linoleum in this room was also throughout my kitchen, hallway and foyer at one point.
I considered installing a floating vinyl floor, but fell in love with the look of painted flooring that I had seen on Pinterest!
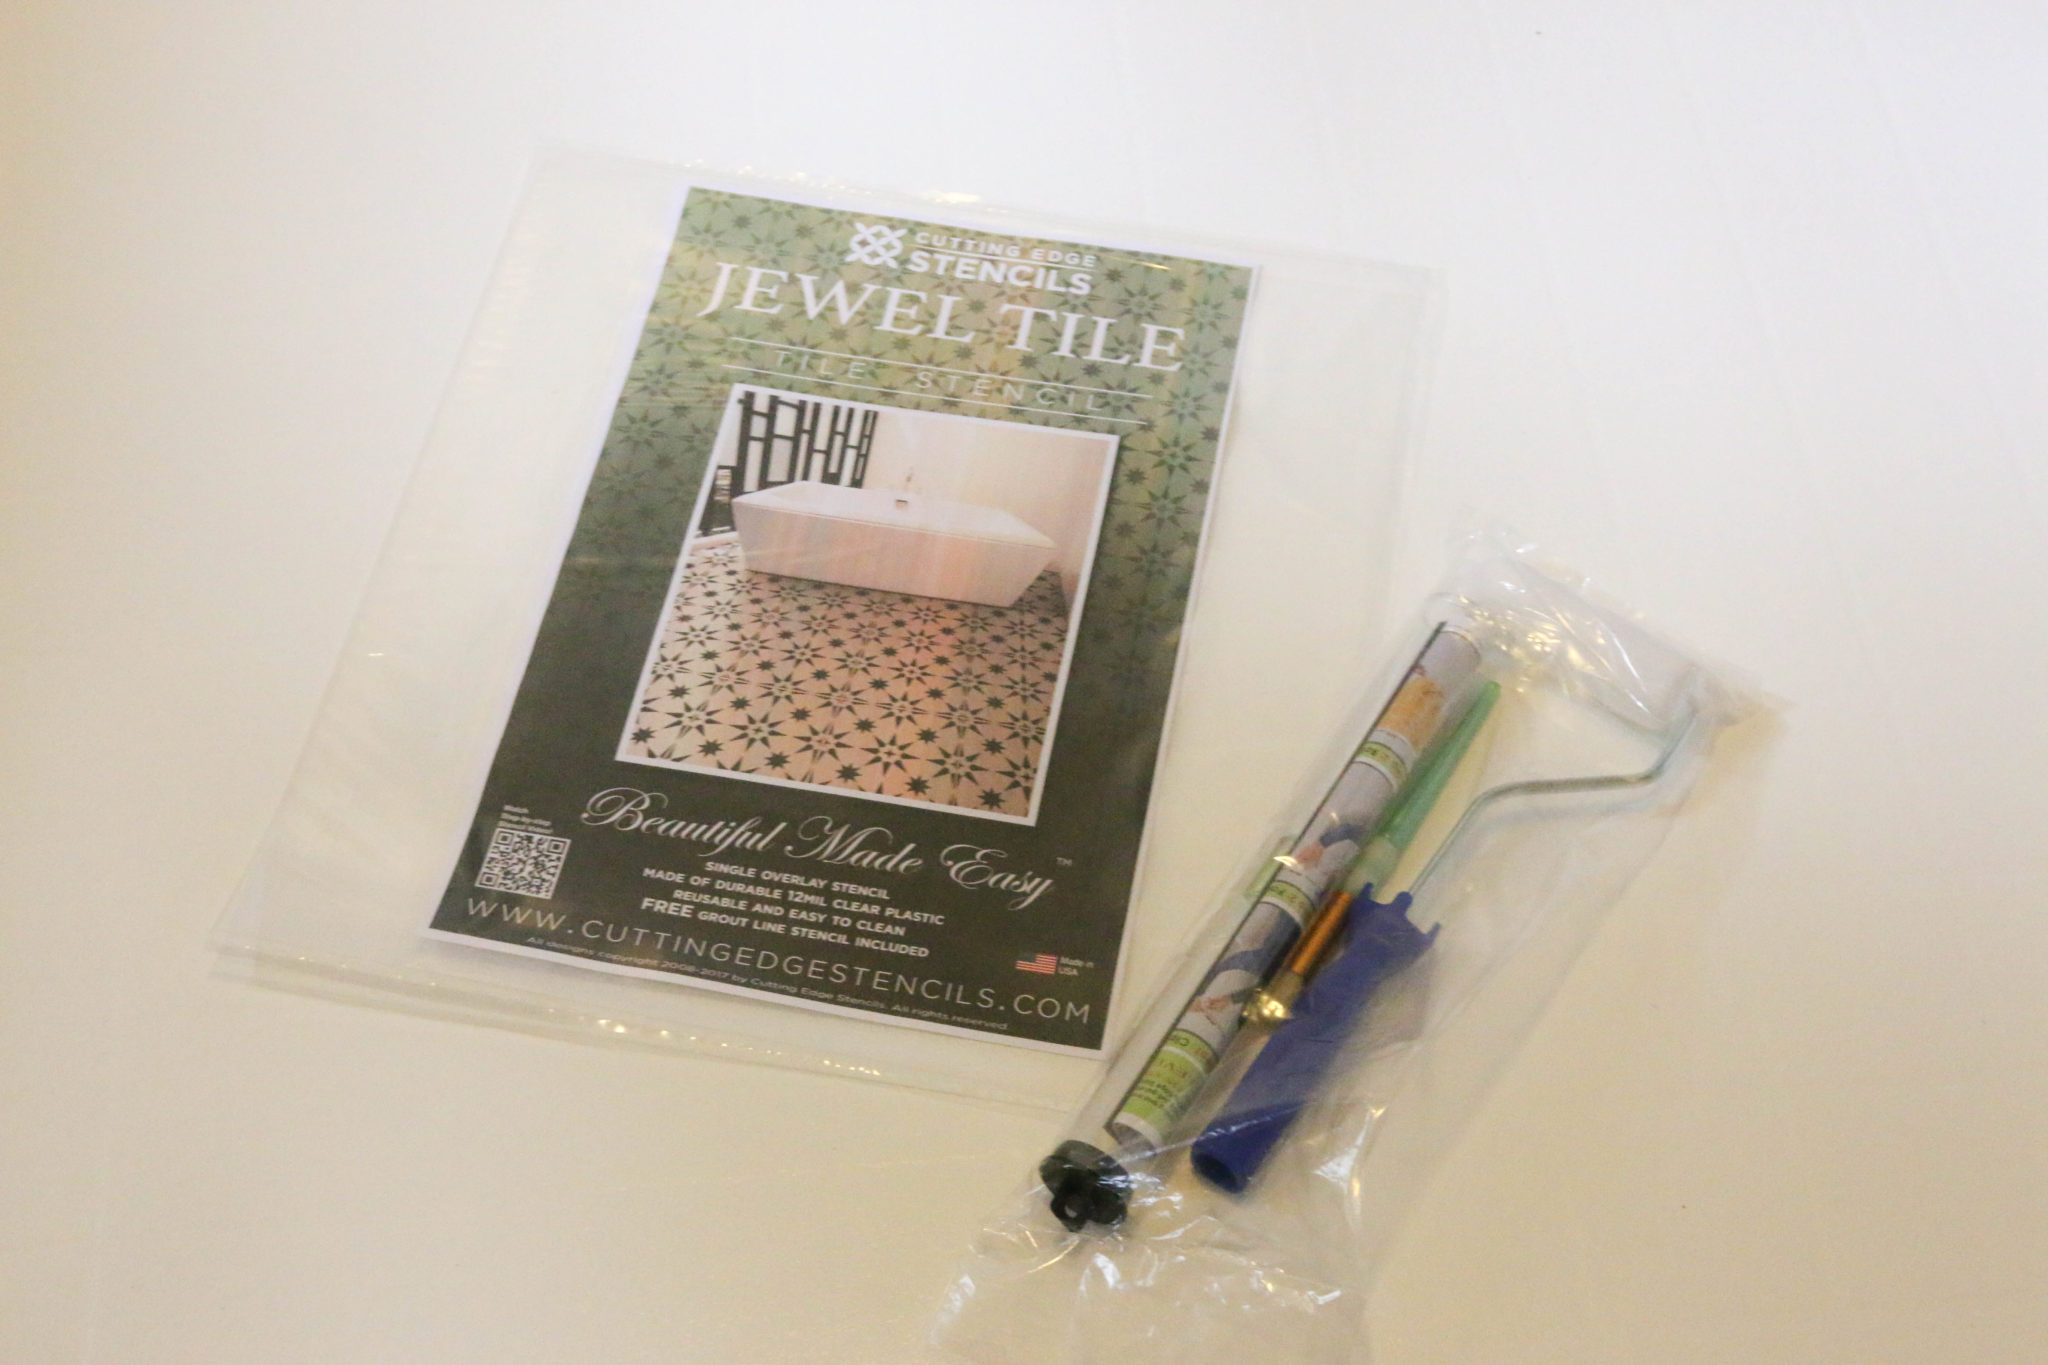
Cutting Edge stencils offered to send me a stencil kit to redo the floor and I jumped at the chance! After a quick survey of other bloggers that had used stencils and paint to redo their floors, I decided on a Jeweled Tile floor stencil and used porch and floor paint to create the look.
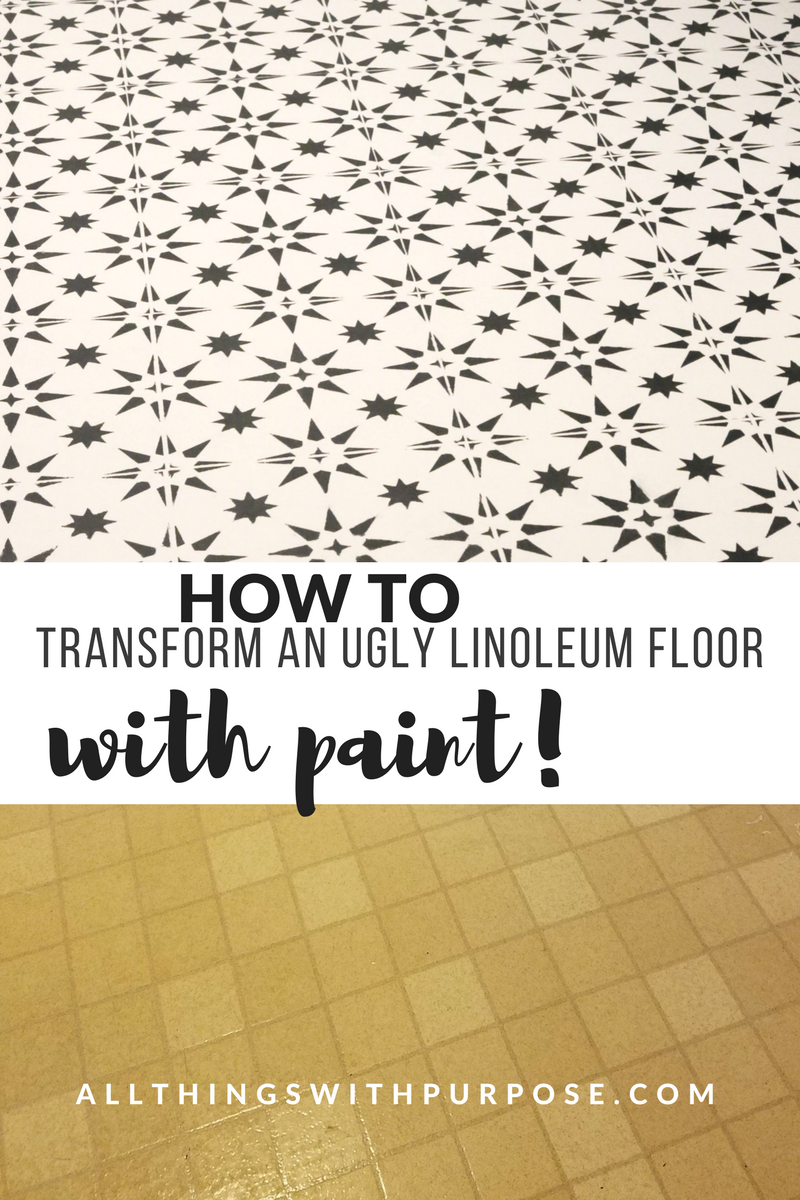
Before and After
Supplies
Here what you need to gather before starting your project:
- Cutting Edge Stencil of your choice! I used this Jewel Tile stencil
- Stenciling kit
- Degreaser
- Primer
- Porch and Floor paint in white
- Painters tape
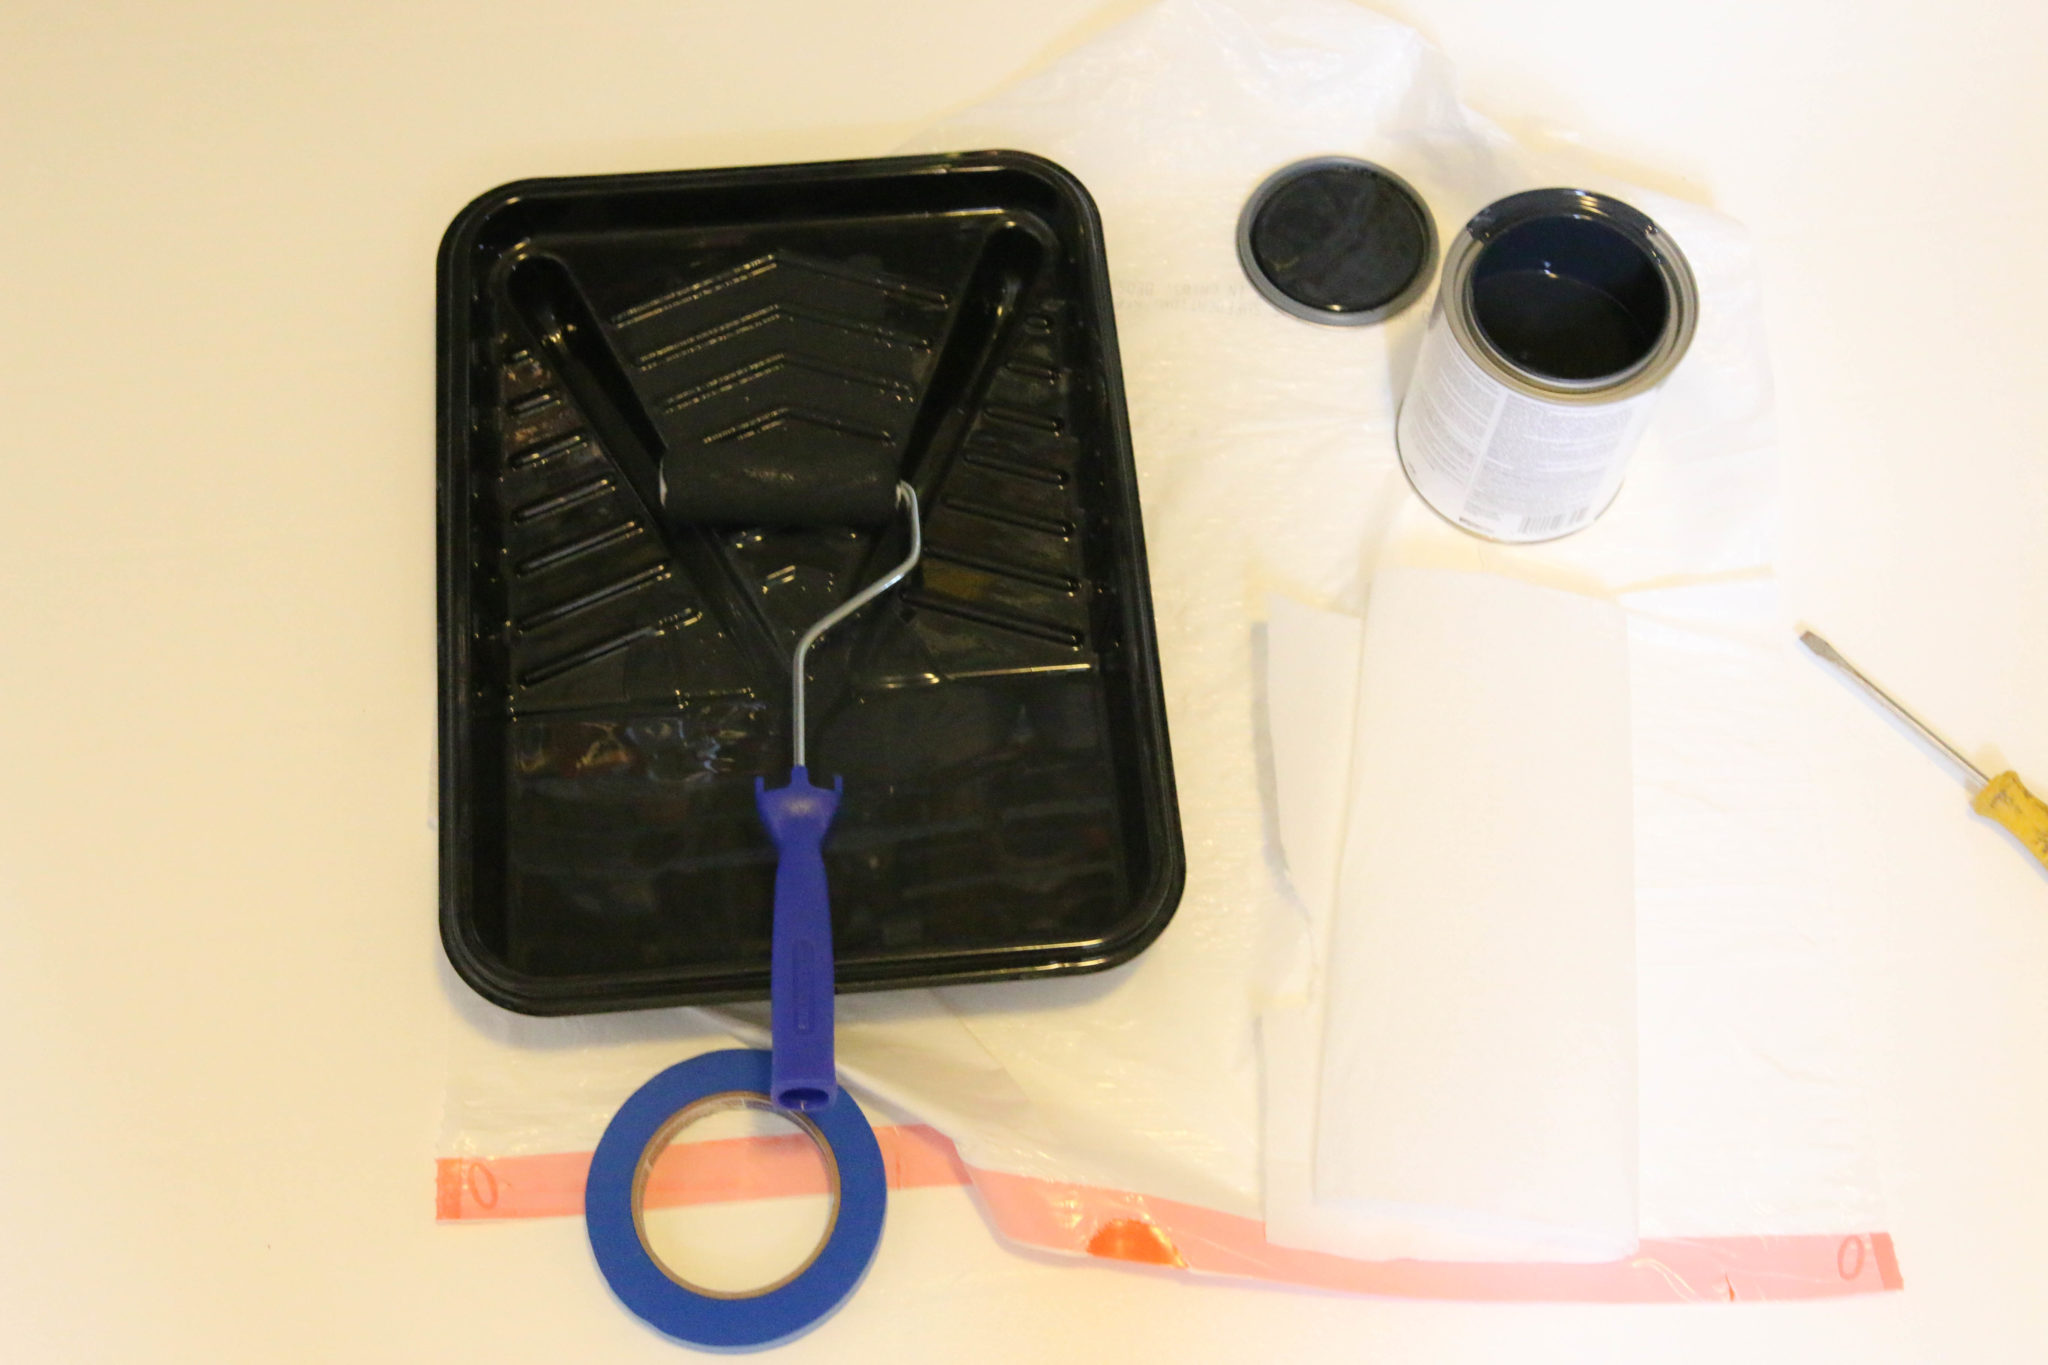
- Porch and Floor paint in black or charcoal
- Roller and tray
- Paper towel
- Hair dryer
Step One
I vacuumed first, then scrubbed the floor really well with a degreaser. I then rinsed it with water and cleaned it with rubbing alcohol for good measure.
Step Two
I primed the floor with Stix Waterborne Primer using a regular, short nap roller.
Step Three
I allowed the primer to dry for the afternoon and then painted over it with a white, porch and floor paint. What I had read, was that using a porch and floor paint (meant to withstand heavy foot traffic) would hold up best in the long run.
Others have used regular paint and top coated with polyurethane. I’m not really sure which one would hold up the best, but because I wanted a crisp, white base coat, I decided to steer clear of polyurethane which tends to yellow over time.
Note: I have used water-based poly which is not supposed to yellow, but I really didn’t want to risk it.
Step Four
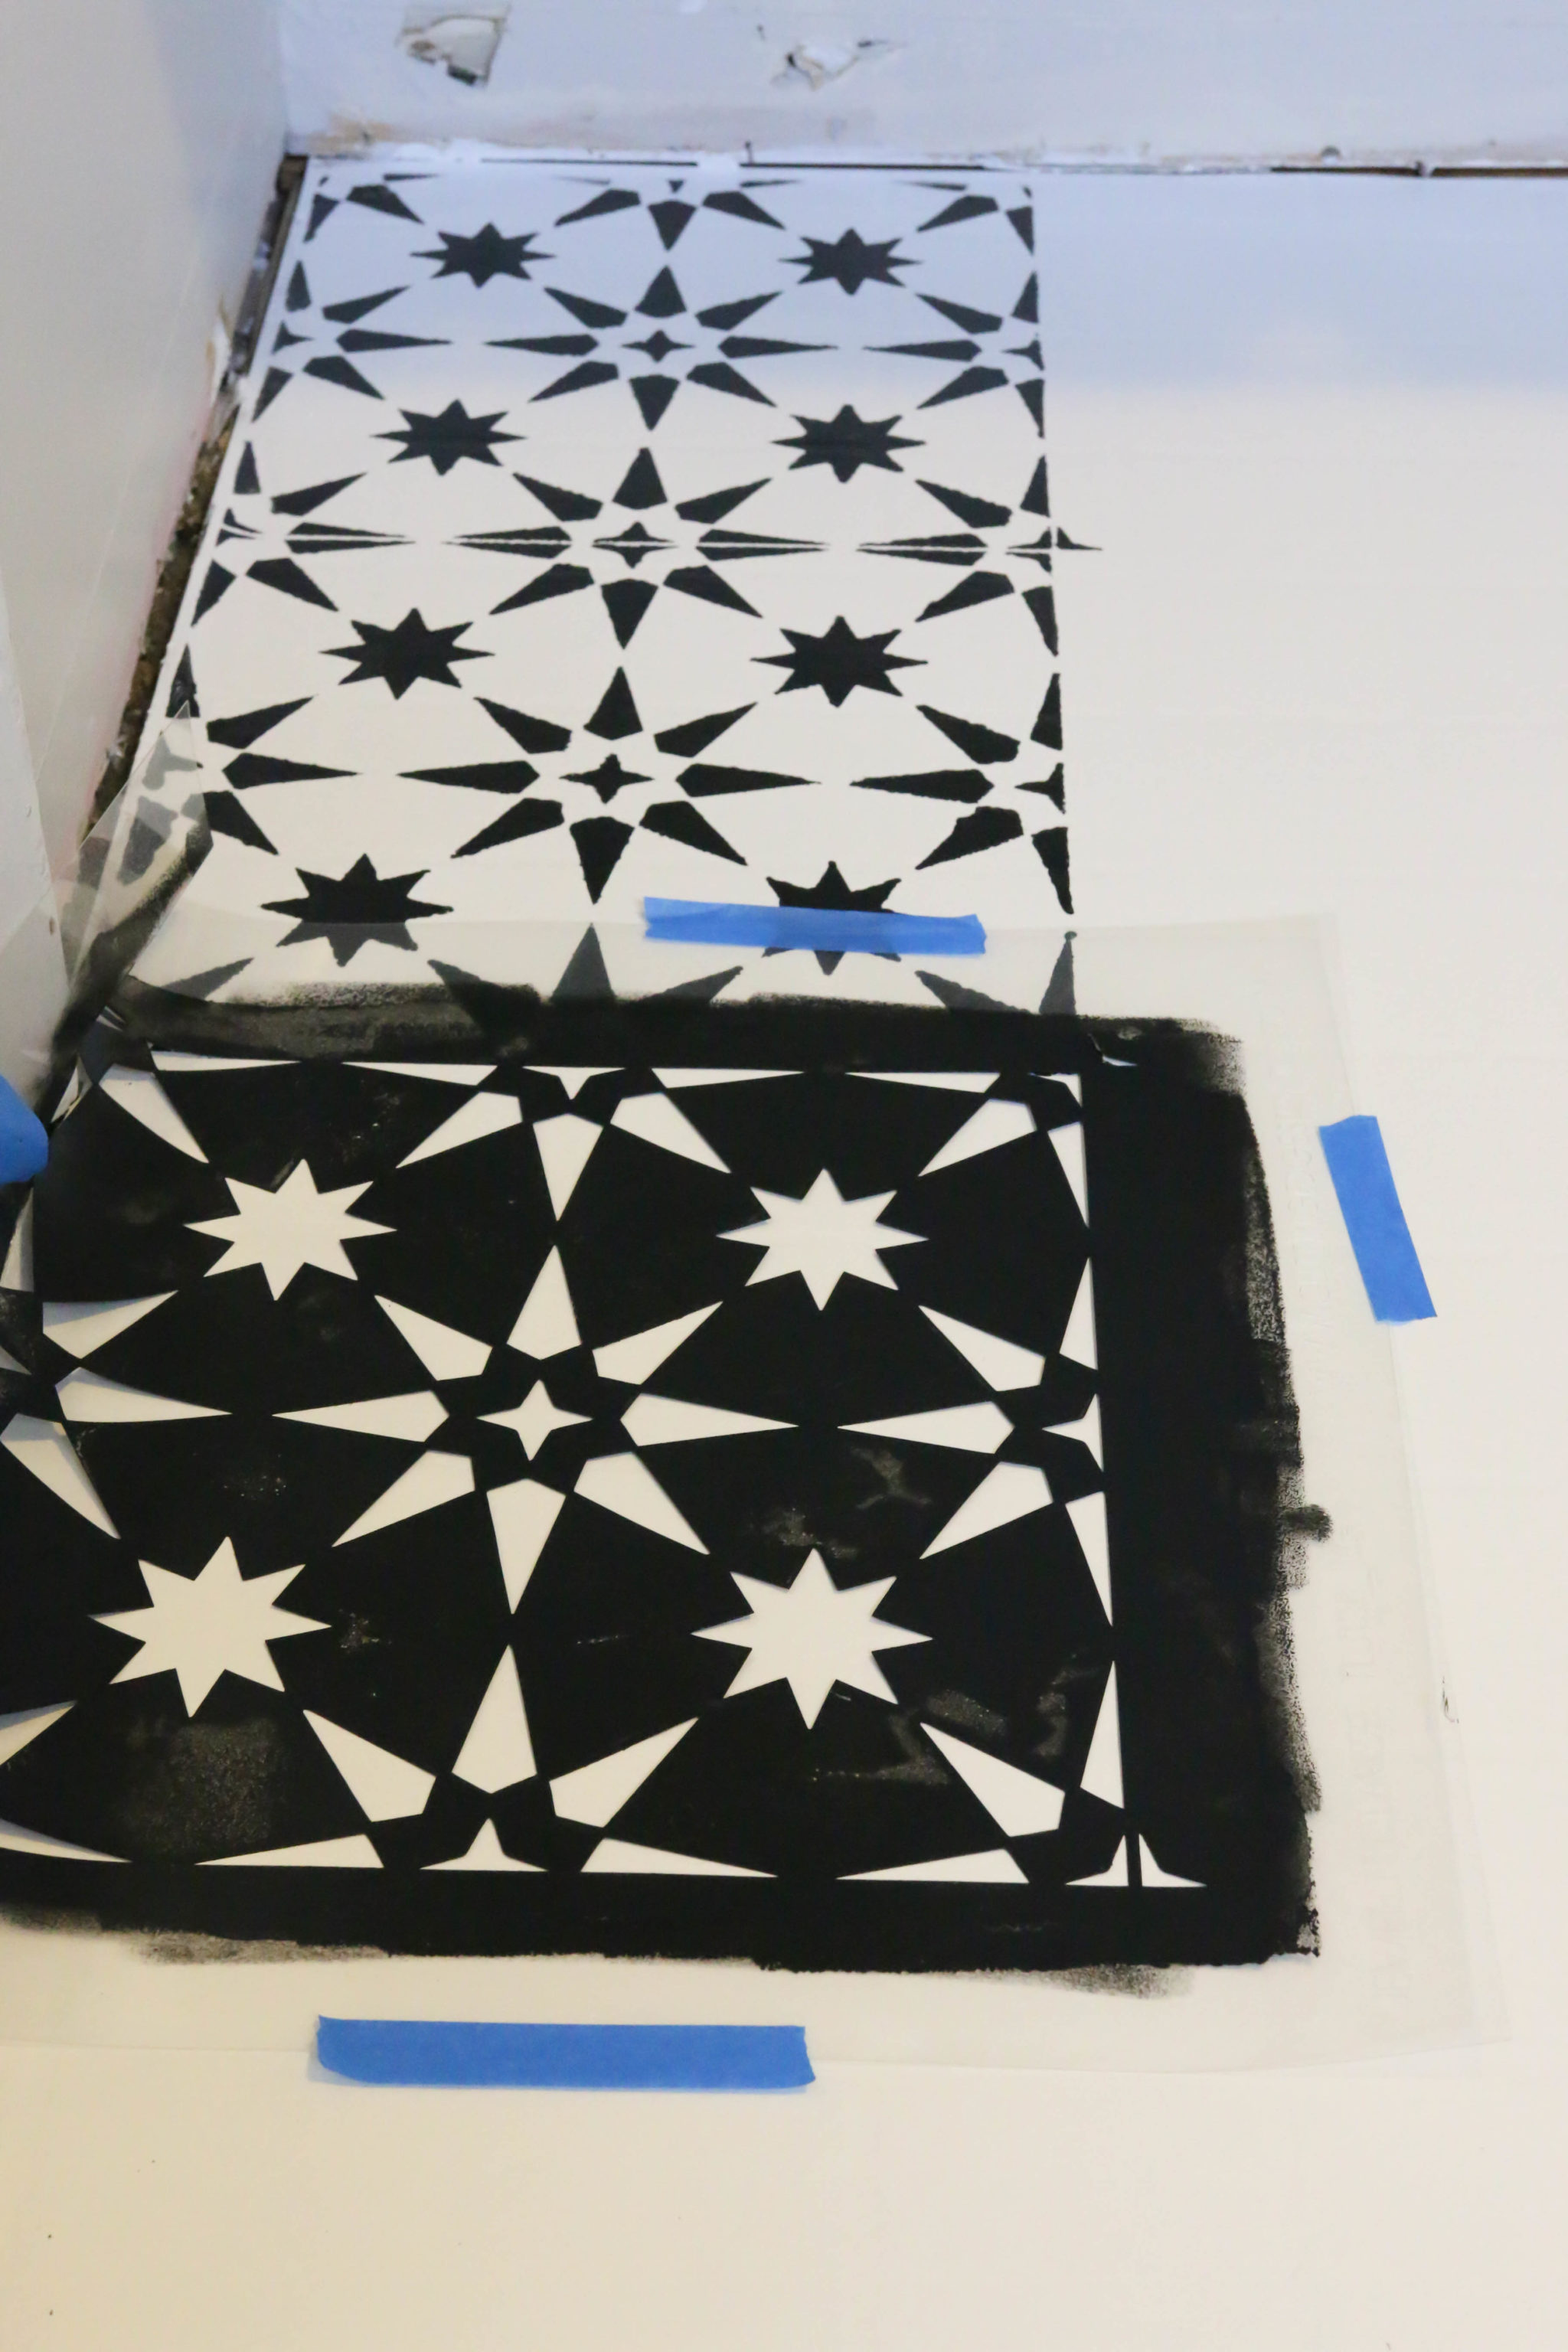
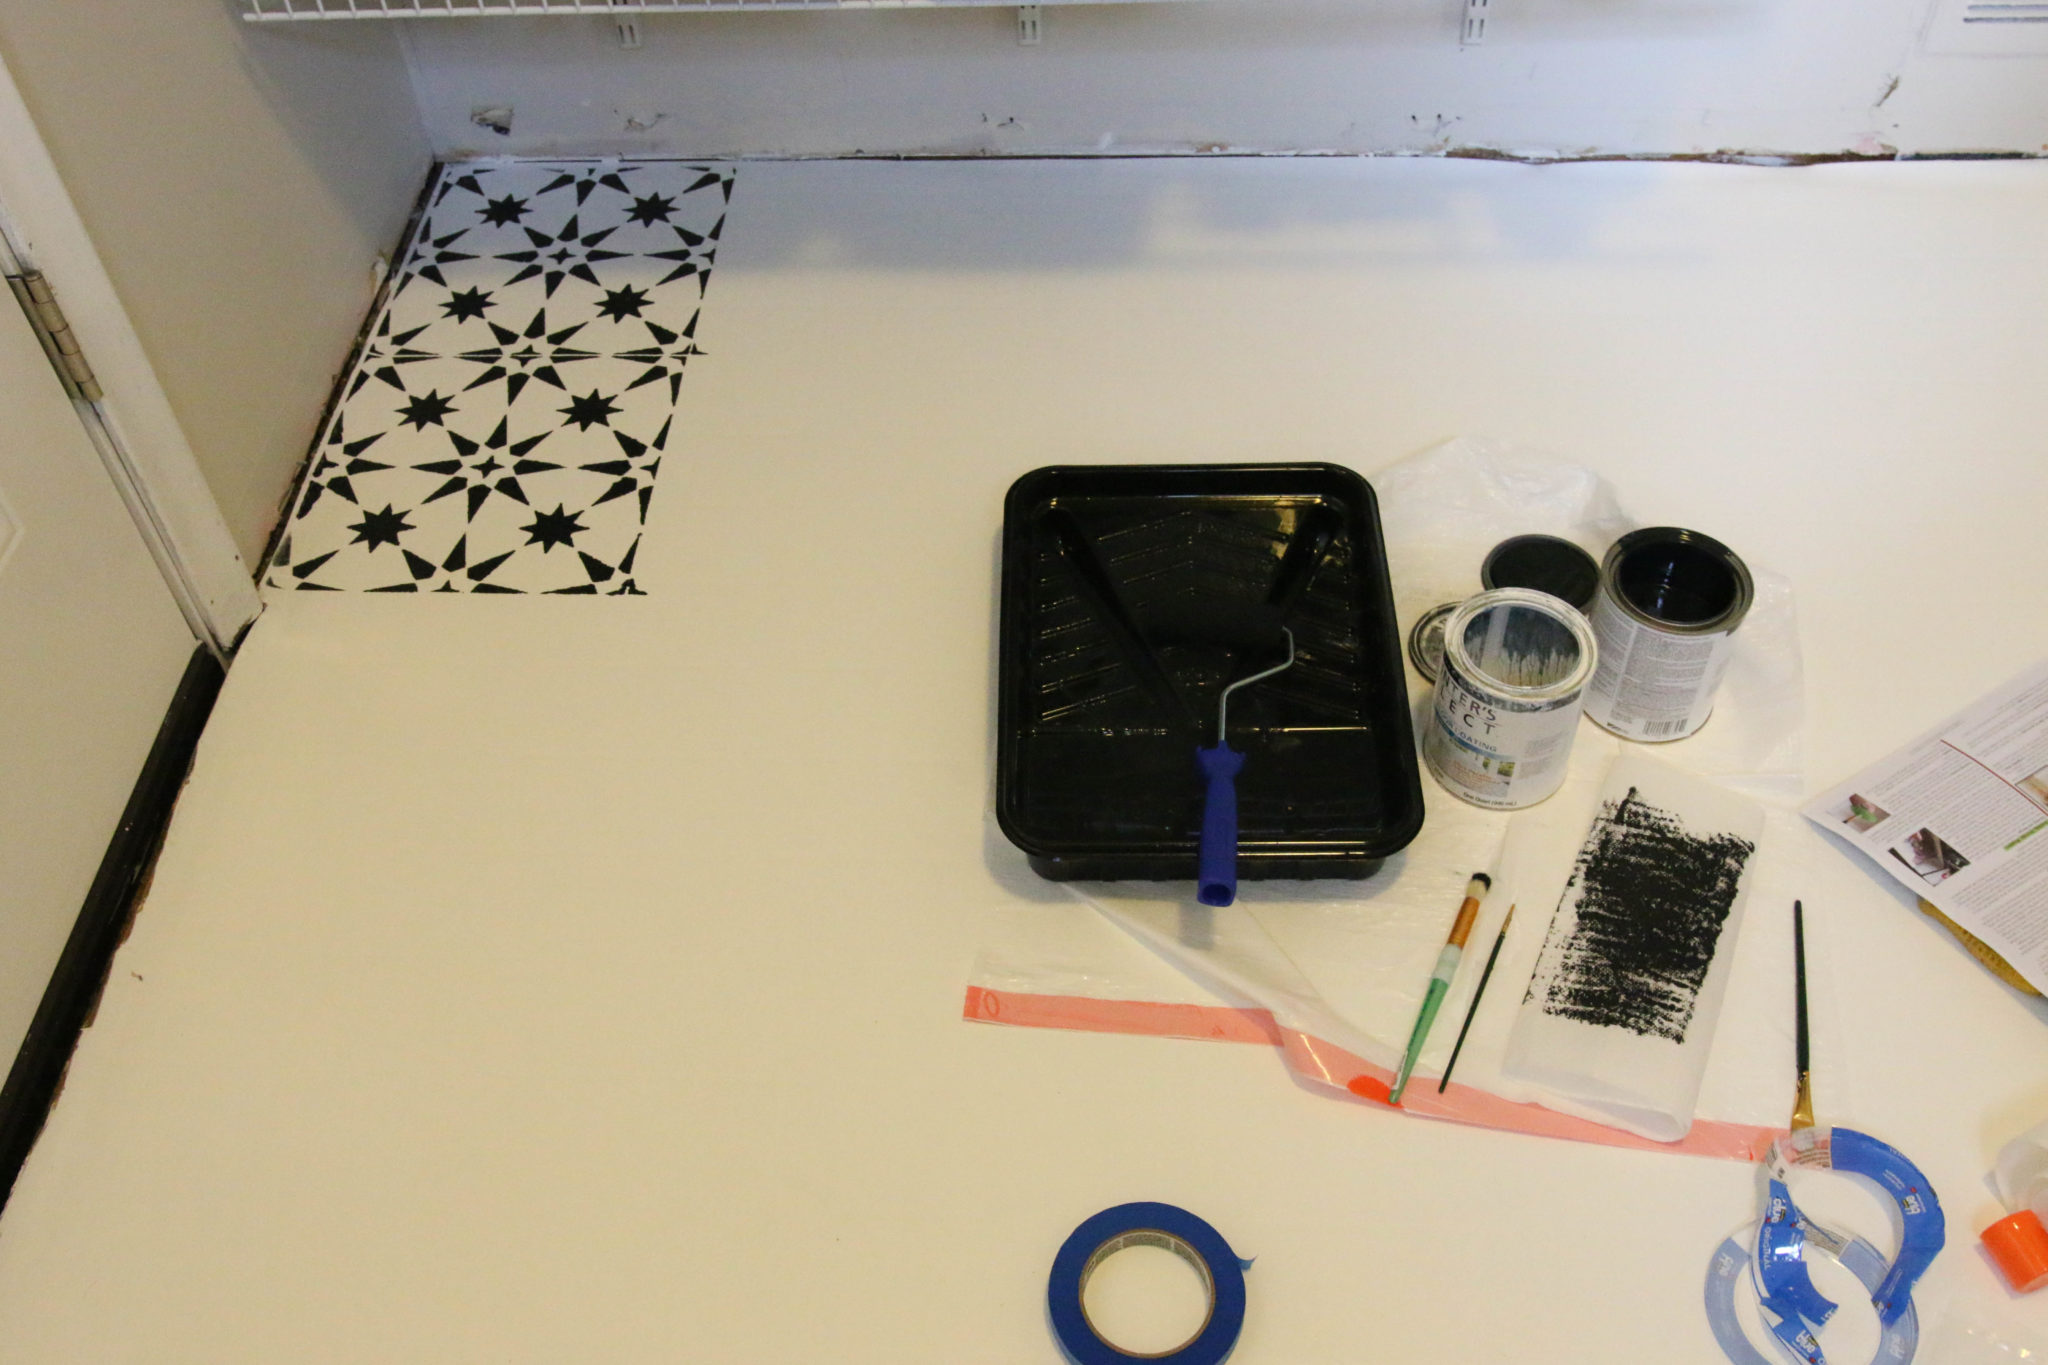
Stencil time! Here are some tips I picked up along the way:
Tip #1
Before starting, gather all the supplies you will need: Small foam roller and tray, painters tape, tarp or garbage bags, paper towel, spray adhesive, hair dryer, damp cloth.
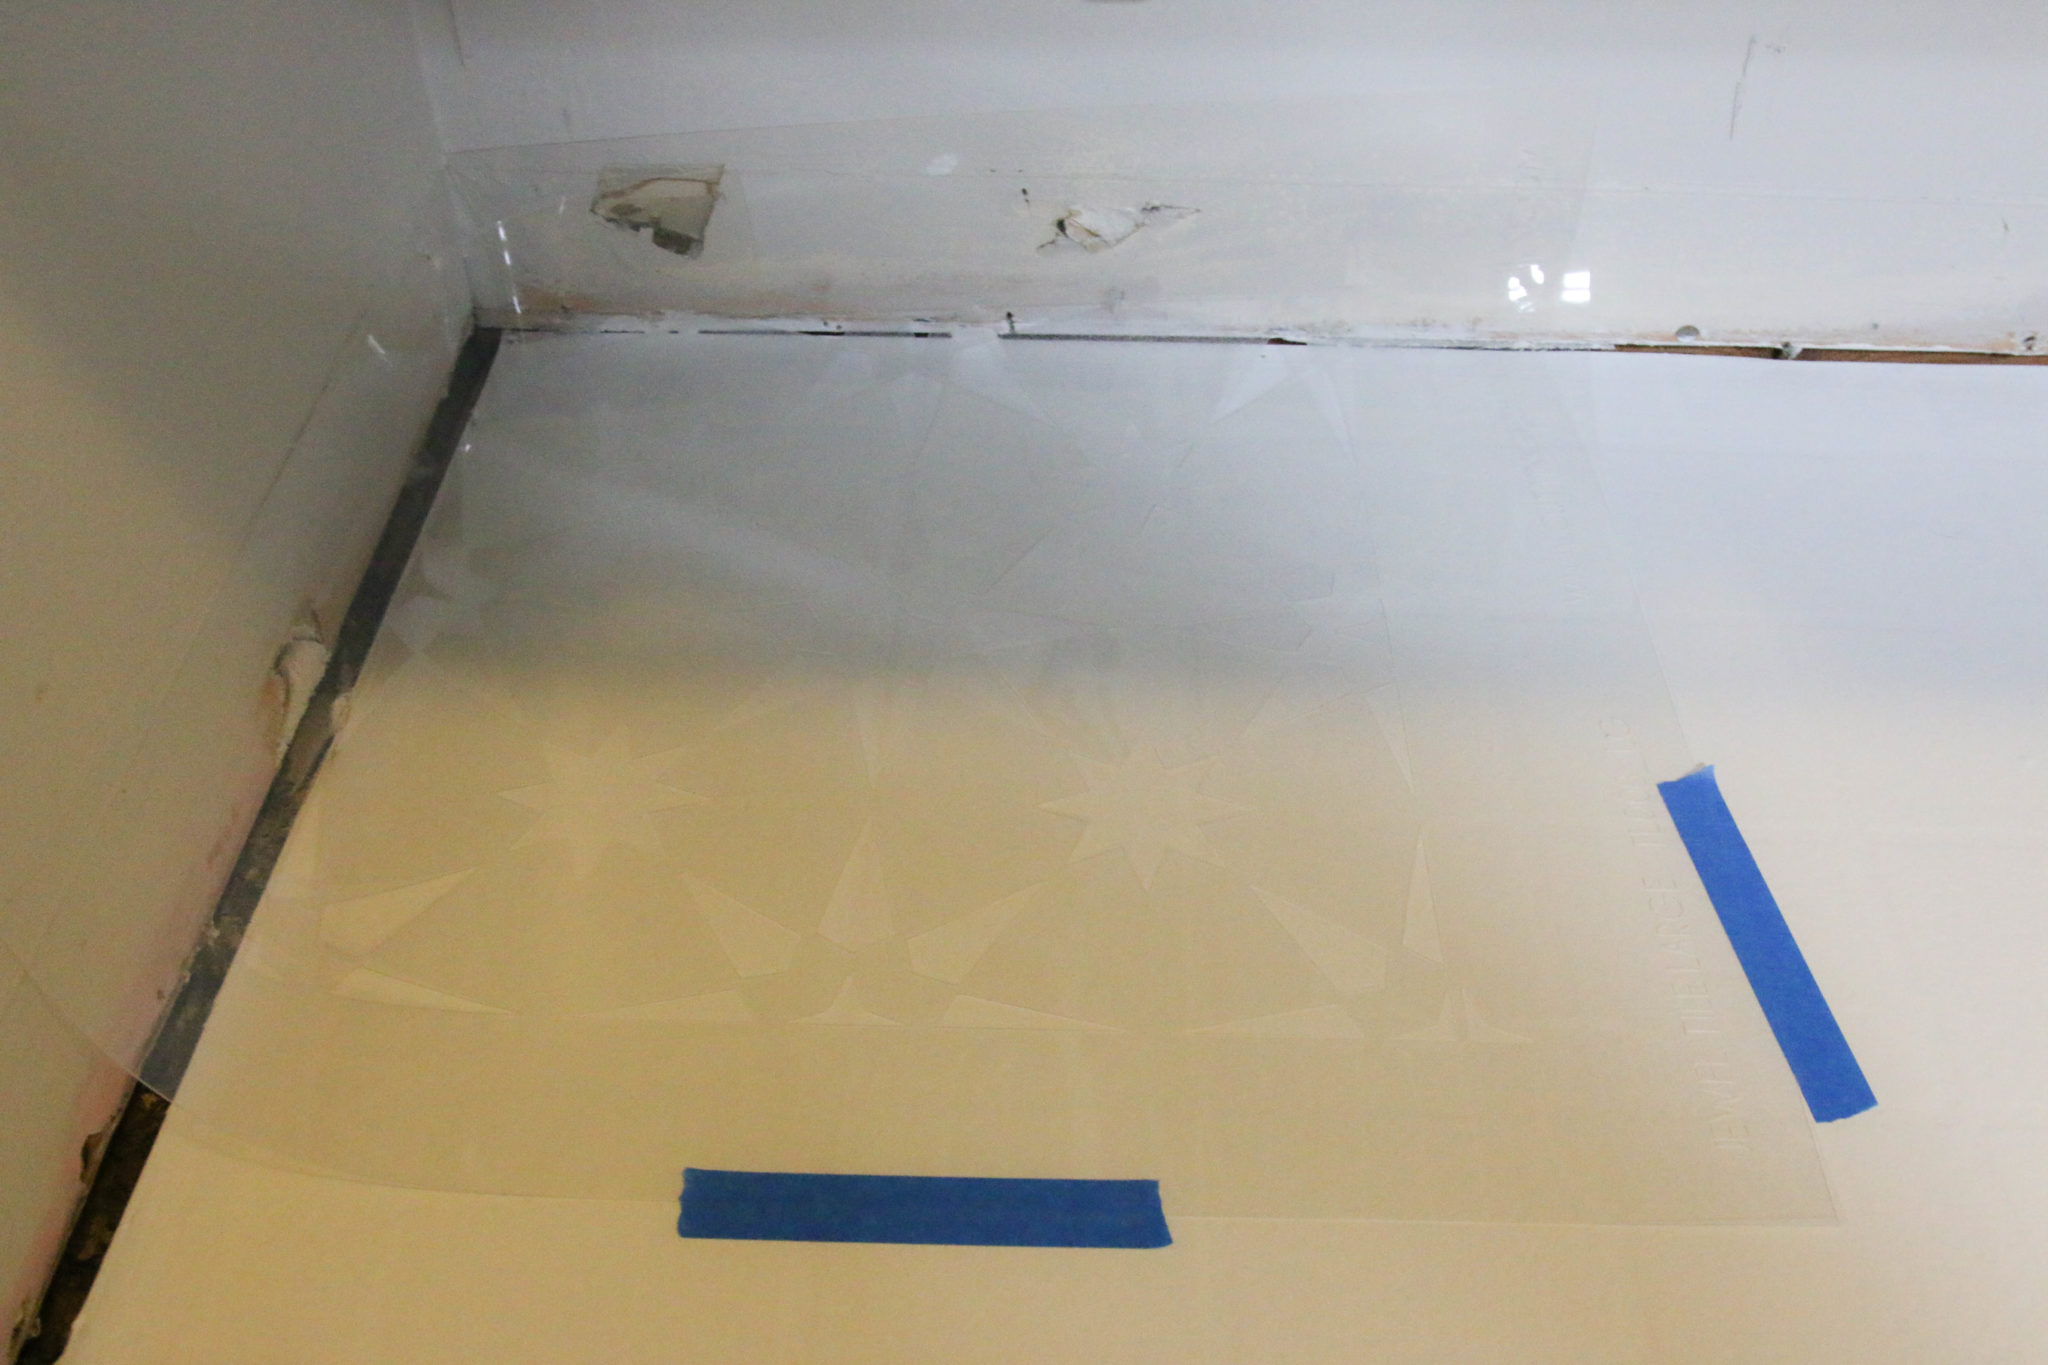
Tip #2
Position your stencil with the painters tape, but be careful with the adhesive! I had seen others use spray adhesive to keep the stencil in place for crisp, clean lines. I ended up using way too little or way too much. Too little, and the stencil still moved on me. Too much, and it stuck to the floor and left gummy goop in it’s path. I found that tape by it’s self did the trick.
Tip #3
Dry your paint and stencil with a hair dryer to speed up the process! I did one entire row before I got smart and used a hair dryer. Without it, it would have taken me a couple days to finish this tiny room. Every time I painted one square, it took a good 5 minutes to air dry before painting the next one. Add that all up and it was way too long.
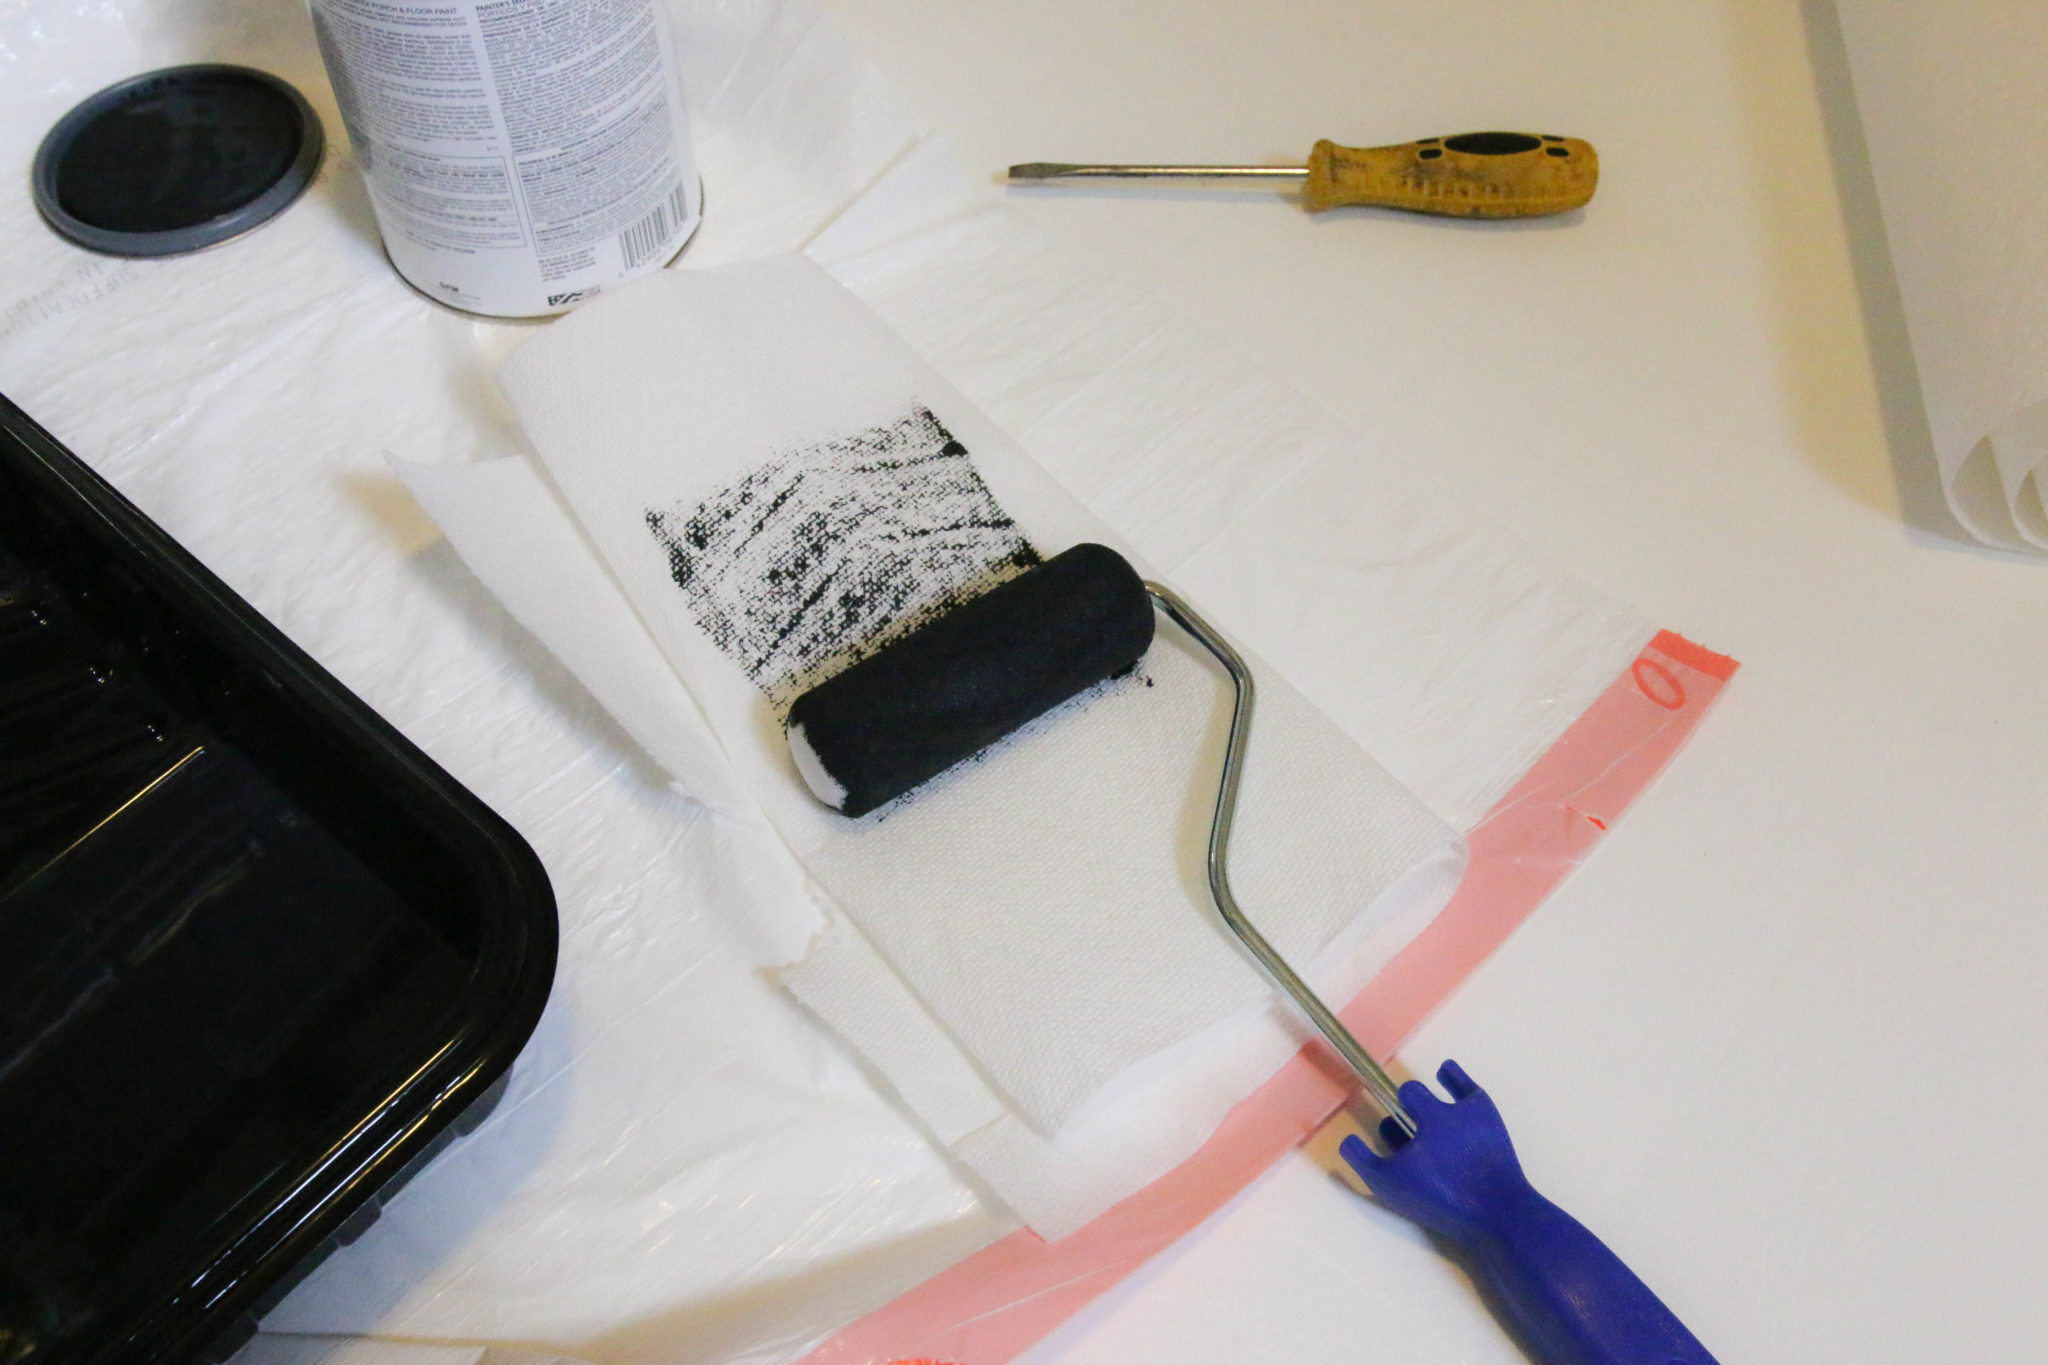
Tip #4
Gently roll your paint off onto a paper towel before painting the floor. This will get off the big clumps and help the paint go on smoothly without bleeding through the edges of the stencil.
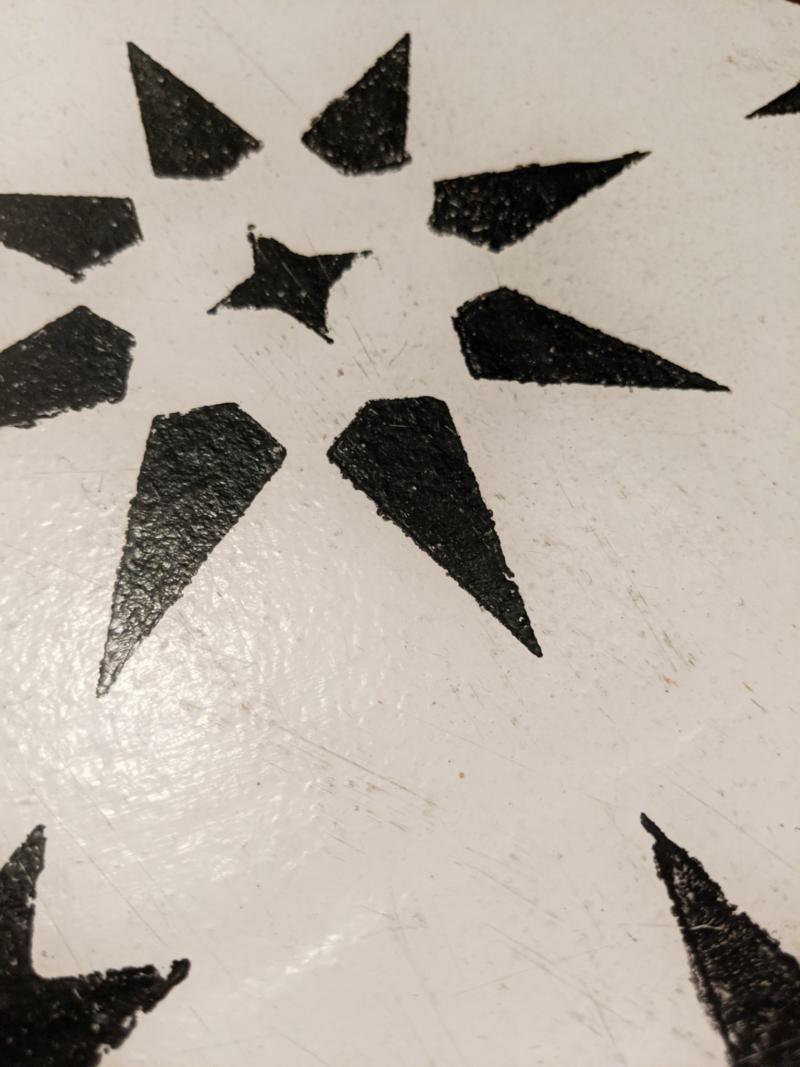
Tip #5
When you find yourself being critical of your work and thinking everything looks sloppy, take a step back! Up close, I kept thinking my edges looked really sloppy, but in the grand scheme of things, you would hardly notice. Use a small artists brush to clean up big mistakes or messy lines, but don’t sweat the small stuff.
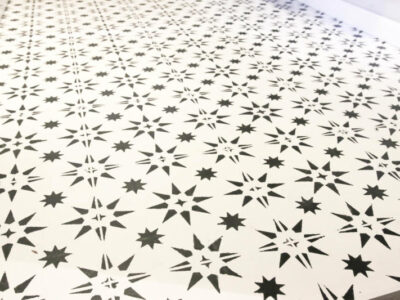
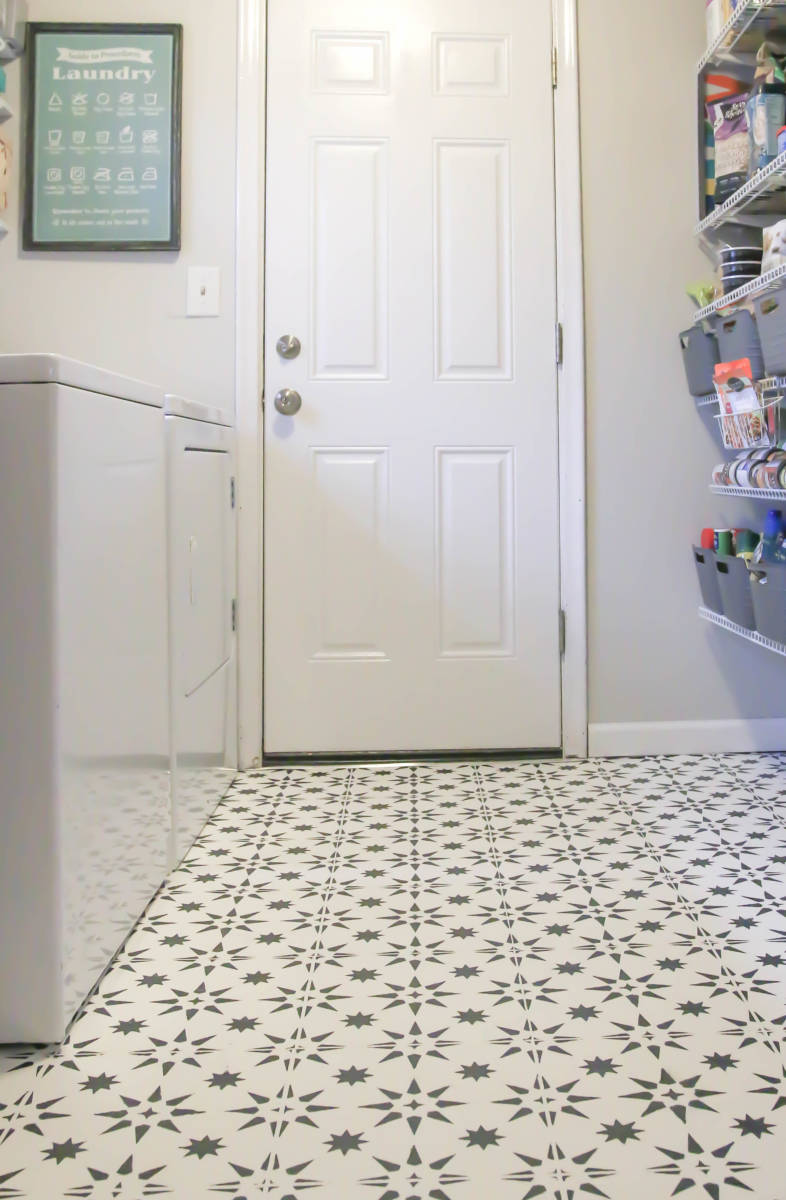
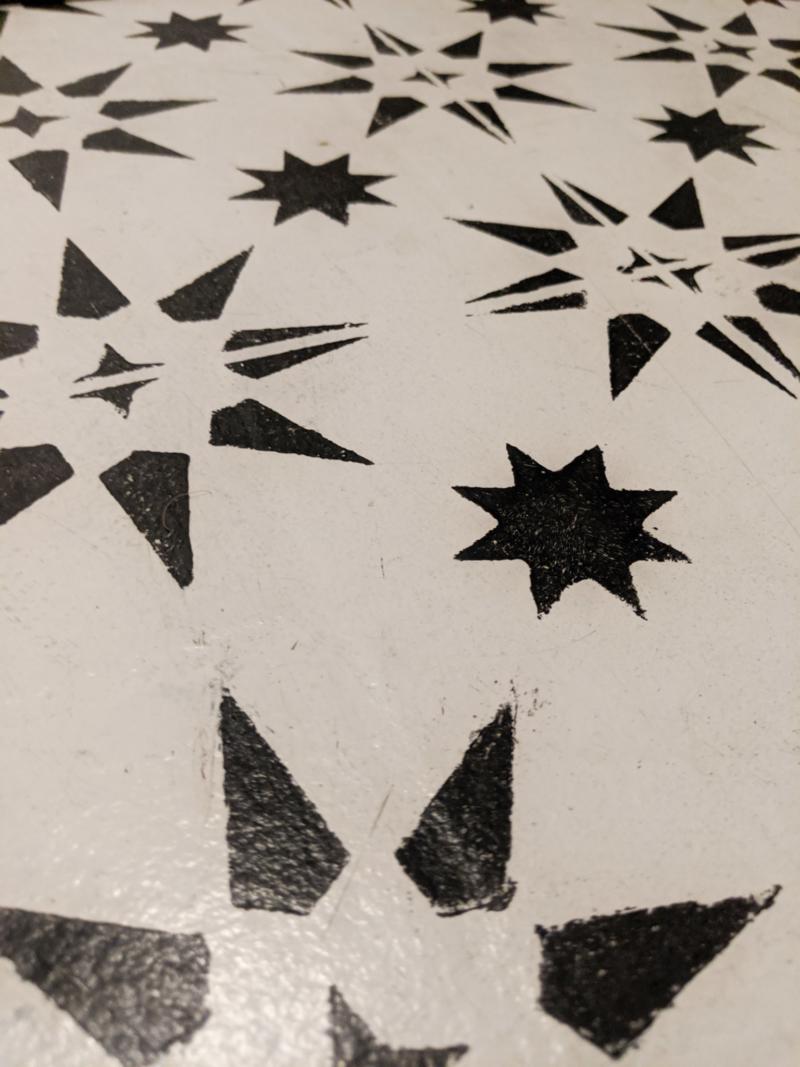
The Final Product
It took me the whole afternoon to do this room and I couldn’t walk for a week, but it was so worth it!!
Mental note: wear knee pads and sit on a pillow next time!

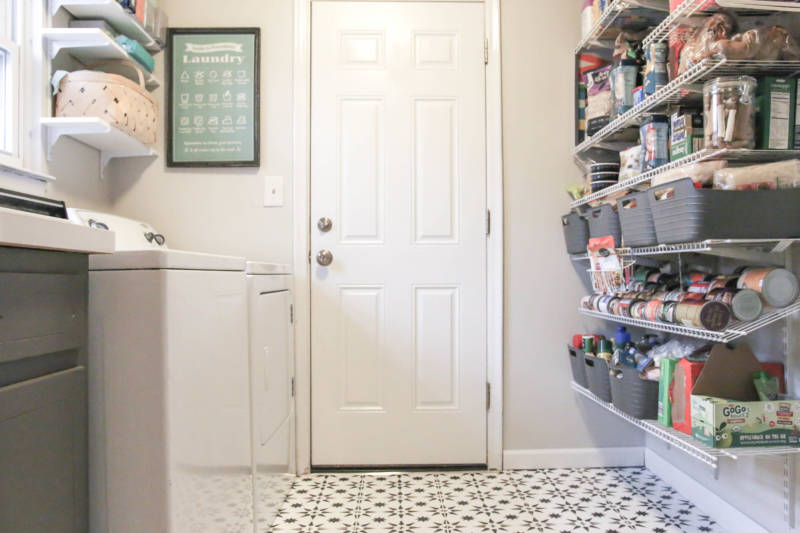
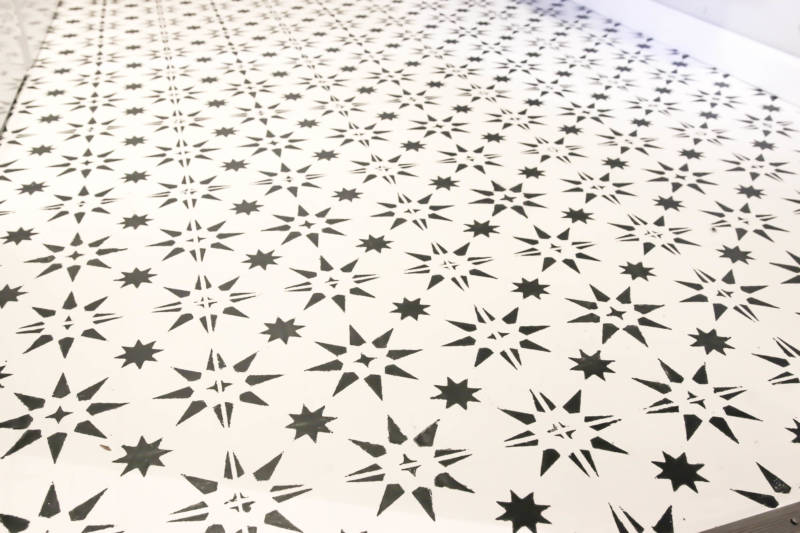
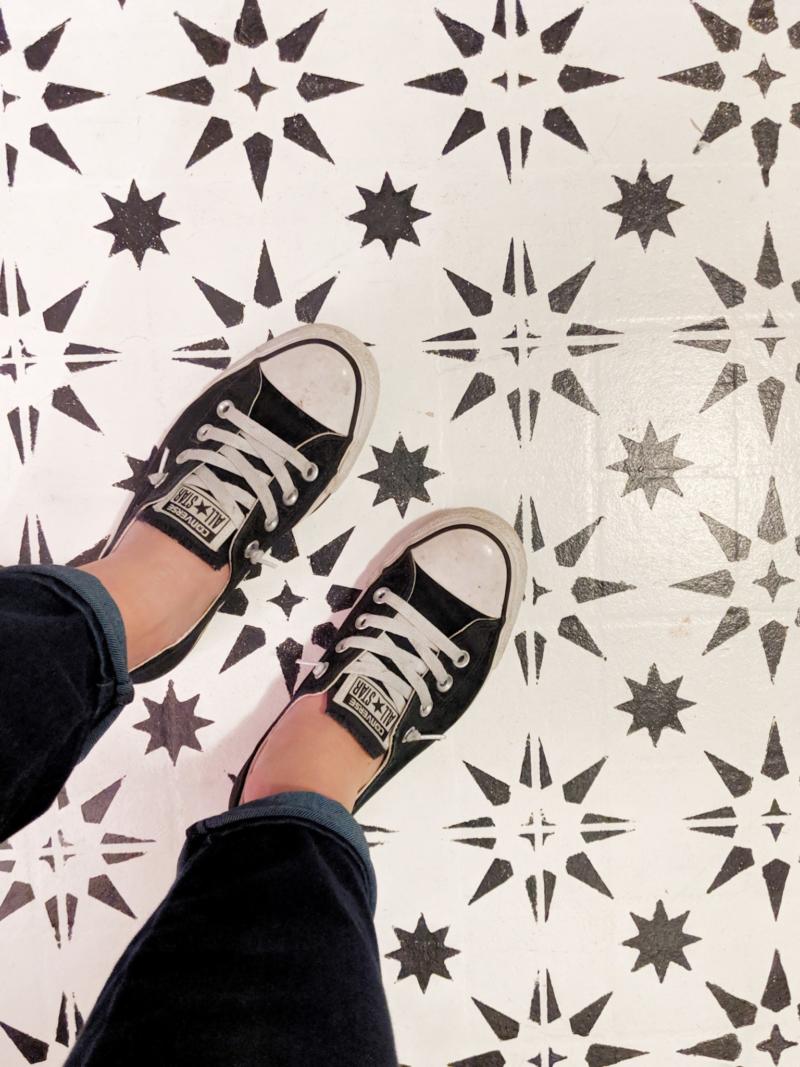
Update: What it Looks Like Almost 2 Years Later
I have had a lot of people ask what this floor looks like today and if it has held up. It is almost 2 years since I painted my floor. Overall I am very happy with how well this floor has held up. This laundry room gets some heavy, dirty traffic. It’s the one spot in our house that gets super dirty foot traffic. There is some expected scuffs and scrapes, but nothing super noticeable. If you look closely you’ll see more, but this pattern is really forgiving. There is absolutely no chipping or peeling. I’m impressed by the floor paint’s durability.
 Pin-It for Later!
Carol F Whitehouse
Excellent job! I realize you did this quite a while ago, but I was wondering if you could tell me which size of the Jewel tile design you used. They come in many sizes but don’t label the sample pictures with the size used. I like the size you used… thank you!
Marion
Hello Sarah,
thank you so much. I am pretty excited to start with this in our concrete floor. I must say that your stencil pattern is most beautiful and I wonder if it is possible to get it or do you see a possibility to send it or where I can buy a similar one (with friendly stars) ? Thank you so much in advance for your help if possible.
Have a great day Sarah
Greetings from Vienna
Marion
Cindy Smith
I’m starting to create a sewing/craft room for myself in the walkout room of our basement. I have got to do something with the linoleum tile floor and what you have done is so encouraging. Would you please tell me how soon you were able to walk on your floor and place your furniture and things on it for full use of the space again? Like you I want white to be the base color and using gray or a not quite black accent color. Thank you so very much.
Sarah Lemp
Hi! I followed the instructions on the can of floor paint that I used, but I would recommend waiting at least 3 full days.
Cindy Smith
Thank you so much for the answer.
Marcia
I want to stencil the ceramic tile around the fireplace. Has anyone tried it and how did it turn out? I know that once I try this there’s no turning back. If it doesn’t look good I don’t know what I will do.
Rosemarie Rust
So did you use a top sealer or not! I have a foyer I want to do,which gets a lot of traffic. Thank you
candace lawrence
Sarah, I love what you did. I have a MCM and wold like to paint over a linoleum floor, also in excellent condition, but with a marbling patten, no stencil. Will the primer conceal or cover the squares of the existing lineoleum tiles? Unlike your pattern, mine will not coexist with squares.
Sarah Lemp
Hi Candace! It should cover the pattern, but not the indent. Does that make sense? The original color and patterned on my floor covered really well, but if you have a texture, or outlines of the tile, those will still be slightly visible. But I don’t think it would look bad!
Brittany
I LOVE this floor! That stencil is beautiful and it came out perfectly. Thank you for sharing!
Robin
I am considering doing this to my kitchen. It has been over a year since you have done your floors. Are they still holding up? Can you post a picture, please?
Emily
How is the paint holding up to wear and tear?
Sarah Lemp
Hi Emily! It is holding up great!! I will try and do a follow up post to show updated pictures!