• Skip to main content
  • Skip to header left navigation
  • Skip to header right navigation
  • Skip to after header navigation
  • Skip to site footer
  • Start Here
    • About
    • Contact
    • Media Kit
  • Blog
    • All Posts
    • Natalie
    • Taylor
    • Carissa
All Things with Purpose

All Things with Purpose

RV Renovations and Family Travel

  • Shop
    • Amazon Storefront
    • My Online Store
  • At Home
    • Crafts & Sewing
      • Doll Clothes
    • Decor & DIY
    • Homeschooling
    • Lifestyle
    • Parties & Seasonal Celebrations
    • Recipes
  • RV Renovating
    • Renovated RVs For Sale
    • How To
    • Tours
  • ON THE GO
    • Theme Parks
      • Ride Guides
      • Universal Studios
      • Disney World
      • SeaWorld Orlando
      • Cedar Point
    • Travel Tips
    • Camping
    • Cruises
    • Florida
    • Michigan
    • California
    • Hawaii
    • NYC
  • Popular Posts
    • How To Paint RV Walls
    • How Much Does it Cost to Renovate an RV
    • Basic Dress Pattern for American Girl Dolls
    • Our Favorite Spots in Northern Michigan
Home › Blog › Sequin & DIY Fringe Embellished Curtains (Contributor Post)

Sequin & DIY Fringe Embellished Curtains (Contributor Post)

Guest Contributoron September 15, 2014677
Sequin Curtains

detailed sequin and fringe embellished sheer curtains

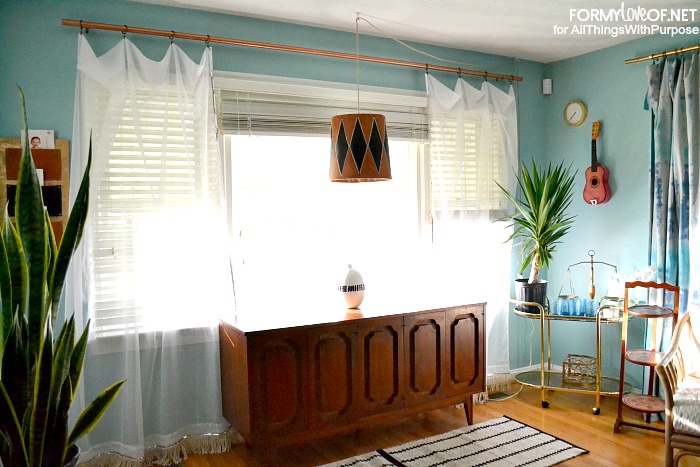
Hello Everyone! My name is Corinna, blogger behind For My Love Of, and I’m here today with a contributor post! I’m a Vintage-aholic, avid DIYer and aspiring Interior Designer. I’m here today to share a tutorial for these gorgeous sequin and fringe accented curtain panels.

X Sequin & Fringe EMbellished Curtains

What You’ll Need:

Sheer curtain panels, Washable glue (meaning it can be washed and will still hold), Sequin ribbon, Cotton rope, Scissors

The Process:

The most inexpensive option I could come up with in terms of fringe borders is DIY. This totally brings the price point on this project way down, so if you’re not strapped for time, I would go this route.

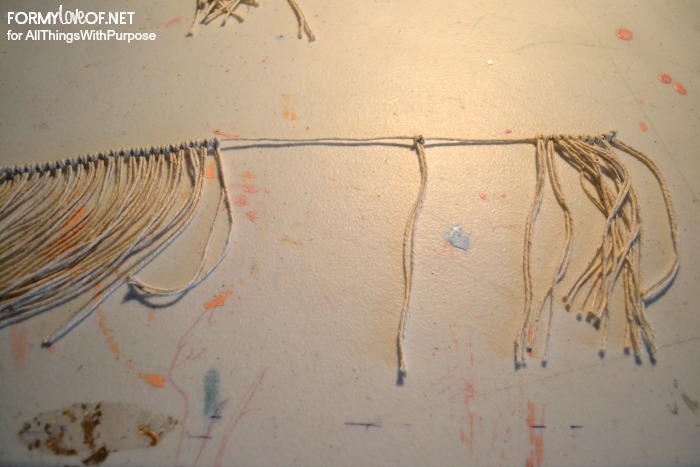
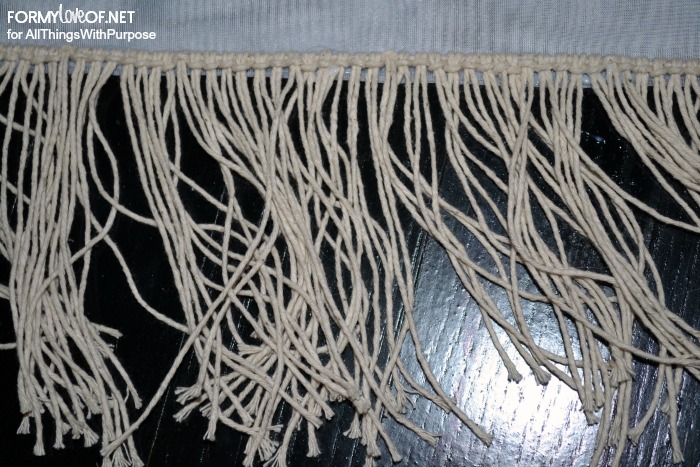
Take the cotton rope and cut a length that is the same length as the bottom of the curtain panel. Then, cut about 700 (yes, seven hundred) pieces that are 10 inch long. This length could vary based on how far you’re hanging the panel from your floor, so that’s something to consider if you’re hanging the panels pretty high up on the wall.

Fold one of the 10 inch pieces of rope in half and tie it onto the long piece using a larks head knot (You can check out this and 4 other beginners knots here). It’s tedious, but I find it didn’t take nearly as long as I expected. Once you find your groove, you could even catch up on shows while knotting. When nearing the end of the rope, start sliding them toward the end and work inward. It’ll be easier than trying to force knots onto a little sliver of rope.

larks head knot the smaller strings onto the longer string

Once you’ve finished creating the fringe, put down a ribbon of glue along the bottom of the curtain panel.

lay down glue

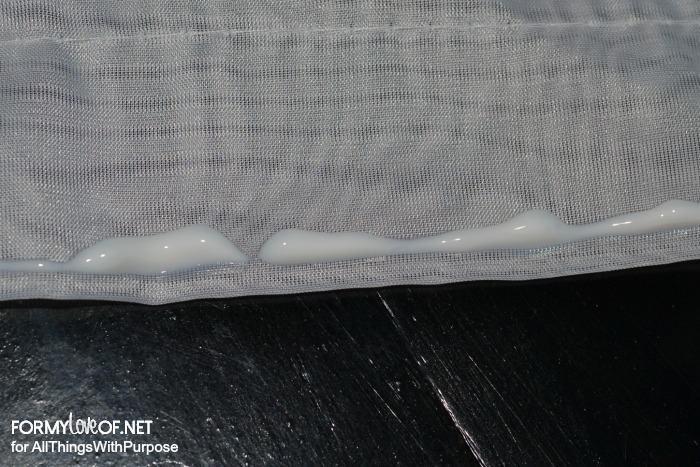
And press the fringe into it. The glue doesn’t dry very fast. In fact, my particular brand takes 24 hours to cure.

press diy fringe into glue

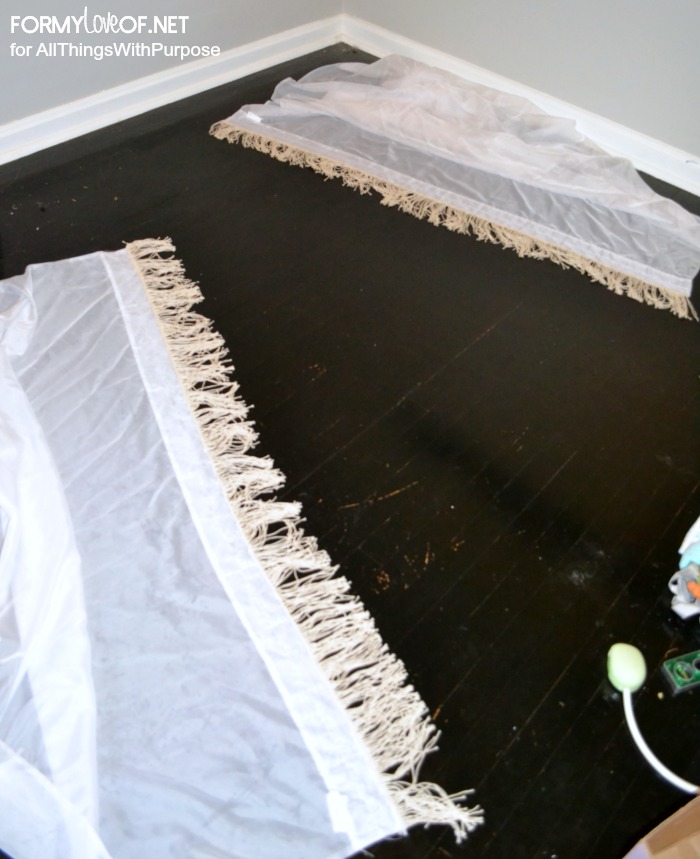
Make sure the panels are in a place they can sit for awhile so that the glue can fully dry. I chose to do mine in stages, first the fringe, then when I had more time without the little one, I pulled them out into the living room and did the sequins.

leave in safe place for glue to cure

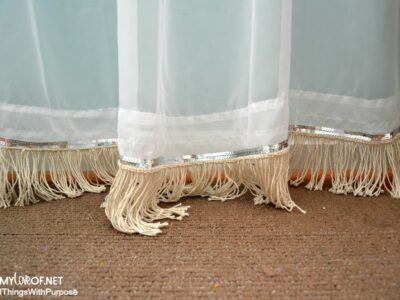
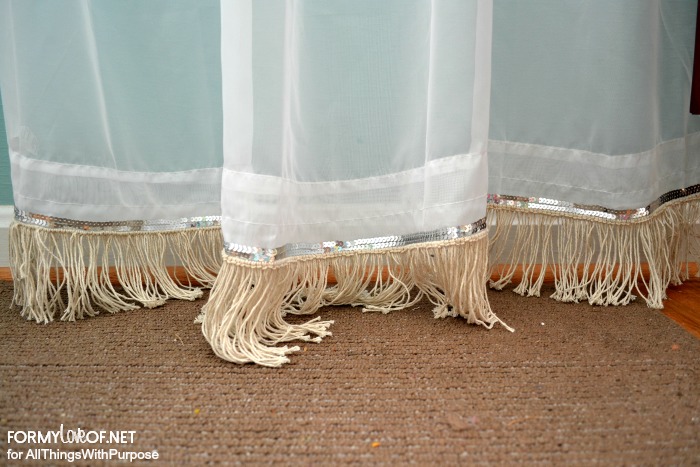
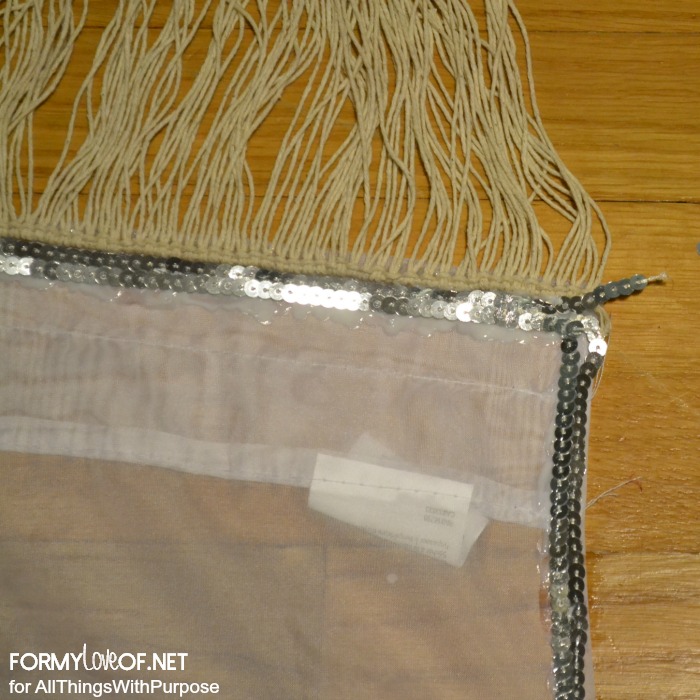
Put down more glue along the fringe and up the side of the panel. Press the sequin ribbon into the glue.

press sequin ribbon into glue

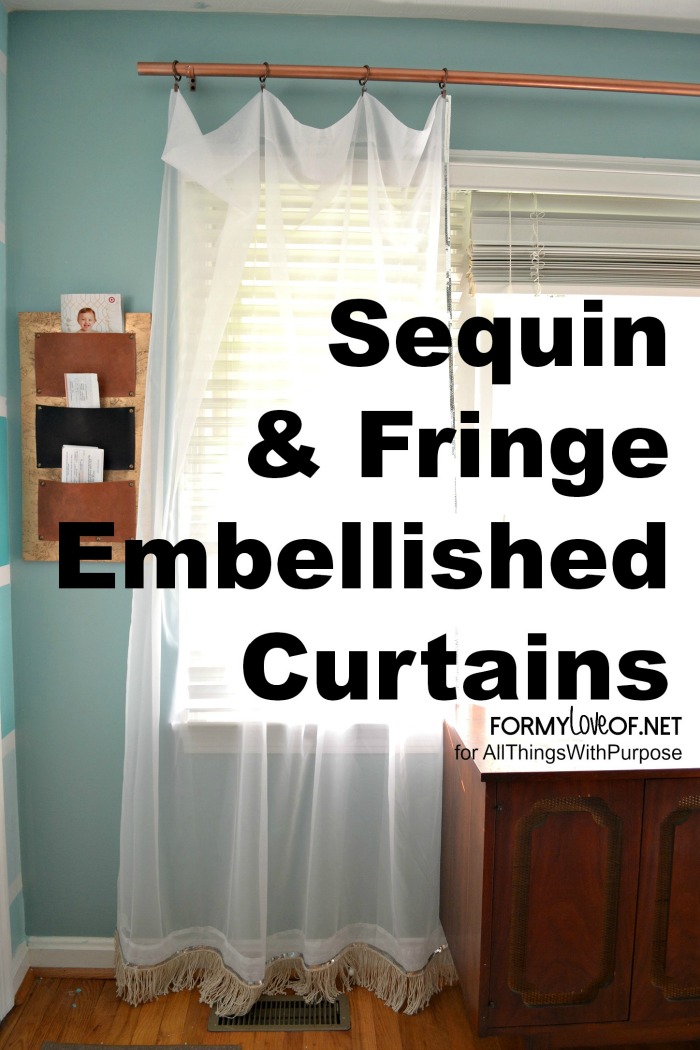
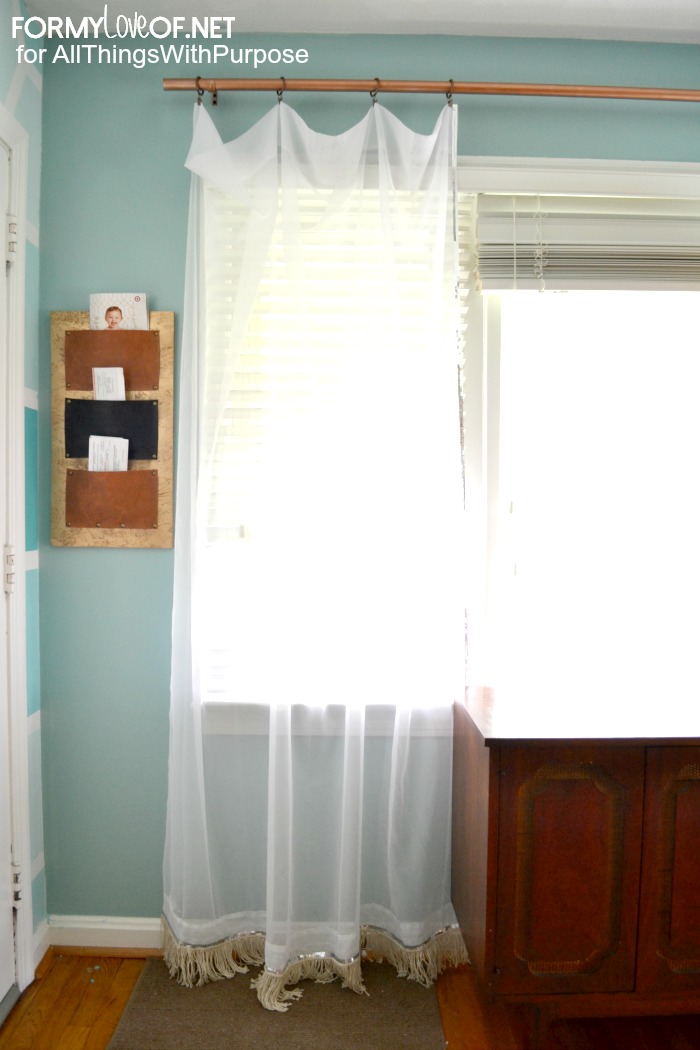
Once the dry time is complete, though, they’re ready to hang! I’ll go ahead and be the first to point out that they are extra gypsy with the lack of curtain rings. I assumed I had more rings on hand than I really did, and am awaiting for more to arrive.

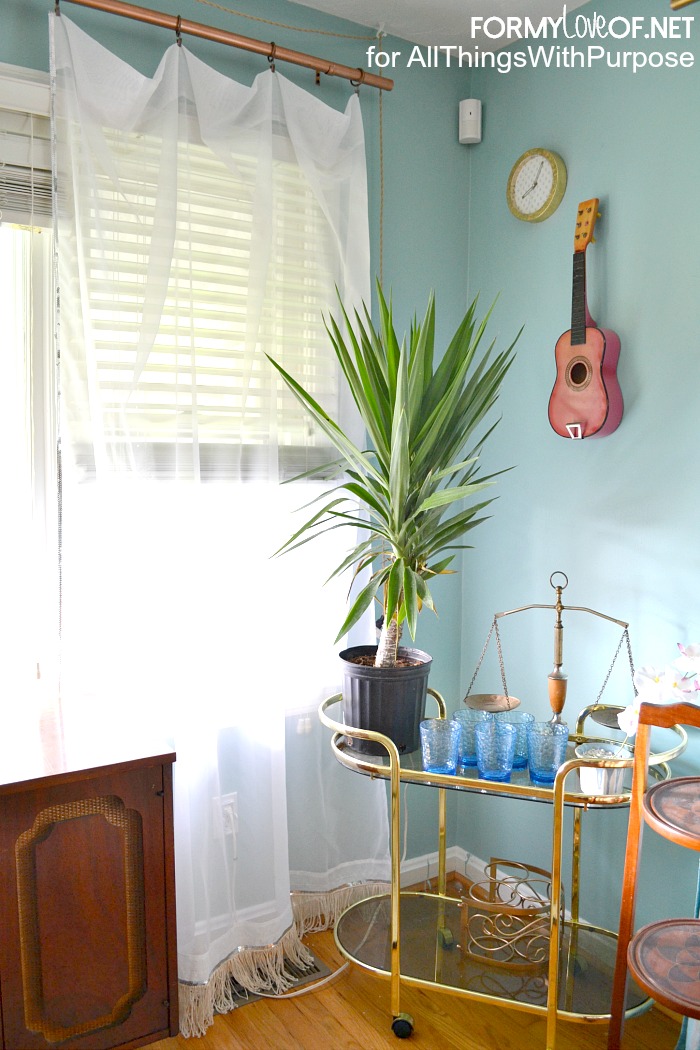
But, they’re still very pretty and add a touch of femininity that my living room was lacking.

sheer sequin and fringe accented curtains flank credenza

sequin edged curtain

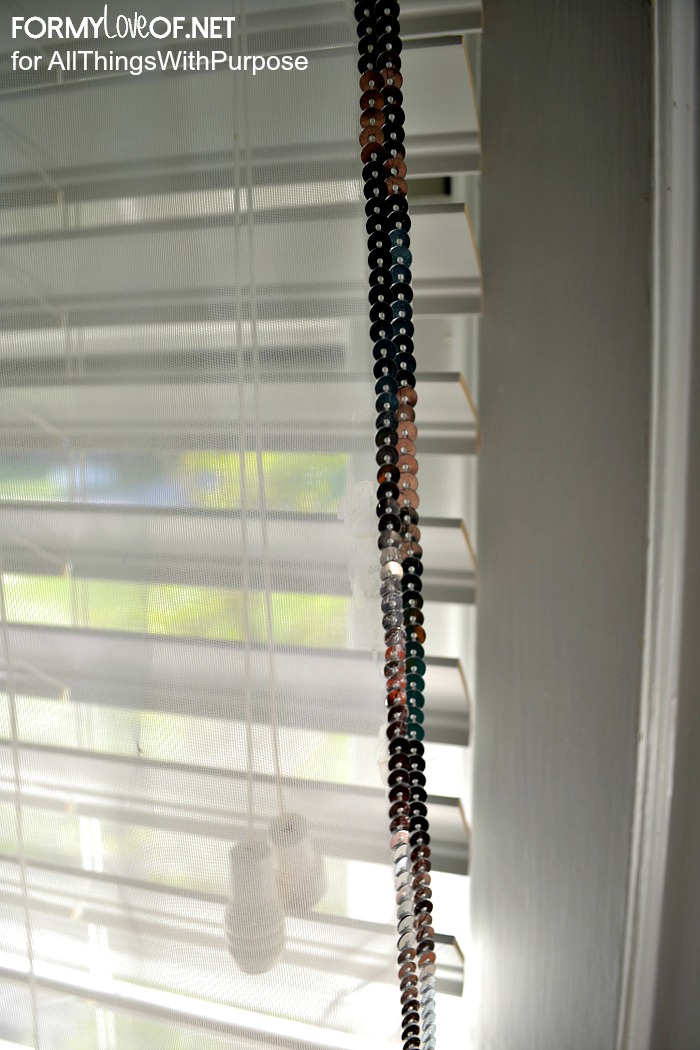
The sequins along the side are subtle, but catch the light and cast little rainbows on the walls throughout the day.

single panel sequin and fringe accented curtains

styled bar cart sheer accented curtains

sheer sequin and fringe accented curtains flank credenza

big window curtain

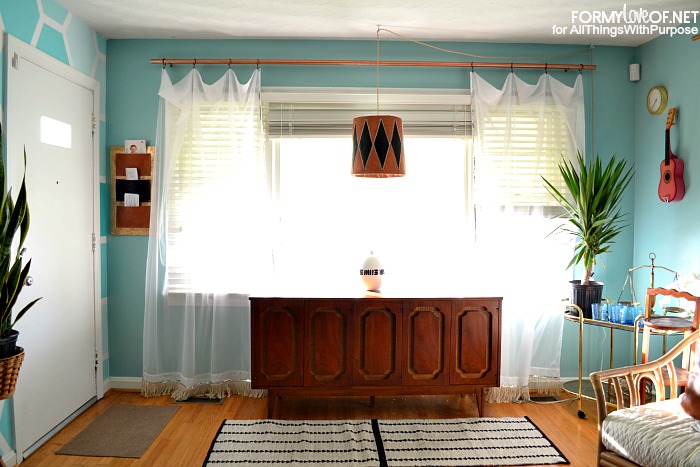
I hope you’ve found this tutorial helpful and inspiring! If you’re eyeing that cool leather pendant light fixture, it’s a DIY that I’ve already shared and you’re welcome to come and check it out along with all the other fantastic DIY’s and Vintage finds on my blog: For My Love Of.

Have a wonderful week!

Category: Decor & DIY
FacebookPin

About Guest Contributor

We are honored to have a number of guest authors and contributors write for All Things with Purpose. Their opinions are their own and provide great variety to the perspectives reflected on All Things with Purpose.

Reader Interactions

Leave a Reply Cancel reply

Your email address will not be published. Required fields are marked *

Recipe Rating (Optional)


Sidebar

Hey, Friend!

We’re a big family on a small budget and we want to help YOU save money on your next Disney vacation! We’re excited to partner with Get Away Today for discount tickets, hotels and vacation packages. Click the link below or call 1-855-GET-AWAY and tell them I sent you!

Get Started
discount disney tickets

Follow on Instagram

follow me on instagram

MORE ABOUT SARAH

Sarah is a second generation homeschooling mom. Originally from Michigan, she now lives with her husband Jay and 5 kids in Florida. They love staying active as a family and going on trips in their renovated RV. Sarah loves to sing, make pretty things and eat pizza.

COPYRIGHT & DISCLOSURE

All content on this site is copyright Sarah Lemp. Many of my posts contain affiliate links. If you click on an affiliate link and buy something, I may receive a small commission. Read more on my DISCLOSURE PAGE.

  • Facebook
  • Instagram
  • Pinterest
  • YouTube
  • TikTok
  • Amazon
  • My Account
  • Media Kit
  • Privacy Policy

Copyright © 2025 · All Things with Purpose · All Rights Reserved · Powered by Mai Theme