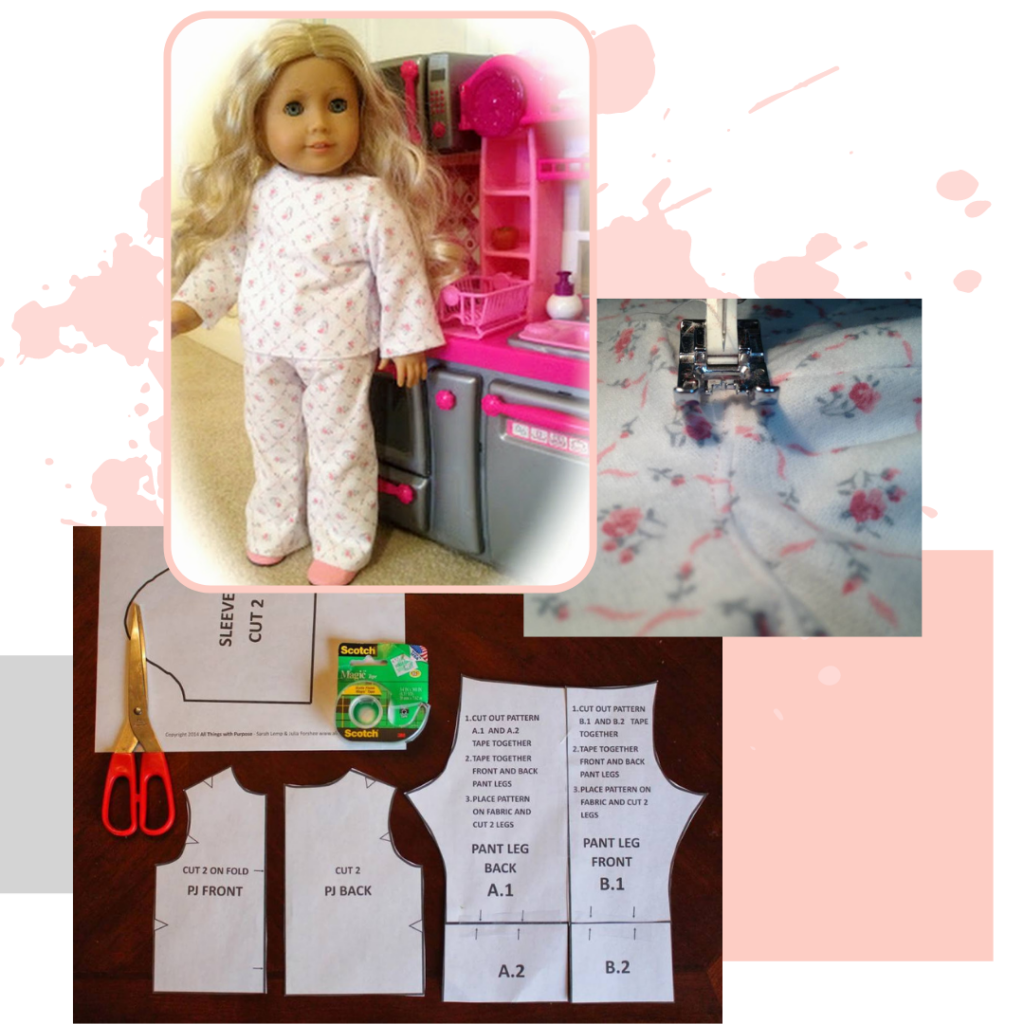
18″ Doll Pajama Pattern
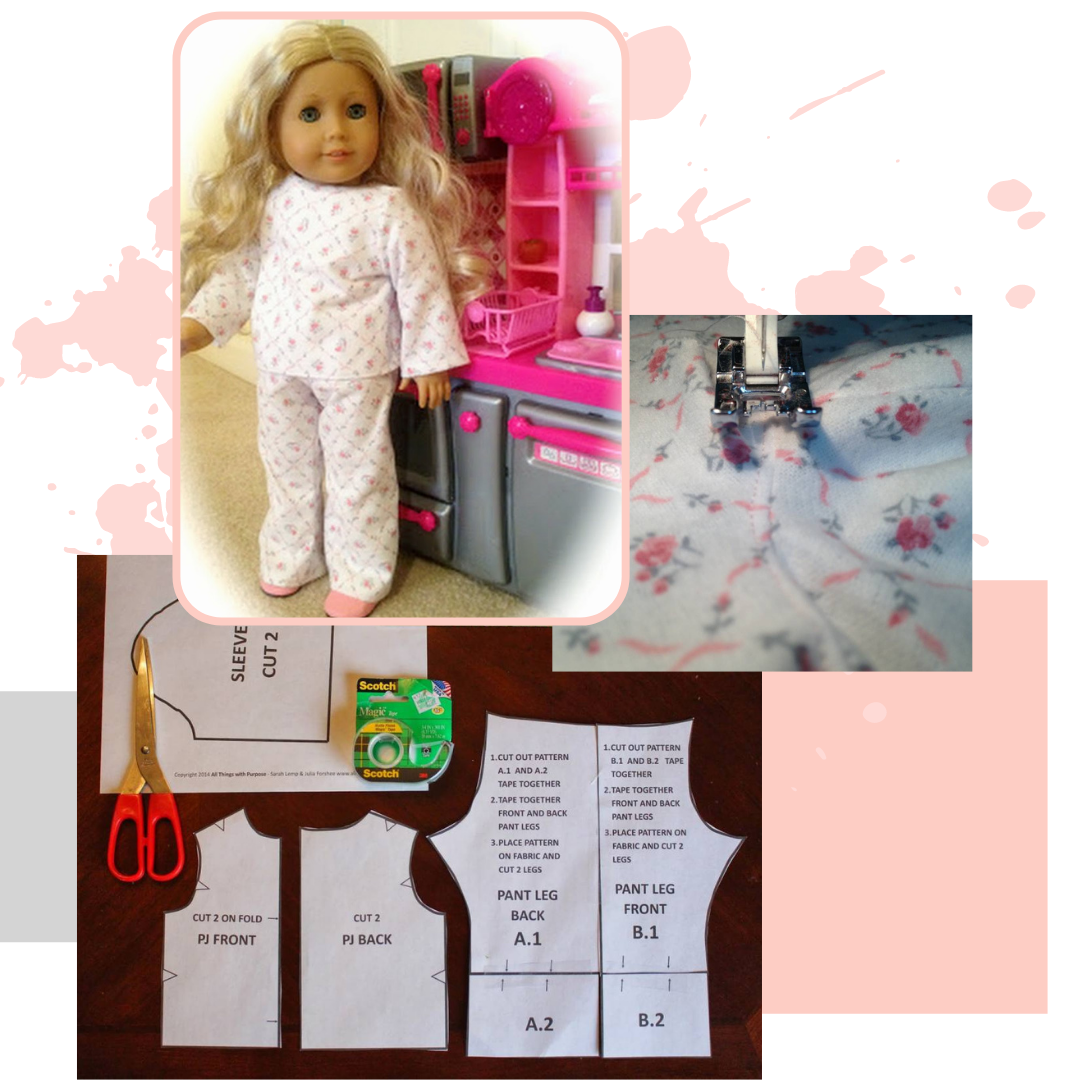
This is a very basic doll pajama pattern for the intermediate-level sewer. These pajamas will look super cute on your American Girl Doll or 18″ Doll. You will need basic sewing skills and a good grasp of how a pattern goes together and where to sew, etc. This is a versatile pattern! Create lots of different looks with this one pattern. The bottoms can be used to create jeans or pants, the slippers can be used to create shoes or ballet flats.


Instructions
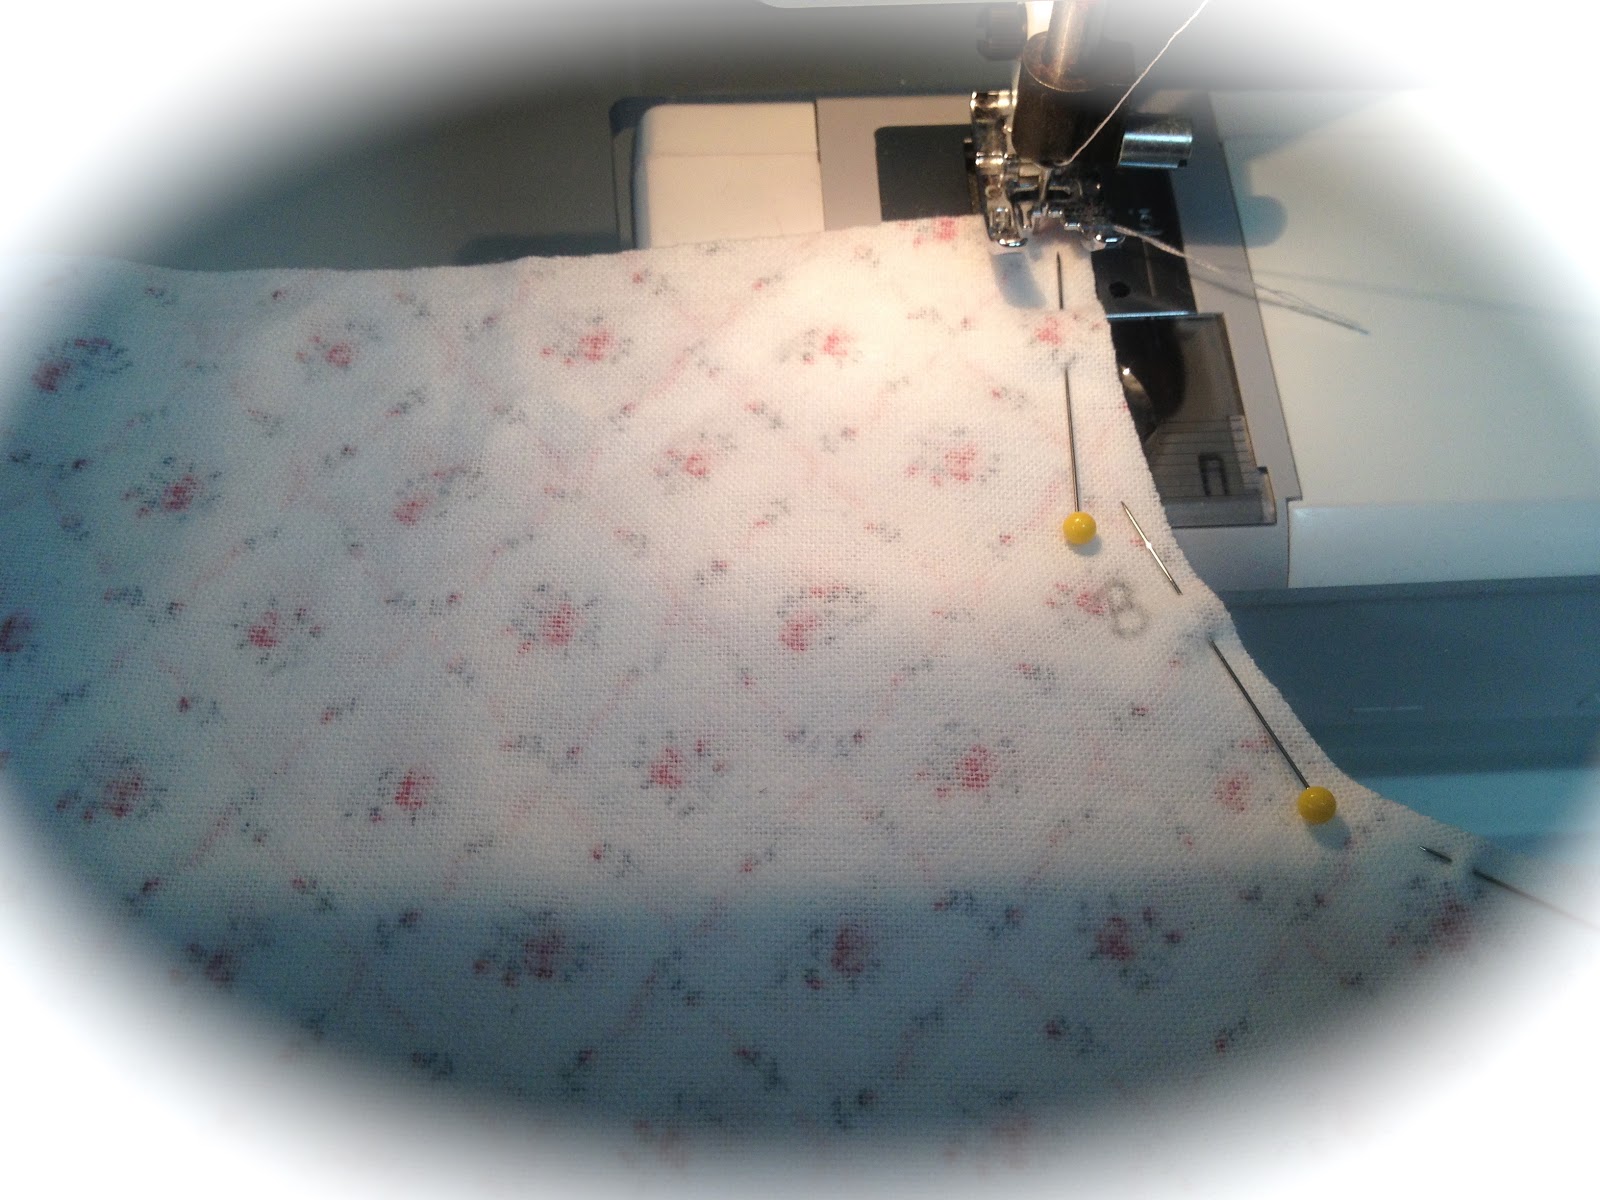
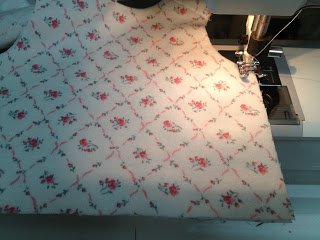
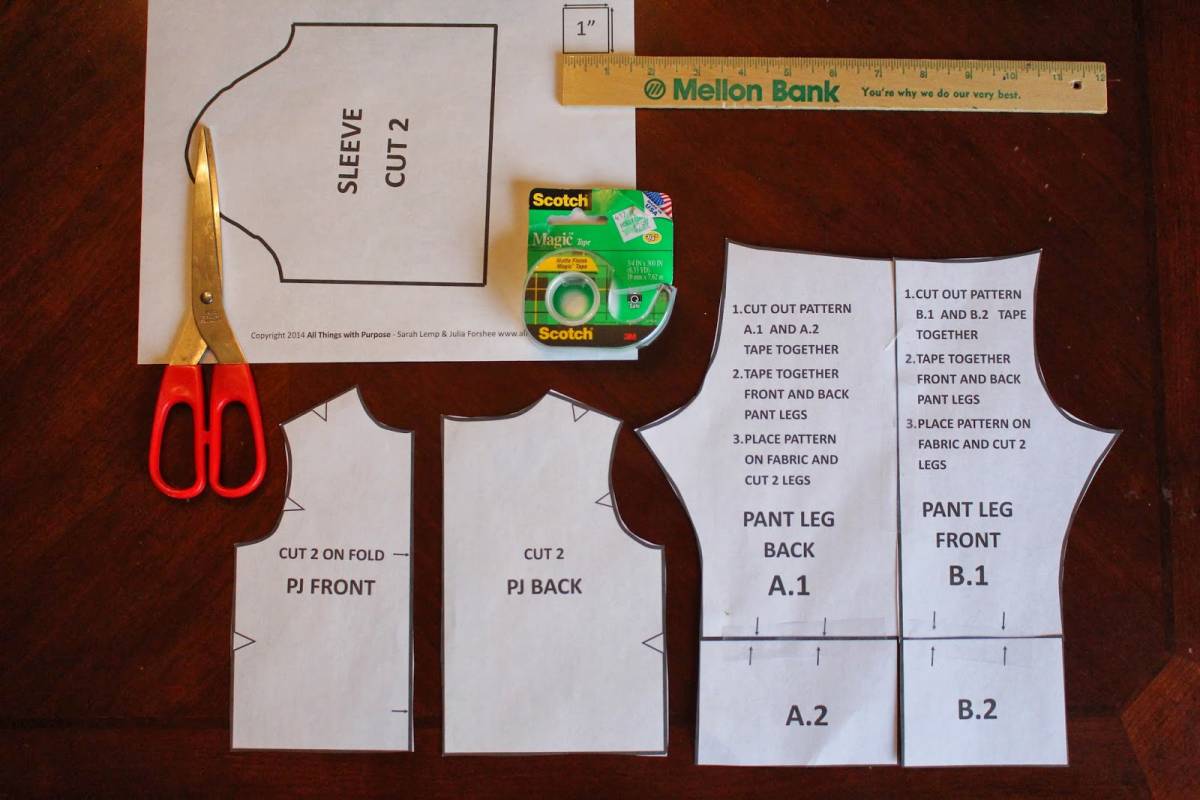
Detailed instructions are included in the printable pattern file. The picture above shows the pattern printed out and taped together. When parts A and B are taped together it forms ONE pant leg. You will need two of these. The slope and curvature of the front and back is different. This is on purpose because the back and front of your doll are different sizes! The curvature of the neck on the top front is different from the back of top because it is meant to be lower than the back.
How To Get This File
Hey, friends! After years of providing this printable for free to my readers, I’ve had to make the hard decision to move it to my shop page where it can now be purchased. You can still find MANY other patterns for free, here on my site.
> To purchase this one, go here: SHOP NOW
> Find other patterns here: FREE PATTERNS
Thank You for Pinning!
heavenlycreations2021
Hello.
I am trying to find the American Girl doll 3 in 1 pattern to print.
I tried looking to purchase it too. It shows how to make it but no where is there a link to print it.
Please send to he*******************@*****ok.com
Thank you!!!
Christina
Patiee
Hi Christina, I found where the pattern is, where it says Purchase Here you can click that button. Or here is the link:) https://shop.allthingswithpurpose.com/products/18-doll-pajama-pattern-digital-download
Then you put your email in and it goes to your inbox all for free!! And also if you cant click the link just copy and paste it!
-Patiee
Ann Nicholls
Please send me free American doll clothes patterns
Patiee
Hi Ann, I found where the pattern is, where it says Purchase Here you can click that button. Or here is the link:) https://shop.allthingswithpurpose.com/products/18-doll-pajama-pattern-digital-download
Then you put your email in and it goes to your inbox all for free!! And also if you cant click the link just copy and paste it!
-Patiee
Kimberly Hourihan
The pattern has darts on it but there is no mention of sewing them?
Ronda
That is not darts they are marks to line up with the other pattern piece.
Linda Colbourne
i am confused , why do i need 2 front pieces, is there a video with instructions?
Debbie
Front goes on a fold, creates on piece
Katy Hammack
I am happy to pay the $1.99 but when I click on it there is no way to buy the pattern for pajamas.
Sarah Lemp
Thank you for bringing this to my attention, Katy! I have fixed it and you can find the pattern here: https://www.allthingswithpurpose.com/american-girl-doll-pjs-pattern/
Patty
Hi Sarah,
Is there any way I can get the pattern for these pants? My two granddaughters would love for me to make them for their dolls☺️
Kif Tiner
Can you please explain to me how to sew the sleeves on? I am having an awful time trying to figure it out. Thanks!
Evelyne
Hi
Thank you so much Sarah for the free pyjama pattern it’s sot cute!! Take care
Debbie
I have logged in but still can’t find the free pattern that I can print out ?
Sarah Lemp
Hi Debbie! If you are logged in, you should be able to find them here: https://www.allthingswithpurpose.com/programs/free-membership/american-girl-patterns/
April
I made the pj pants for my girls’ dolls (made a peasant style top to match her pjs), and they turned out super cute! Very quick and easy to put together, especially after I’d already sewn 6 pairs for all of my kids, hubby, and myself for Christmas! Thanks for the great FREE pattern!
Sarah Kays
I would love this pattern how did you get it or send it to me at ka*******@***oo.com
Sharon Christ
I cant down load
Mary Ann
Are you supposed to sew the 2 fronts of the pajama together before you attach the back? I am a visual person, is there a tutorial video or clse up picture of how to make the pajama top?
Thank you in advance!
Cheryl Cooper
Love the PJ pattern. I am going to make two pairs for my granddaughters. Could you please let me know how much fabric is needed for the top and bottoms. I am using two different fabrics,
mary
Have I missed the place where fabric yardage requirement for PJ pattern is located?
Chris
Thanks so much for helping get into the archives successfully! My niece’s daughter requested pajamas for her doll and these are going to be the ones..Thank you.
Chris
I just finished the pajama top and it seems that the under arm of the sleeves is a little bulky and tight.
Is there something I can do to loosen it? I guess the 3 layers of fabric is the reason, but since the seem is so small I can’t cut any slits in the seam allowance to ease it a bit. Also, what is the length of the finished top? I am making this as a gift and I don’t have a doll to try on my creation.
Thanks for your help.
Sarah Lemp
Hi Chris! What type of fabric did you use? I’m wondering if that played a part in it feeling bulky? As long as you followed all the printing instructions and measured the square to make sure it measures 1 inch, the top should fit fine! Though I know it does seem tricky when you don’t have the doll to try it on…
Chris
The flannel may be on the thicker side. Next time I will check and compare the weight.
Finished the pants today. Can’t wait to try another one of your patterns.
Have a great day!
Elaine Zaichkowsky
Would I be able to get the pattern for the 18” American doll pjs.
Sarah Lemp
Yes, just subscribe above to be given a password which gets you into the printables library!
Regina
When you lay the two fronts together and sew the neckline, do you also sew the shower seams down. When do you sew the shower seams. Confused. Need words with pictures.
Sarah Lemp
Hmm, I am sorry it is giving you issues. We are definitely in the beginning stages of this and are finding a few bugs. Just remember the password is case sensitive. You should enter it and it will automatically open the main printables menu…
Uylond Lynch
As a grandmother, I can’t wait to sew the pjs for my granddaughters’ doll.
How much fabric do I need for one pair of pjs?
Thank you so much.
Patsy Birdwell
Dear Julia and Sarah, I realize this is an older area for comments, and am just hoping you get it. I am a retired teacher living on a fixed income and have a six year old granddaughter. She knows her mam sews, so when she got her AG doll for Christmas she couldn’t wait to show me (Mam, grandmother) and said, “Mommy says the clothes for my new doll are really expensive so we will have to get an outfit as we can.” I remember as a child carrying a much loved but dirty doll, because of no clothes. Thank the stars above I have scraps from years of sewing and your free patterns, It will only take time and thread now to make my grandchild happy. Thank you so much for your kindness and generosity. Patsy Birdwell
Sarah Lemp
You are so sweet, Patsy! I am glad you found us and hope you enjoy making clothes for your granddaughter! Thank you for the kind words :)
Fran
I did not follow the pant directions exactly as given. I taped the two pieces of Part A together and the two pieces of Part B together and then I taped Part A and Part B together at what would be the side seam. I then cut out two of the larger pieces. I stitched the front crotch together and the back crotch together and then I stitched the inseam together and I did not have a side seam. Also, I cut everything out with pinking shears so the fabric would not ravel. I am going to make the shirt later today.
dede
I have been working on this pattern tonight but I am having a hard time understanding how to do the sleeves. I have never sewn any items with sleeves and I am finding this very difficult. Could you please help. Thank you.
Kitty sparkles
This is soooooo cute, and i really want to make it! However, it looks a little difficult. Could you make an instructional video?
Beth
Do you have a video on how to put the pattern together. It has been a long time since I did one for doll clothes. The pictures are not enough help foyer me.
Thanks
B.G. In N.Y
Jennifer
Thanks for the free AG patterns! I am making my daughter a wardrobe for her Bitty Twins dolls with scrap fabric I have from other sewing projects. I have a question about the pajama shirt back. How is it supposed to close? I am not quite following from the pictures. I can put in buttons, but wasn’t quite sure if that was what was intended.
Sarah Lemp
I believe when Julia originally made the pattern she intended to close the back with Velcro! You could really use whatever you want, but most American Girl clothes, when you buy them from the company come with Velcro because it is easier for kids. You could use a small piece on top or use a strip across the whole opening. I hope that helps! Have fun! :)
Jennifer
Thanks!! I had downloaded the old version of the pattern a while ago and misplaced the directions someho. Then, when I got the new version of the pattern, I saw the Velcro.
Julia Forshee
You do not add extra except to the PJ Bottoms or Pants. The reason being is our printer paper is too small to hold the entire leg. So follow the instructions on the Pattern you are cutting out to know how much to add. I do use a 3/8 seam allowance for all seams. Does that answer your question?
Anonymous
So the 3/8 in seam allowance is figured into the pieces. I don’t have to cut 3/8 in. around pieces for seams. Just want to be sure. I do understand about adding to PJ bottoms or pants. Thanks for very nice pattern. My granddaughter will be thrilled.
Julia Forshee
You are correct. The 3/8 seam allowance is figured into the pieces. Enjoy!!
Anonymous
Do you add an extra 3/8 in to all pieces for seam?
Anonymous
What fabric do you suggest using?
Julia Forshee
Flannel is what I used and it worked very well.
Anonymous
Do you have word instruction? I’m trying to make this for my best friend in two weeks, also making the sleeping bag (i’m good on that though). :)
Sarah Lemp
the instructions are included in the pattern – you’ll find the link up at the top of the post. hope that helps :)
Denise
Re printing out……. when you go to print it out UNCHECK the option for FIT TO PAGE
Accebynnel
So for clarification, you printed it as “actual size”? I want to print this out, but want to make sure I’m printing it correctly.
amy mayen
Cool! I love ag stuff!
Reb Thack
How long is the elastic for the pants? I’m almost done making them to go with the doll my daughter is getting tomorrow for her birthday (therefore, I don’t have the doll to measure) thanks!
Sarah Lemp
I just measured and the American Girl Doll’s waist is aprox. 12″ around. Therefor, I would cut the elastic to be a several inches shorter – aprox. 8″ or so (depending on the type of elastic you are using). Hope that helps!
Tammy
Hi!
I am using fleece to make the top so I should skip the second front piece, right?
Anonymous
I am a very beginner at sewing and thought this looked simple enough to tackle…however I am so confused with the 2 pieces of front and when I sew them together it doesn’t look right and I can’t figure out how the back pieces go…UGH I am sure it is really simple but I am just not getting it…can it be done without the 2 fronts? thanks for any help, I was using the instructions and visual but still not getting it.
Sarah Lemp
I am so sorry to hear you are having difficulties :( Keep at it, I am confident you will figure it out with practice!! Julia and I may work on tackling some beginning sewing skills videos. I would tell you to check YouTube, but when I went looking, I found them very hard to find! If you find the two front pieces too hard to master, you could go without the second, you will just have to finish off the neck somehow… turning it over and sewing which can be challenging to get it to look right unless you have a special foot for your machine. The instructions do call for you to do this to the back, it is just slightly more challenging in the front. Just experiment using some scrap material :) I hope it just “clicks” for you! I will ask Julia if she has any better advice!!
Julia Forshee
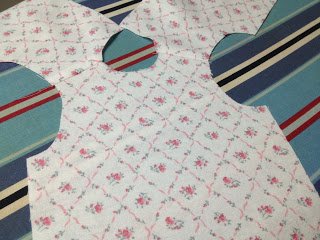
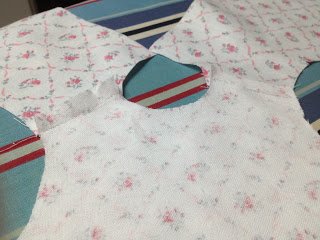
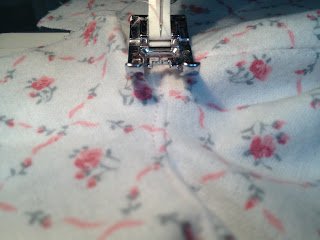
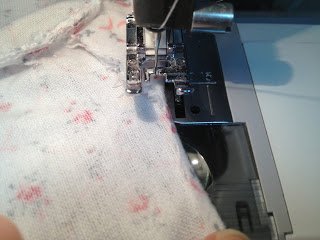
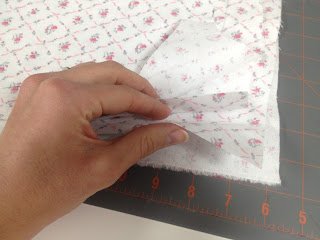
Anonymous, sew the shoulder seams and press the seams. So, you are sewing one front and the backs together. Then you put the right sides together of the two fronts. Meaning if you lay what you just sewed on a flat surface with the brightest side of the material up, or the side that is going to show. Take the second front that you have and lay the side that is going to show on top of it. Lining the neckline up. Now, you should be looking at the wrong side of the front fabric (that will be on the inside eventually), and you are looking at the right sides of the back fabric. This is the second picture.
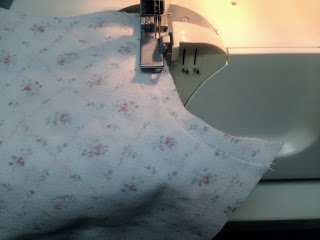
Then you sew the neckline together. Press that seam. Then press that seam open. You are going to then “stitch in the ditch”. This is the third picture. You press it open and sew the seam you just created to one side. If you don’t get this, just fold the second front (lining) in place and press the neckline.
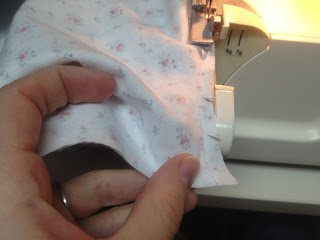
After you’ve done that, sew the sides of the lining (or the second front that you folded over) in the same seam when you sew the side seams. 1 layer of the back with two layers of the front. This will create a nice look on the inside of your PJ’s, too.
Please let me know if you need anymore help!!
Regina Long
When do you sew the shower seams of the second piece to the backs?
Anonymous
I don’t see anything on the size or length for the elastic for the pants. What width elastic should you use?
Sarah Lemp
I don’t think Julia mentions anywhere what size she used – I will have her add that in! In my opinion though, I don’t think it really matters, just be sure to turn the waist over to create an opening wide enough to hold whatever you have on hand. Anything under 1/2″ wide would probably work best! Maybe 1/4″ or 1/3″ Hope that helps! :)
Courtney
These patterns are fantastic! Thank you for the pictures! I made the top today for my daughter, after making pants from a different tutorial yesterday, and it was the first shirt I ever made, and thanks to your tutorial, I was able to do it! And it looks fabulous! I cut out the pieces for the shoes, but I can’t figure out what to do! Do you have a tutorial posted for those too or no? I saw in your post that you said you would later, not sure if I missed it though. I have searched all over the internet and there are no picture or video tutorials for the kind of pattern you used, and it would be a great service to all of us DIYer! Thank you so much for your blog, I just found you today, but I will be sticking around!
Fellow homeschooler,
Courtney
Sarah Lemp
Courtney, thank you so much for your kind words. I am have that tutorial almost done. Sarah and I have to get supper and take the kids ice-skating tonight. So, I should have it together later tonight!!
Sarah Lemp
Courtney, here is the link for the slppers! I Hope you enjoy: American Girl Doll Slippers Pattern
Anonymous
Ok thankyou… Also I am kind of confused as to why there are supposed to be two fronts for the top. Help please??
Sarah Lemp
Cutting 2 pieces for the front and sewing them together with the right sides facing in is just one way of making the neck look nice and clean. Be sure to follow the instructions Julia has included up at the top of the post. Once you have sewn the pieces together, turn them right side out and you will have a nice clean looking front to your PJ’s!
Anonymous
Hi… I love this! I was wondering how I could be sure that I printed it the right size… also, I’m a very inexperienced sewer, so I’m assuming that there is an extra half inch on every side for seams. Thankyou!
Sarah Lemp
Anonymous,
So glad you like the pattern! I am speaking for Julia here, and she is free to chime in if I give the wrong advice…haha but I am pretty sure the pattern should print out the exact size you need. I would save it to your computer to be sure,a and make sure you are viewing it at 100% – but it shouldn’t be tricky. Notice in the separate instructions document (also linked above,) that she could not fit the whole pattern all on one page, so the instructions show how much to add onto it. I believe the pattern is already taking seem allowance into consideration. I hope that helps! I will have Julia verify this :)
Julia Forshee
Sarah, you are absolutely correct. I used a 3/8 seam allowance. On your sewing maching it usually is the line with the 10. Just a little more than the edge of the sewing foot. 5/8 seam allowance is a lot for doll clothes. Let us know if you have any other questions. Another tip is making sure you press after each seam you sew. You’ll get a much more professional look!!
Jerry
Thank you so much for this darling pattern! Could you explain how to print the PDF pattern pieces so that they are actual size and not thumbnails? My printer recognizes them as pictures and prints a 1×1.5″ thumbnail only. They open in Google Documents, is that the way you uploaded them? Thanks for any suggestions! I would love to make a pair for my granddaughter’s dolls.
Sarah Lemp
Jerry, thank you for commenting! I am sorry you are having difficulties :( Yes, it should open in google docs and you should be able to print from there. My only suggestion is to try downloading it first? Go to file and select download, maybe that way it will open correctly on your computer. It should be a full 8 1/2″ x 11″ page pattern. I am assuming you have an Adobe Acrobat reader, if not, download it for free at http://www.adobe.com I hope you have success!!
Bev
I can not open the pdf file for pattern.
It says it was not decoded right.
Please help.
Thanks Bev in Ohio
Sarah Lemp
Bev, you may not have a PDF viewer installed on your computer. If not, you can get one for free at http://www.adobe.com you need their Acrobat Reader installed to view PDF documents. I hope that helps, I just checked and everything is working fine!
Norma
I too would like to know what size should I print the pattern at. Love your pattern. Thank you.
Sarah Lemp
Hi Norma,
Instructions for printing are included with the pattern. Make sure the “fit to page” option is NOT checked off on the print screen. As long as that box is not checked off, you should be printing at 100% or standard/regular size. Once printed, you can make sure if came out right by measuring the box included in the pattern.