If you thought I was excited about painting my cabinets…
or my faux marble painted countertops…
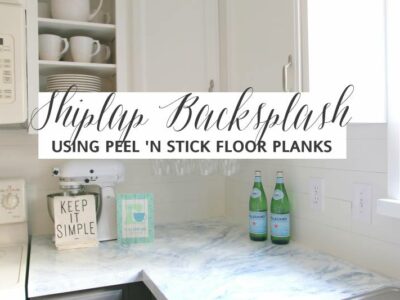
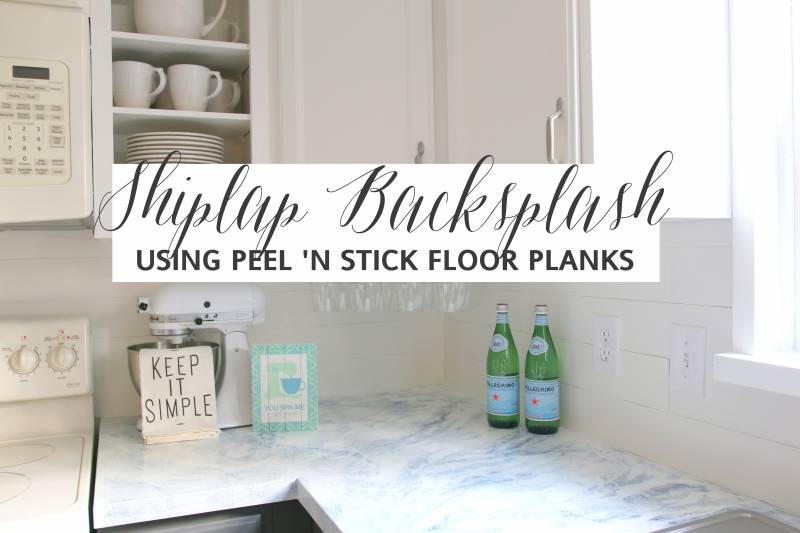
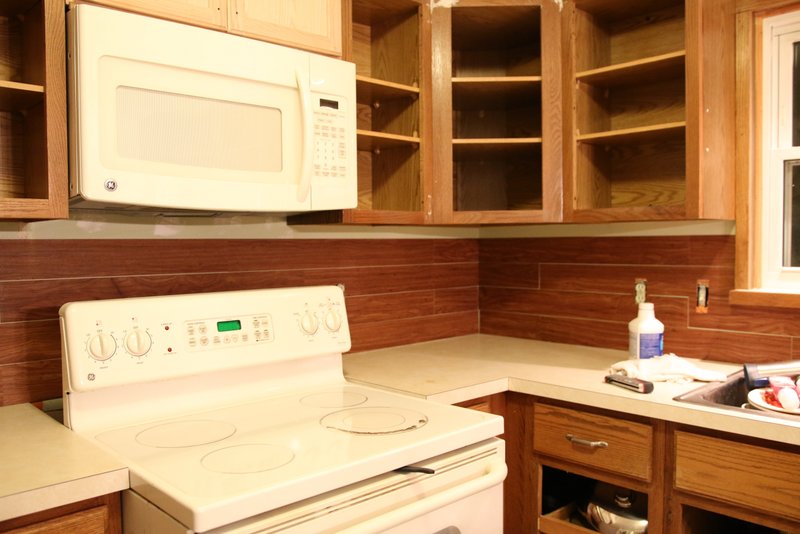
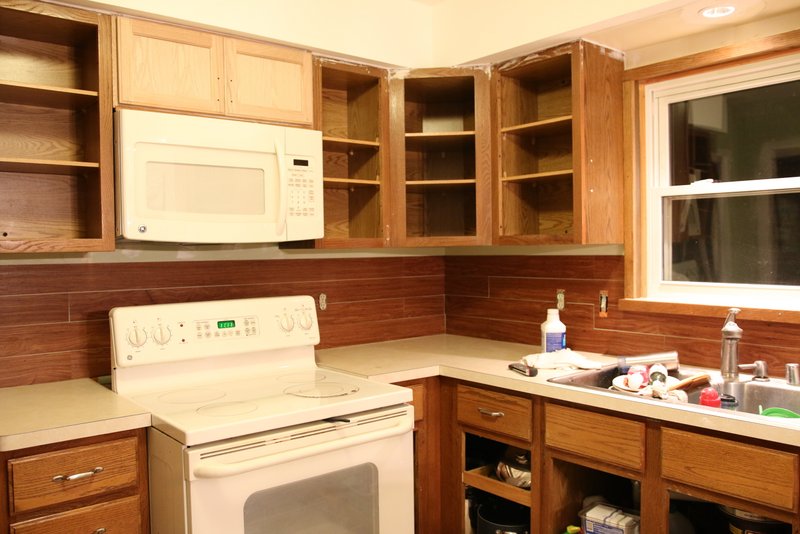
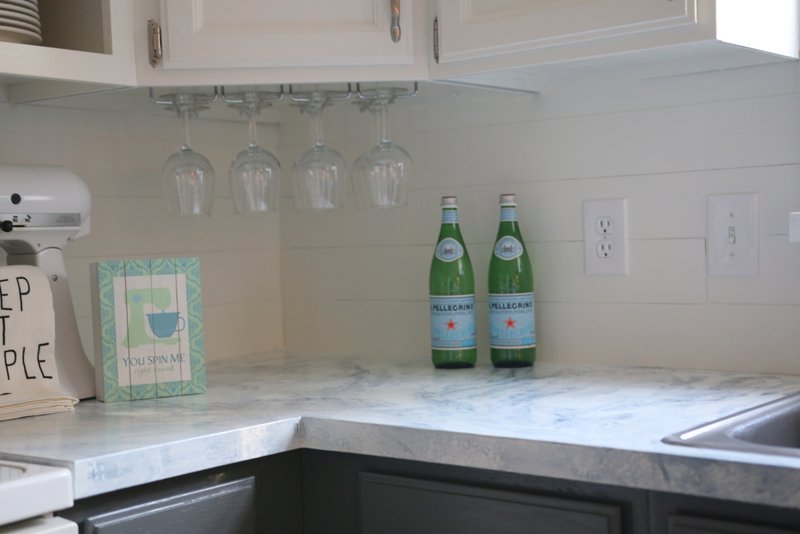
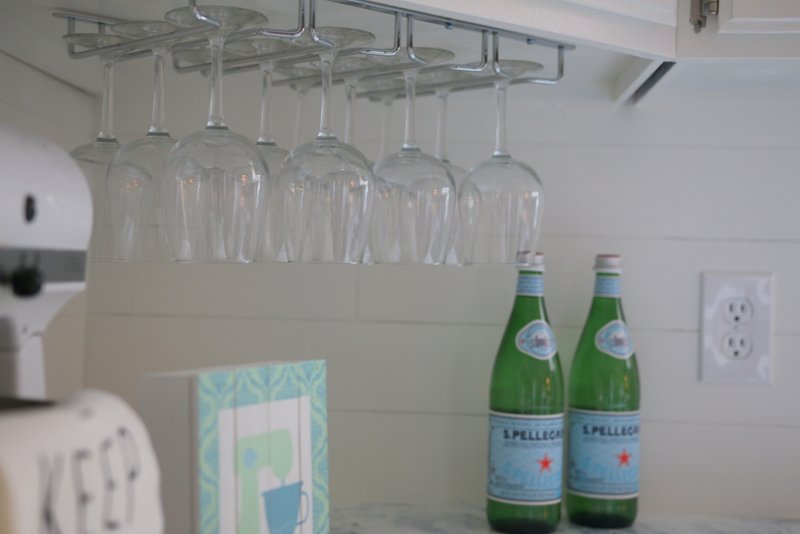
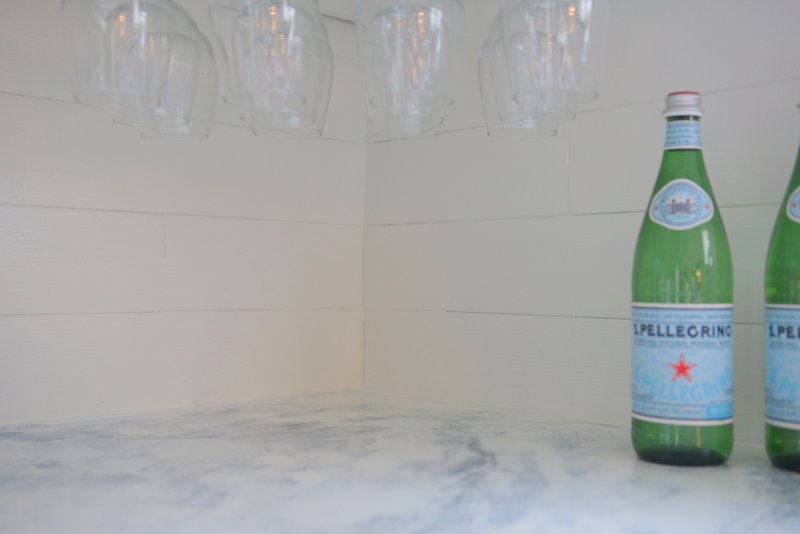
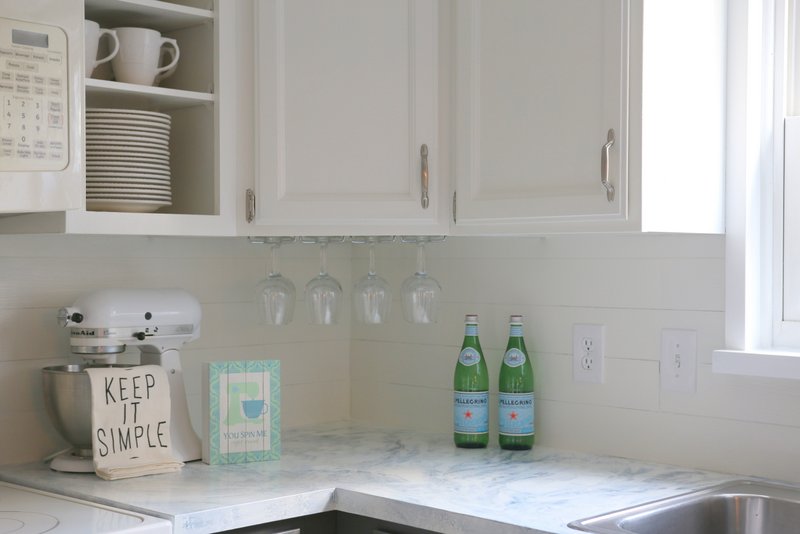
you obviously haven’t heard me talk about this shiplap inspired backsplash!
What is Shiplap
The term “planked wall” is a very broad term that refers to a super popular trend for interior walls. Planked walls have come and gone in popularity over the years. A while back, the natural wood of tongue and groove paneling was very popular as an accent wall. Tongue and groove wall planks were known to be installed vertically or horizontally. Planks are sometimes made out of pine board or even MDF.
Traditional shiplap walls on the other hand are usually installed horizontally and are very common as interior and exterior siding – especially in old farmhouses and especially in Texas apparently! The term “shiplap” has become a buzz word in recent years thanks to the Texas based HGTV show “Fixer Upper” and hosts, Chip and Joanna Gaines.
We all LOVE that warm farmhouse feel of bright, white shiplap. The term “shiplap” technically refers to the specific cut of wood and how it comes together. But in most cases, you can get the rustic look you want in your modern farmhouse, without specifically using a shiplap board.
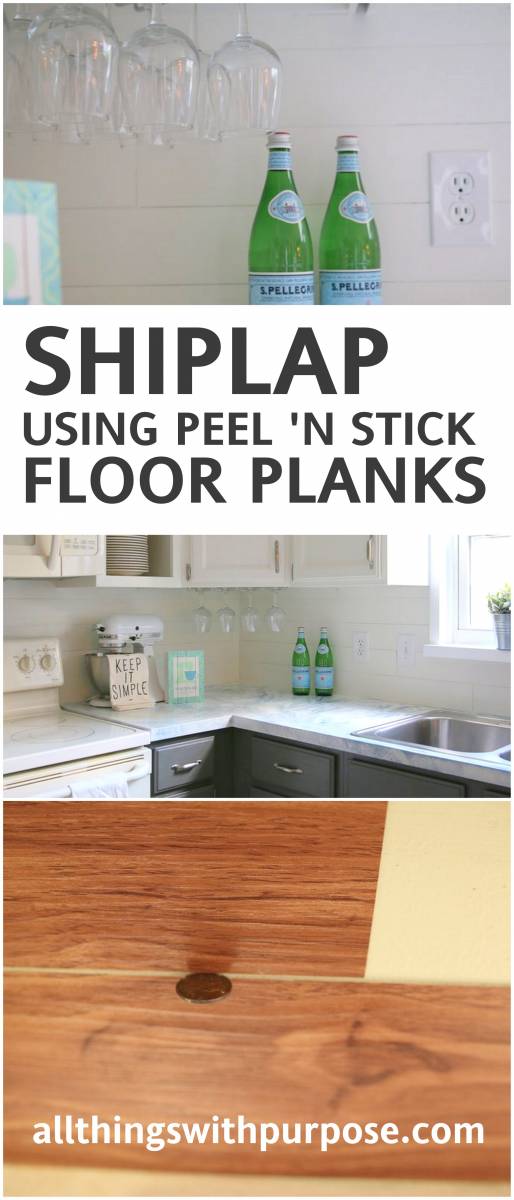
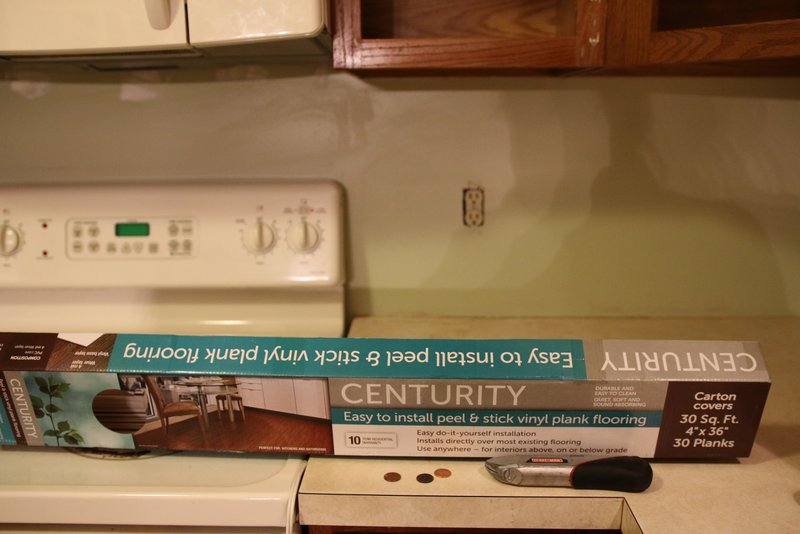
In my case, I created the look of real wood shiplap paneling using vinyl wood floor planks instead of wooden boards!! For about $20 I bought one package of peel and stick flooring. This can be used on a kitchen island, in a mud room or to create a cozy bedroom look.
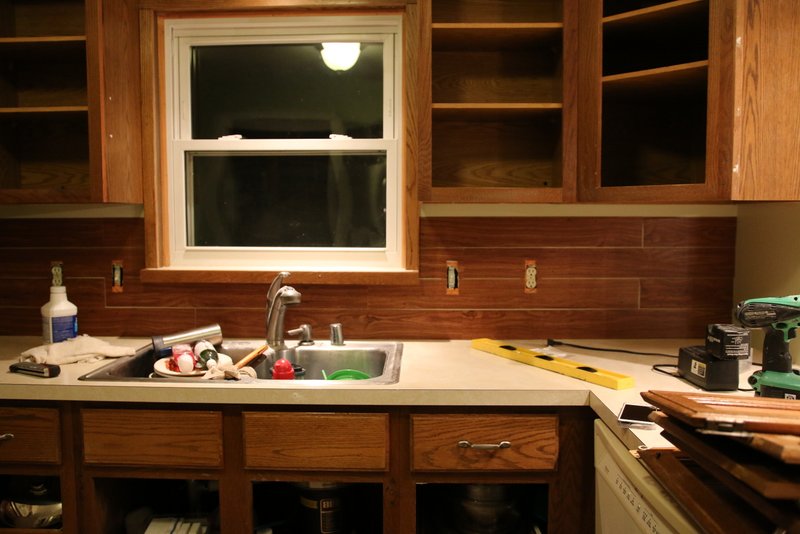
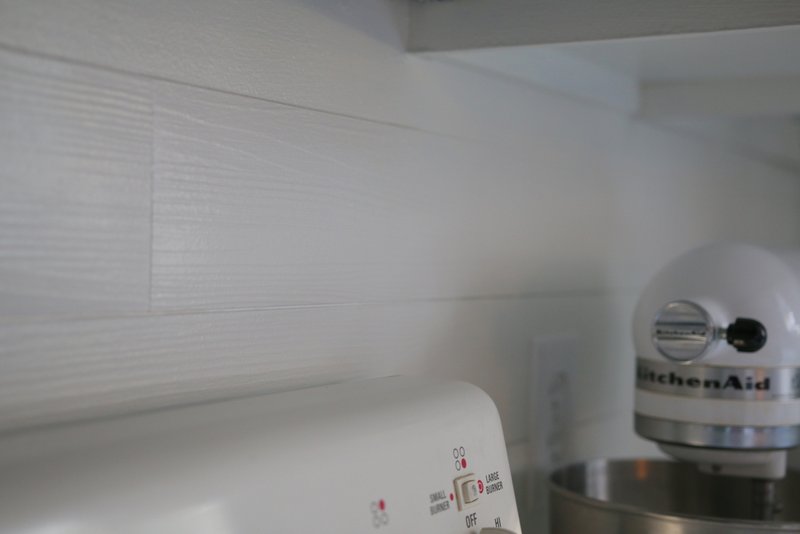
I started with a clean, dry surface. My wall surface was a vinyl sheet that had been previously painted. I started on the bottom and simply lined my first plank up with the counter. I positioned the next plank directly beside the first until I reached a corner.
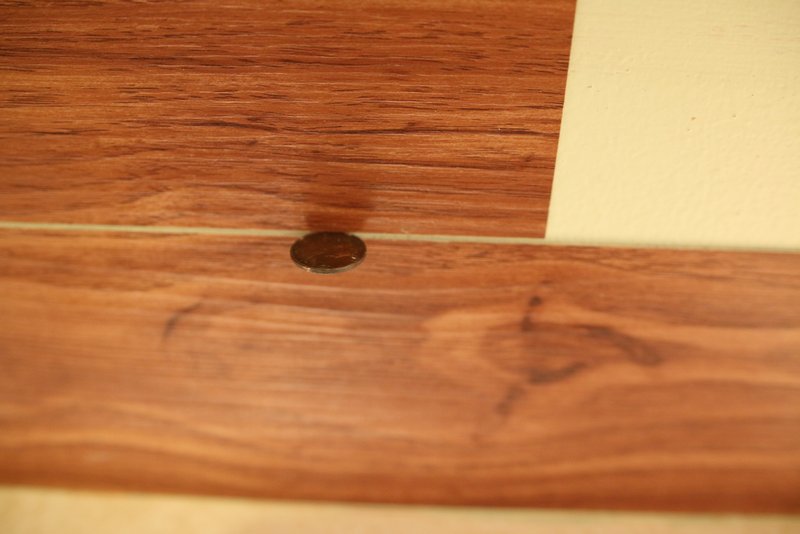
The vinyl is super easy to cut and only needs to be scored with an exacto knife. For my next row up, I cut a piece in half so the boards would be staggered and spaced it above the first row using a penny. Press on each board, firmly as you go. Follow package instructions for specific pressure and timing. Some may recommend using a rolling pin.
I left a small space between the planks and the bottom of the cabinets. I chose not to spend time cutting any planks horizontally to fill that gap. I planned on painting my cabinets and shiplap all the same color, and figured it would blend together well.
I painted the boards first using Stix primer. Then, I painted with the same color as my cabinets: Benjamin Moore Dove White.
***TIP! The trick while painting, is to make sure the paint doesn’t settle into your cracks and fill them up. You want that defined horizontal line to create a rustic and natural look. I continually cleaned out the crack using a wood skewer.
I love the fact that even though it’s vinyl, the wood grain look comes through!
If installing this as a backsplash, I recommend sealing along the countertop with silicone.
Supply List
- Liquid Sander
- Stix Primer
- White Paint (I used Benjamine Moore Advanced in Dove White)
- Vinyl Wood Planks (Mine are from Menards, but these are similar and can also be found at Home Depot)
- Exacto Knife
- Pennies
- Wood skewer or pointed stick to keep cracks clean
- Silicone Sealant
UPDATE!! Almost 6 months later and my shiplap is still in place, it has cleaned really well and nothing is falling off! I did a similar project, however, on a furniture piece and I had to use additional glue and nails to keep the planks in place. They started warping and popping off almost immediately. I’m not sure what to contribute the success in my kitchen to – the brand of plank, paint I used, deglossing agent or temperature in the room. But either way, I am still super happy with my results!!
ANOTHER UPDATE!! My farmhouse style shiplap is still holding fast almost a year later. I wanted to point your attention to some great tips provided by a reader:
Hello Everyone: I read with interest about the vinyl tile backsplash idea. Being from the flooring industry for 40 years, allow me to comment. Vinyl tile adhesive, whether applied at the factory or put down ‘wet’ has a unique feature: it never fully dries; it remains tacky for life. The reason? If it dried hard (like construction adhesive) it would crack and lose its adhesive quality (from the weight of people walking on the tile). Further, the force of gravity pulls the tile into the tacky adhesive forever. Because of this property, when installed vertically, tiles will usually begin sliding downwards, buckling the tile below it (again, the force of gravity). Why your particular installation has not failed, is a quandary. Perhaps the tiles are thick enough not to bow out? Or the adhesive formulation is unique to that company? Not all hope is lost, however.
Preparation: When ever you will be using adhesive, you must DEGREASE the surface COMPLETELY. Mopping a floor or cleaning a wall with window cleaner is not enough! Have you cleaned a black stove top only to see shiny ‘streaks’ across it? That is grease; this amount will cause adhesive failure. Another example is glassware. Ever wash a clear glass bowl and see droplets of rinse water remain? The class has grease on it. Water will sheet-off only if the glass is CLEAN. So, before using self stick tile or adhesive (you can use adhesive with self stick) use a product labeled DEGREASERE. Do not dilute; clean up with paper towels first, then with a couple of ounces of vinegar in a gallon clear water, wipe down again (okay to use a clean cotton towel here). If there is paint on the surface, first scarify it with an old brick, then clean as above.
Since all vinyl glue won’t work, there are two types that will: COVE BASE ADHESIVE or CERAMIC TILE ADHESIVE TYPE I (one). They both dry semi-hard, but retain just a bit of elasticity. Hint: I use CTA for laminating wood together, or gluing wood to walls, etc. It is so much stronger than construction adhesive! and does not crystallize. For thin tile (1/16″) use a 1/16″x1/16″ trowel; for thicker tiles, use 1/8″x1/8″ trowels. Have a bucket of warm soapy water on hand for IMMEDIATE clean up. Once it gets dries, only scraping will remove it. HINT: after spreading the glue, set the tile. If you touch the glue and nothing transfers to your finger, it has skinned over and must be removed with a putty knife and new troweled on. Next, use a 4′-6″ section of white plumbing pipe (or rolling pin) and press the tile into the wet adhesive. (we used 100# rollers on floors giving us 100% adhesive contact).
One last HINT: where the tile meets the countertop,put the tiles on top of a nickel. This way, when you caulk, it will go under the tile (not just on top, giving you a much tighter water seal and longer lasting job. Now get off the computer and Go have fun…- Joseph
You Might Also Like…
See the rest of my kitchen here: Fixer Upper Inspired Kitchen Reveal!
See my tutorial for the faux marble countertops here: Faux Marble Painted Countertops
Samantha Wark
Is there any material to use aside from these two, cove base adhesive and ceramic tile adhesive tape?
Maggie
So I really like this idea but you didn’t explain the process very well. You provided a list of materials but you didn’t explain how you used even half of them and why. I was excited to find this article but now I’m a little disappointed.
Mahmoud
Thanks for you’re sharing! Must have a try! And i am expecting more from you.
peel and stick tile
Paige
Hi! Just curious how the vinyl shiplap is holding up? Great diy project!
Kaden Joy
Before I found your site I was racking my brain trying to figure out what to do for a back splash that would go well with some brick walls. When I saw your post the sun came out, you genius you. Floor planks on the wall as ship lap I love it TY and your other comm enter that added about degreaser and adhesives. I found my perfect backspash
Shawnna
I really like your project. I’m about to embark on a similar idea for my backsplash and it’s always fun to see how it might look. I’m going over the top of tile, so I’m taking a different approach that will hopefully turn out as well as your kitchen. I think you did a beautiful job!
LAURA {NOT A TROPHY WIFE}
Sharing on my Saturday Shares series about shiplap/plank flooring! Love how this turned out! laura
Joseph D Mihalak
Hello Everyone:
I read with interest about the vinyl tile backsplash idea. Being from the flooring industry for 40 years, allow me to comment.
Vinyl tile adhesive, whether applied at the factory or put down ‘wet’ has a unique feature: it never fully dries; it remains tacky for life. The reason? If it dried hard (like construction adhesive) it would crack and lose its adhesive quality (from the weight of people walking on the tile). Further, the force of gravity pulls the tile into the tacky adhesive forever.
Because of this property, when installed vertically, tiles will usually begin sliding downwards, buckling the tile below it (again, the force of gravity). Why your particular installation has not failed, is a quandary. Perhaps the tiles are thick enough not to bow out? Or the adhesive formulation is unique to that company?
Not all hope is lost, however.
Preparation: When ever you will be using adhesive, you must DEGREASE the surface COMPLETELY. Mopping a floor or cleaning a wall with window cleaner is not enough! Have you cleaned a black stove top only to see shiny ‘streaks’ across it? That is grease; this amount will cause adhesive failure. Another example is glassware. Ever wash a clear glass bowl and see droplets of rinse water remain? The class has grease on it. Water will sheet-off only if the glass is CLEAN.
So, before using self stick tile or adhesive (you can use adhesive with self stick) use a product labeled DEGREASERE. Do not dilute; clean up with paper towels first, then with a couple of ounces of vinegar in a gallon clear water, wipe down again (okay to use a clean cotton towel here).
If there is paint on the surface, first scarify it with an old brick, then clean as above.
Since all vinyl glue won’t work, there are two types that will: COVE BASE ADHESIVE or CERAMIC TILE ADHESIVE TYPE I (one). They both dry semi-hard, but retain just a bit of elasticity. Hint: I use CTA for laminating wood together, or gluing wood to walls, etc. It is so much stronger than construction adhesive! and does not crystallize.
For thin tile (1/16″) use a 1/16″x1/16″ trowel; for thicker tiles, use 1/8″x1/8″ trowels. Have a bucket of warm soapy water on hand for IMMEDIATE clean up. Once it gets dries, only scraping will remove it.
HINT: after spreading the glue, set the tile. If you touch the glue and nothing transfers to your finger, it has skinned over and must be removed with a putty knife and new troweled on. Next, use a 4′-6″ section of white plumbing pipe (or rolling pin) and press the tile into the wet adhesive. (we used 100# rollers on floors giving us 100% adhesive contact).
One last HINT: where the tile meets the countertop,put the tiles on top of a nickel. This way, when you caulk, it will go under the tile (not just on top, giving you a much tighter water seal and longer lasting job.
Now get off the computer and Go have fun…
Joseph
Chris Bailey
Thanks. Having worked with vinyl tile a bit over the years I was wondering when the sagging would begin. I liked your detailed explanation and careful step by step instructions.
Alicia
This is awesome! I am wondering if I could do a bedroom headboard with this if I have textured walls. Do you think they wouldn’t stick well to textured walls?
Joseph D Mihalak
No they won’t – not enough surface area for the adhesive to work. You could first install the tiles on 1/4″ underlayment grade plywood (not osb!), them screw the plywood to the wall, finishing the edges in whatever way you like.
Joseph
Kelly
How is it working with liquid, like splashes from a sink? Did you caulk around the meeting between the shiplap and countertop?
Sarah Lemp
Kelly,
Splashes have been no problem! Yes, I caulked all along the edge of shiplap and countertop and have had no problems yet!
Anne Birdsong
Hi Sarah, I’m Anne, and I just found your blog through Pinterest. I LOVE your idea for creating faux shiplap! You are so very creative. I can see myself using this in my next home for sure. Thank you for the inspiration! Anyway, have a wonderful day, and I hope you can pop over to my blog (https://birdsongbitsandpieces.blogspot.com) sometime to say hi!
Mary
Hello Sarah,
Love your style, budget friendly ideas and creativity. I’m curious, how the painted vinyl planks are fairing. Does the paint scratch easy or has there been any affect from the heat of the stove?
I look forward to your followup.
Tara
Do you worry about this damaging the wall? Want to do this in a bedroom and my husband is concerned what will happen when we take it down.
Hallie Bennett
Looks great. Think it would look good even without painting them. My problem is I have those old Masonite cupboards and paint just peels right off. They look terrible. Any good suggestions? I wonder if the ship lap would stick to the front of the cupboards.
Jennie @ The Diary of a Real Housewife
Hi Sarah! I have another question! I actually went out and bought the flooring today. How did you get the penny stay? IS there anyway you can do it without a helper?
Sarah Lemp
Hey Jennie, I did not have a helper… it just kind of stuck! Once the top plank came down on top of it, it was tight enough to hold I guess?? I’m so excited about your project! I’d love to see pictures when it’s done! I really hope it turns out well :)
Jennie @ The Diary of a Real Housewife
Your kitchen looks awesome!! I am looking for an easy way to put shiplap on a wall in my dinning room and I might give this a try!! What are your thought after working with the material how it would work for a wall. Are you able to easily clean up any spills and splashes? Thanks so much for the awesome idea.
Sarah Lemp
Hey Jennie!
What I like about the vinyl is how easy it is to work with and cut – so much less work/mess than pulling out wood and power tools. I have found it to be really easy to clean off. I’ve had spaghetti splatters that wiped off beautifully. I think that is really up to the quality of paint you choose to use on it. My planks have held really well, but I can’t guarantee how well they will stick on a wall not knowing the surface, brand of plank, etc. BUT I think using even a small nail to keep them in place is not a bad look either which I have done with other projects! Good luck!! :)
Jennie @ The Diary of a Real Housewife
Thanks so much Sarah! I can’t wait to get my project started =)
Emily
Could you please explain the steps you used to paint your upper cabinets? I do not know much about home remodeling, so I need a step by step explanation for painting the cupboards. Your kitchen looks great! I love Fixer Upper as well– the style is homey and calming.
Karen Muti
Just want to know where I could purchase the white shiplap peel and sticks and how much they are?
Very interested in doing a wall in the livingroom by my couch. I think this would be something i could do.
Lolly Jane
Brilliant. Clever girl!
Rachael
Question!! Is it removable without any damage done to the wall?? Say for a renter wanting to spice up the kitchen?!
Pam in Illinois
Love this!! Did you put any kind of trim to finish where the ‘planks’ end?
Sarah Lemp
Pam,
My planks ended at a door that already had trim, so it was kind of a natural stopping point. If they had not, yes, I would have added a strip of trim to finish it off nice :)
Michaela
Love this!!!I live in a rental. Do you think these would easily come off?
Sarah Lemp
I think it would be doable depending on what kind of surface you’re sticking them to! :)
Becky
You could put up 1/4 inch luan first then put plank on luan ;
If you need to remove later all you need to repair will be nail/screw holes where luan was attached. Can actually cut luan to fit wall then install plank to luan before attaching on wall.
sue
Super idea, that looks very “Joanna Gaines” inspired. I live waaaay north of the border lol (Canada) and peel ‘n stick flooring is expensive. I think you could achieve the same look with laminate … Which is considerably less, the downside though, would be either using liquid nails or a brad nailer to adhere the planks to the wall.
Looks awesome !
Sue
Leah
So I am totally obsessed with this. Seriously considering this for my kitchen as well. Also love the fact that its super budget friendly. Greetings from the Netherlands and ps also love the entire kitchen makeover!
Sarah Lemp
Thank you so much, Leah!! <3
Ellen
Gorgeous! I’ve been contemplating what to do for our backsplash. I love this idea but have a few questions. Were your walls textured or smooth? Ours are lightly textured and I wonder if there would be an issue with them sticking. How are they to clean? I’m concerned about spaghetti sauce or something like that splashing on it while cooking and then not being able to clean it. How many coats of paint did you apply? Did you seal them with anything? Thanks in advance for your time!
Sarah Lemp
Hi Ellen! My walls were smooth – I have heard mixed reviews of how well the self sticking planks hold up. Mine have held great but others have said theirs did not. For a rough surface, I would recommend adding some liquid nails or similar adhesive. I would also use a good degreaser or deglossing liquid to clean them off first. I sealed around the counter top with clear silicone. I did one coat of primer and roughly 1 1/2 coats of paint. I used a satin finish, you definitely want some gloss so they clean off easier. I just made spaghetti the other day and it cleaned off beautifully!
Rhonda Hunter
I’m curious about the spaces between the planks. Don’t you get dirt and dust in them?
Bobbi
This turned out beautifully! Great job and very good instructions. I have a sister I’m going to recommend this to.
Steph Bartels
Love it! Would you ever put the peel n stick flooring on the ceiling??
Sarah Lemp
Steph, that would be interesting!! I guess it depends on what the ceiling looked like – but if it was bad and needed repair, seems like it would be a nice fix. I would definitely suggest using liquid nails however, for extra hold. :)
Annette Jones
So you painted over the vinyl peel ‘n stick? It looks great.
Sarah Lemp
Annette,
Yes, I primed and painted right over it :)
Barb Howard
Amazing Look! Can you paint the slats before you paste them onto the wall? That step might save me trying to reach and stretch in crazy angles.
Amy
I wondered that too!
Pam
I don’t see where you answered the question about sanding & painting before sticking. Also if you don’t put anything between the boards to seal the space, wouldn’t any splashed liquid go in-between and stay there or cause mold? Does it ruin the sheet rock if you eventually wanted to remove it? Thank you for your answering my questions. I love what you did and want to try it but need these questions answered.
Melissa
I’m thinking about doing this in our kitchen as we just finished painting everything white (whoohoo). A few questions: our laminate counter tops have that lip or edge that comes up about 4 inches on the back wall. Did you have this to deal with? 2nd- how did you “end” your shiplap look. Did you cap it with trim once the counter ended? I can’t seem to figure out how I would cap it on ours as it goes into our sliding glass patio door/dining room area. Thanks in advance for any advice!
Sarah Lemp
Hey Melissa! My laminate did not have the edge that goes up on the wall, but I’d say just work around it. Start the shiplap on top of that edge. And I’d recommend wood trim if you’re worried about an exposed edge. Mine ended at a wall on one end and a door casing on the other, so I didn’t need to do anything. But, if I had an exposed edge I would definitely trim it out. Good luck!!
Tiffany
I removed my laminate 4 inch backsplash. Just used a flat putty knife and elbow grease. Be careful because some bacsplashjng cover a hole at the bottom of the drywall where the wall meets the counters. That was not the case with ours. I then sanded where the drywall top layer was uneven with the rest of the wall and applied the faux shiplap on top.
Amy @ StowandtellU
Thank you for the inspiration. I’ve got a kitchen to do and I just love your faux backsplash idea. Your kitchen looks amazing!
Sarah Lemp
Thanks so much, Amy!! <3
Cheryl
I love what you did to update your kitchen :) Did you prep your cupboards as mine are press board I think? have laminate counter tops & now know to do with them a yours are gorgeous …..how long did it take to dry?
Can I use any peel & stick flooring on walls that are paintable as it is too much work to drywall so maybe I can just peel & stick entire wall?
Sarah Lemp
Hi Cheryl! I have more details about my cabinets in this post: https://www.allthingswithpurpose.com/2016/02/my-fixer-upper-inspired-kitchen-reveal/ I prepped them with a liquid sander deglosser. The primer I used: Stix bonding primer will adhere to almost any surface! I highly recommend it! I included more details on my countertops in this post: https://www.allthingswithpurpose.com/2016/02/faux-marble-painted-countertops/ They were dry to the touch in a couple hours. However, the sealing top coat I used takes 14 days to fully cure… it was also dry to the touch in a matter of hours but I would be very careful with it until it is fully cured.
Debra
Looks great! Thanks for sharing your supply list. I want to paint our cabinets and am concerned about the strong oak grain of the wood coming through the paint. Several years ago, we used peel and stick tile flooring that resembles tumbled marble/stone. The tiles have loosened over time and one piece behind an appliance continues to fall off. We have glued it several times. It is not visible to anyone but me, however, it’s annoying. What did you use to adhere the shiplap to the walls? Thanks!
Sarah Lemp
Hey Debra! Thanks for commenting! The peel and stick vinyl planks come pre-glued. they have an adhesive backing that is really strong and I didn’t add any additional adhesive. As for the wood grain, I considered sanding my cabinets down but someone pointed out to me that wood grain is good! Even after painting them, it is still evident that they are wood and not made of plastic… so it’s good :)