Editing Phone Pictures
I wanted to do a quick post about editing pictures on your phone! There are lots of tutorials out there for iphones, but android tutorials can be harder to find.
*The pictures in this post are a little old, since I actually started writing this a year ago and never finished it! I’ll be updating it again soon, I promise.
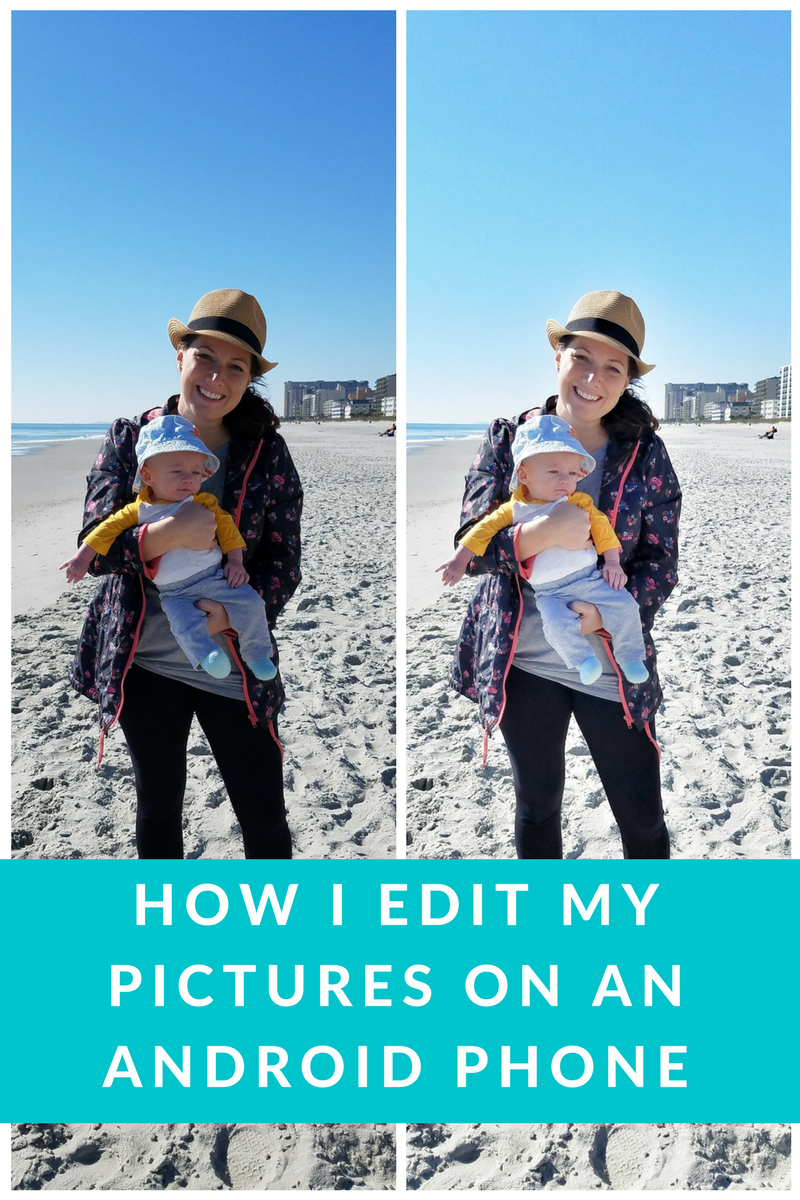
The pictures in this post were all taken on my Samsung Galaxy S7 phone and edited using the free Snapseed app. Since writing this post, I have switched to a Google Pixel3 phone and use Snapseed as well as the free Lightroom app. The majority of pictures on my blog and instagram are taken on my phone! I pull my DSLR out for special occasions, but find my phone camera does a pretty amazing job!
Filters Vs. Adjustments
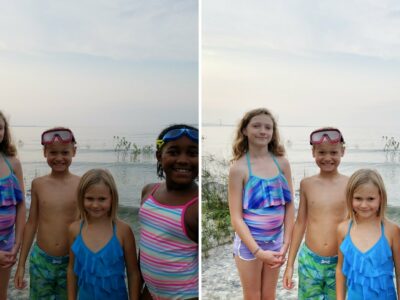
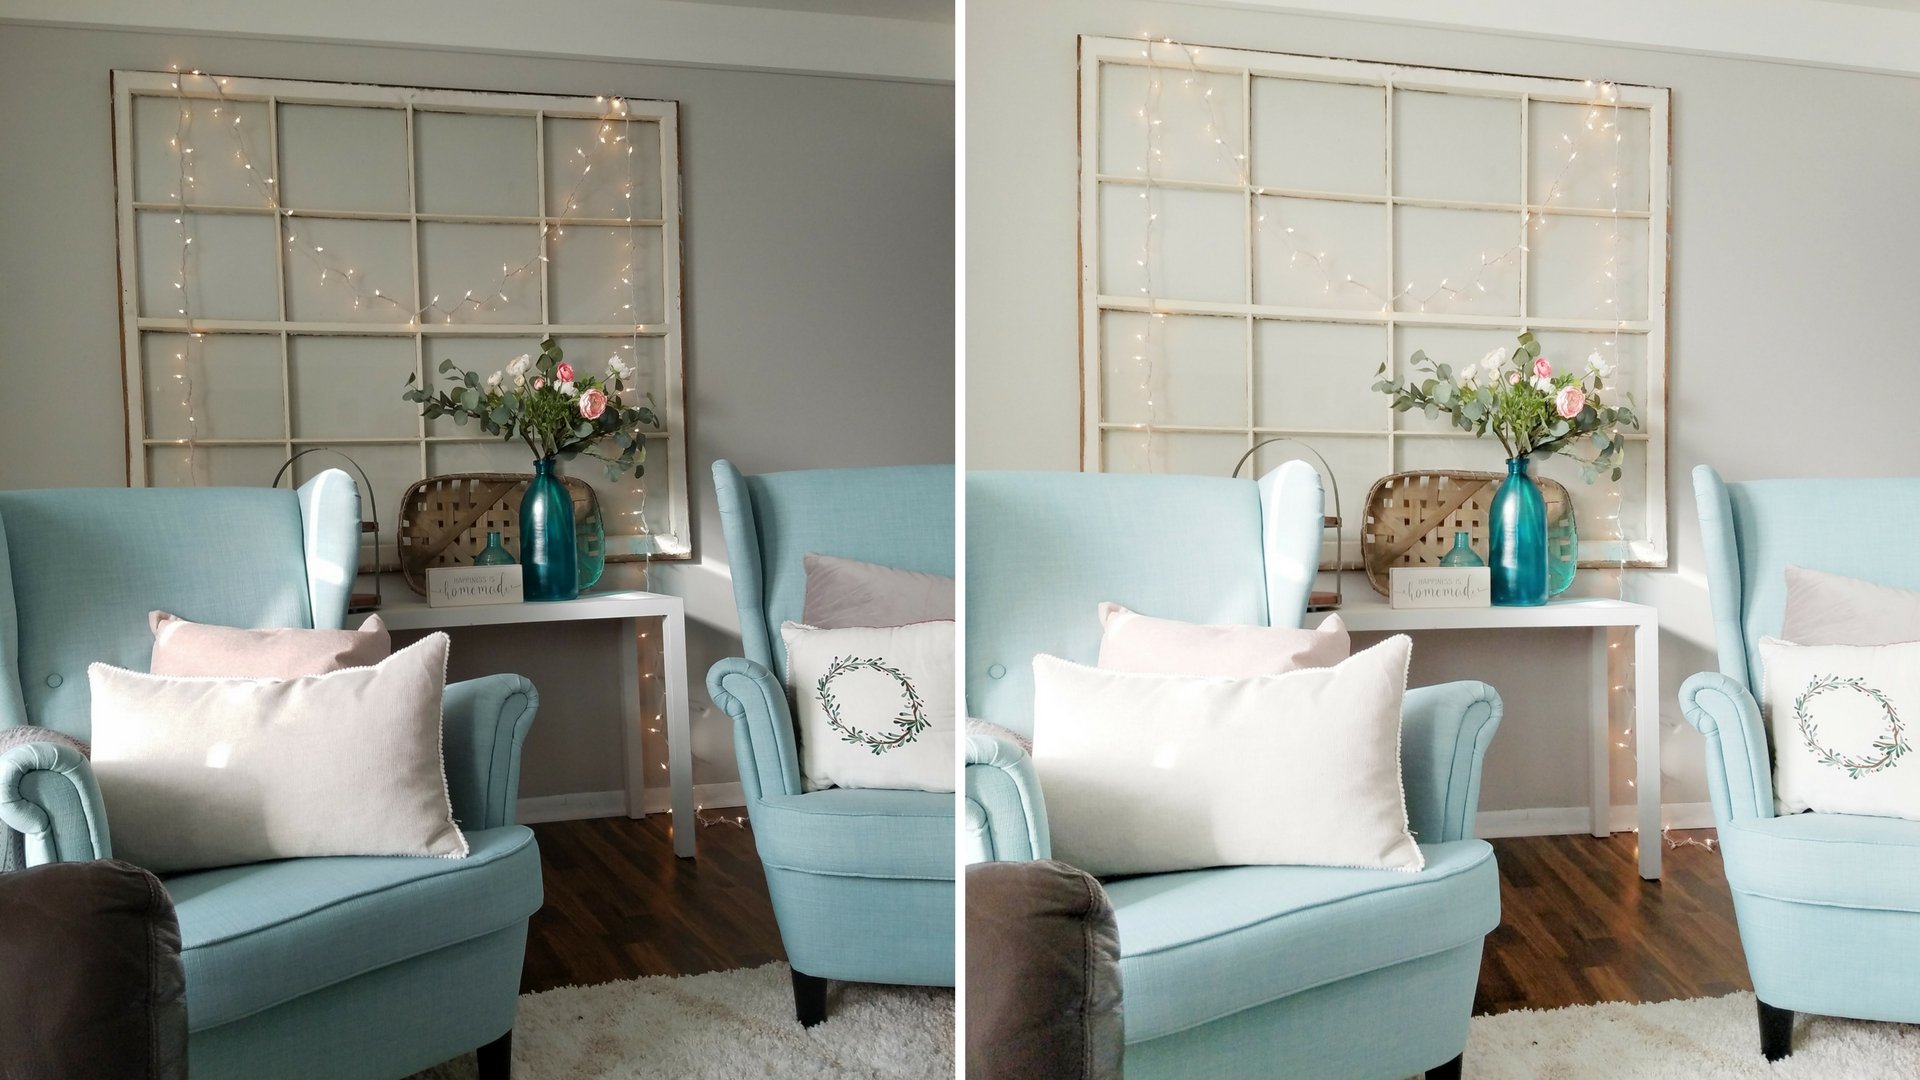
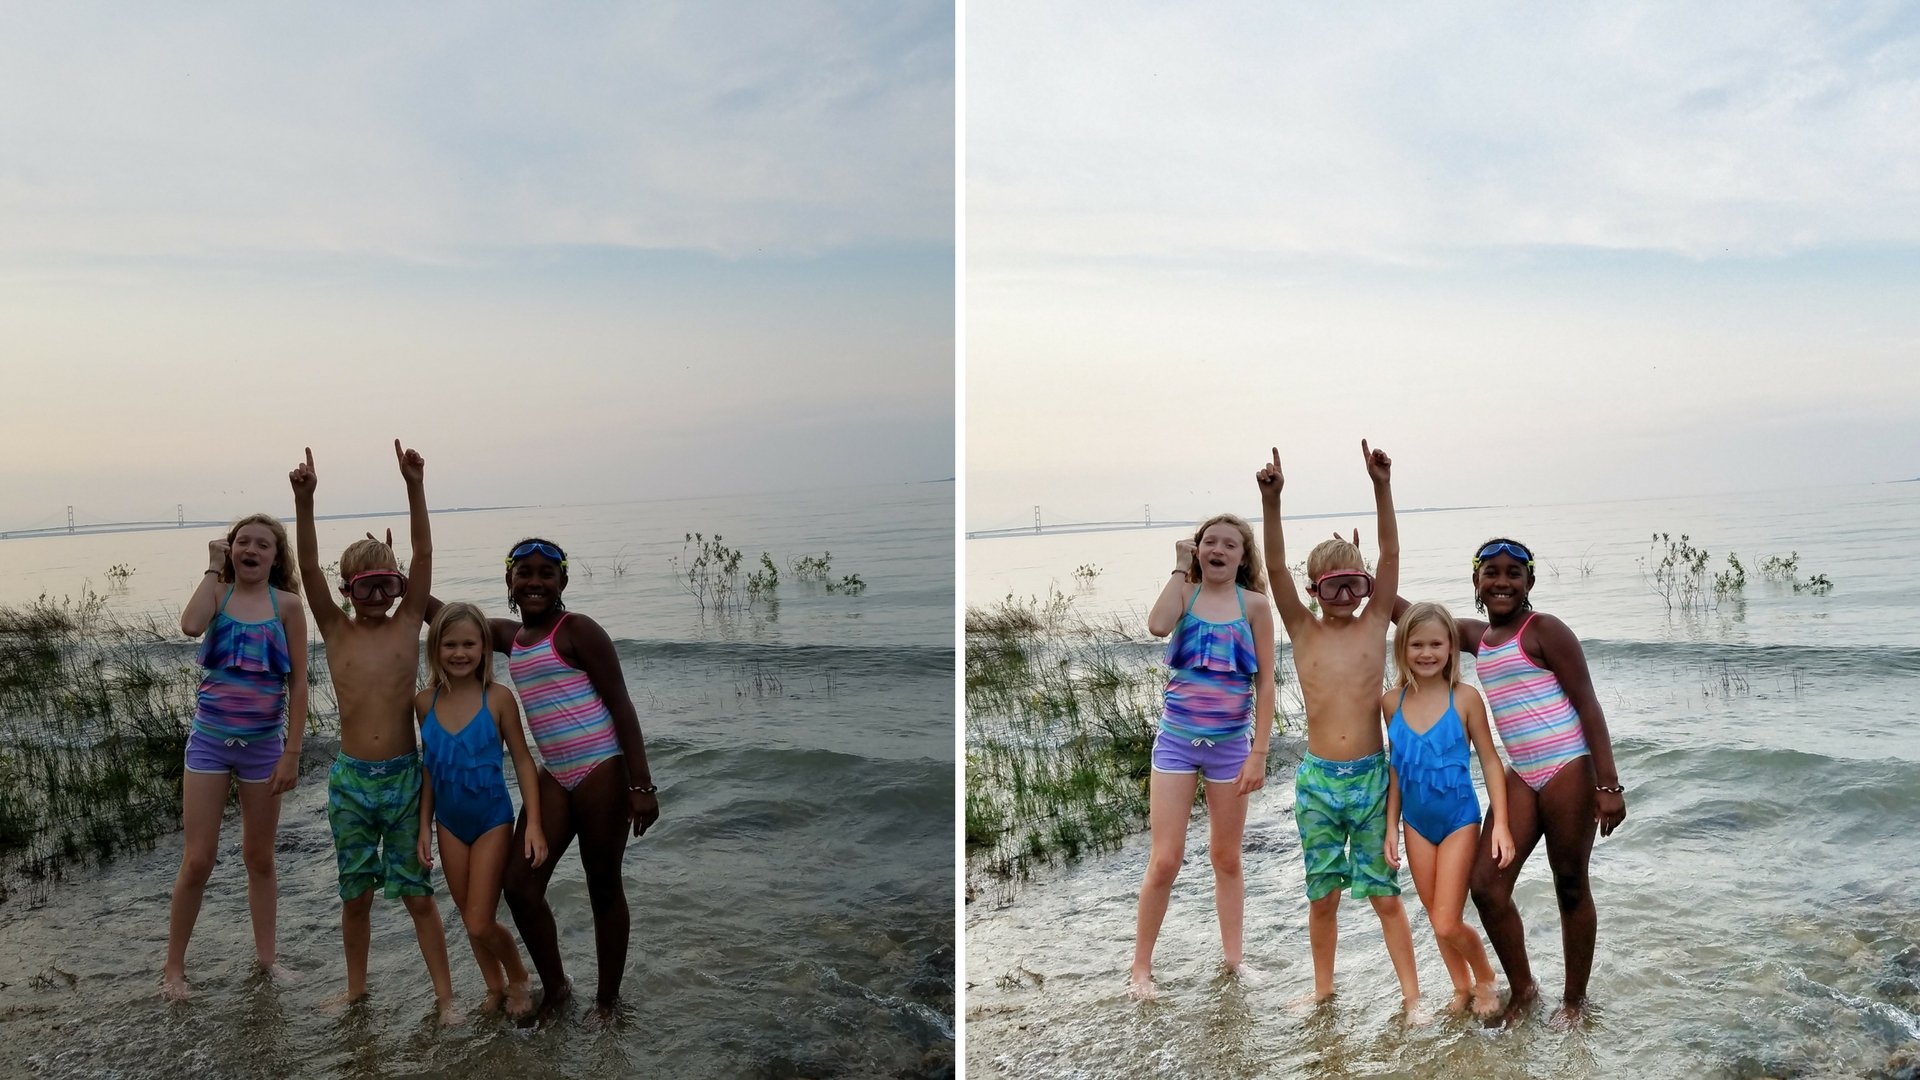
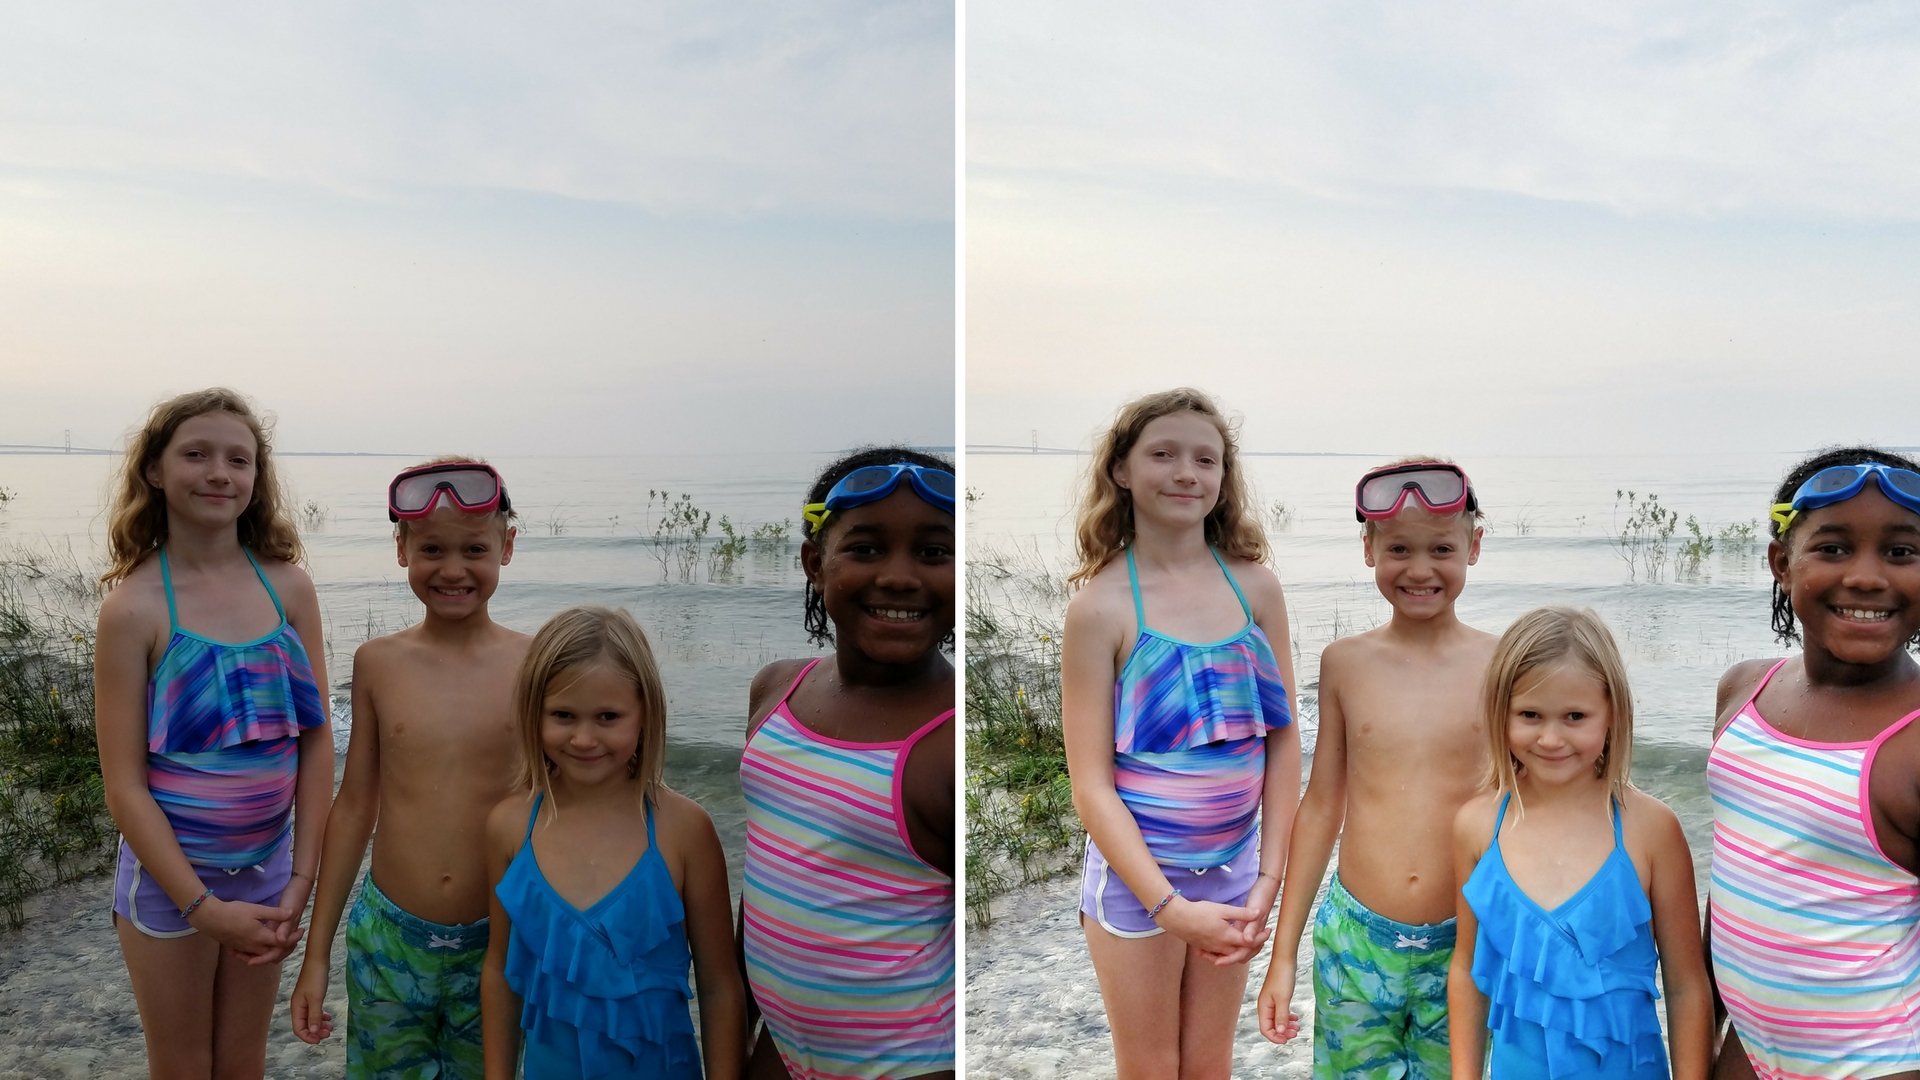
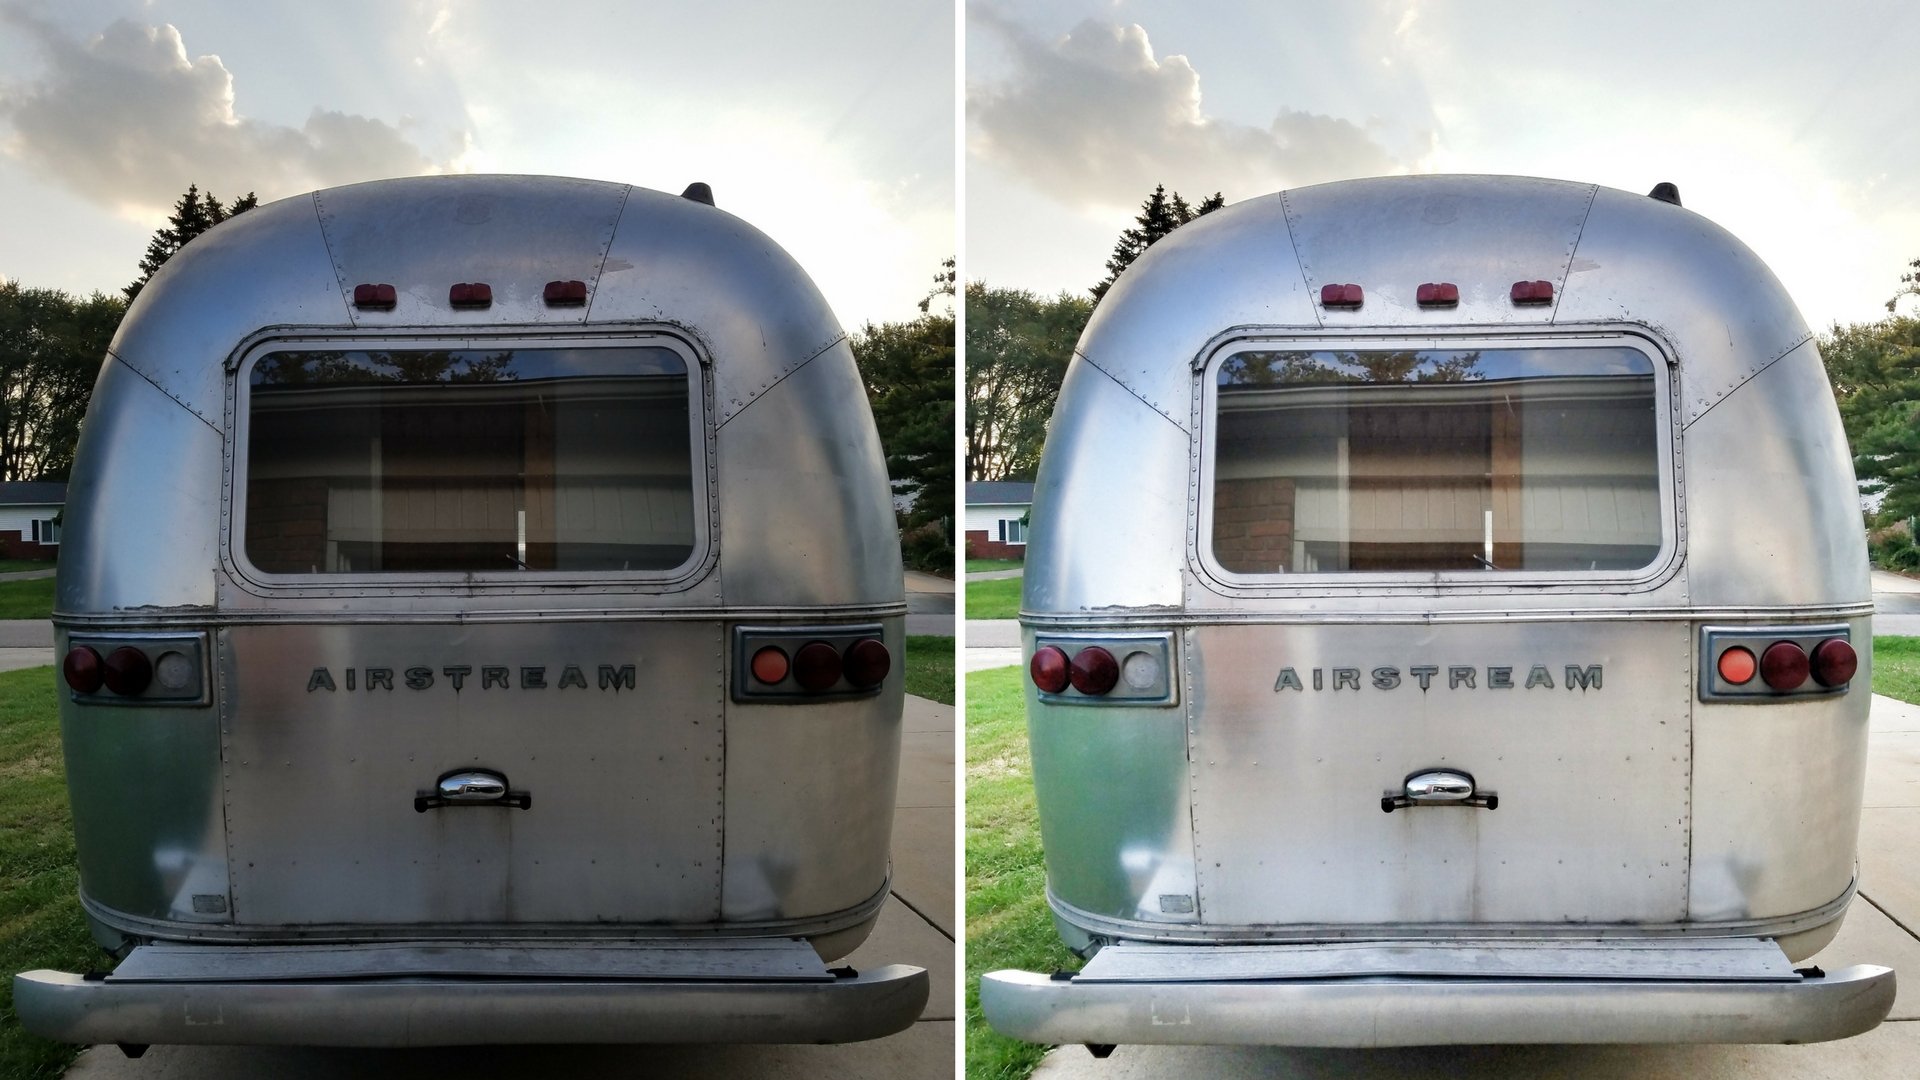
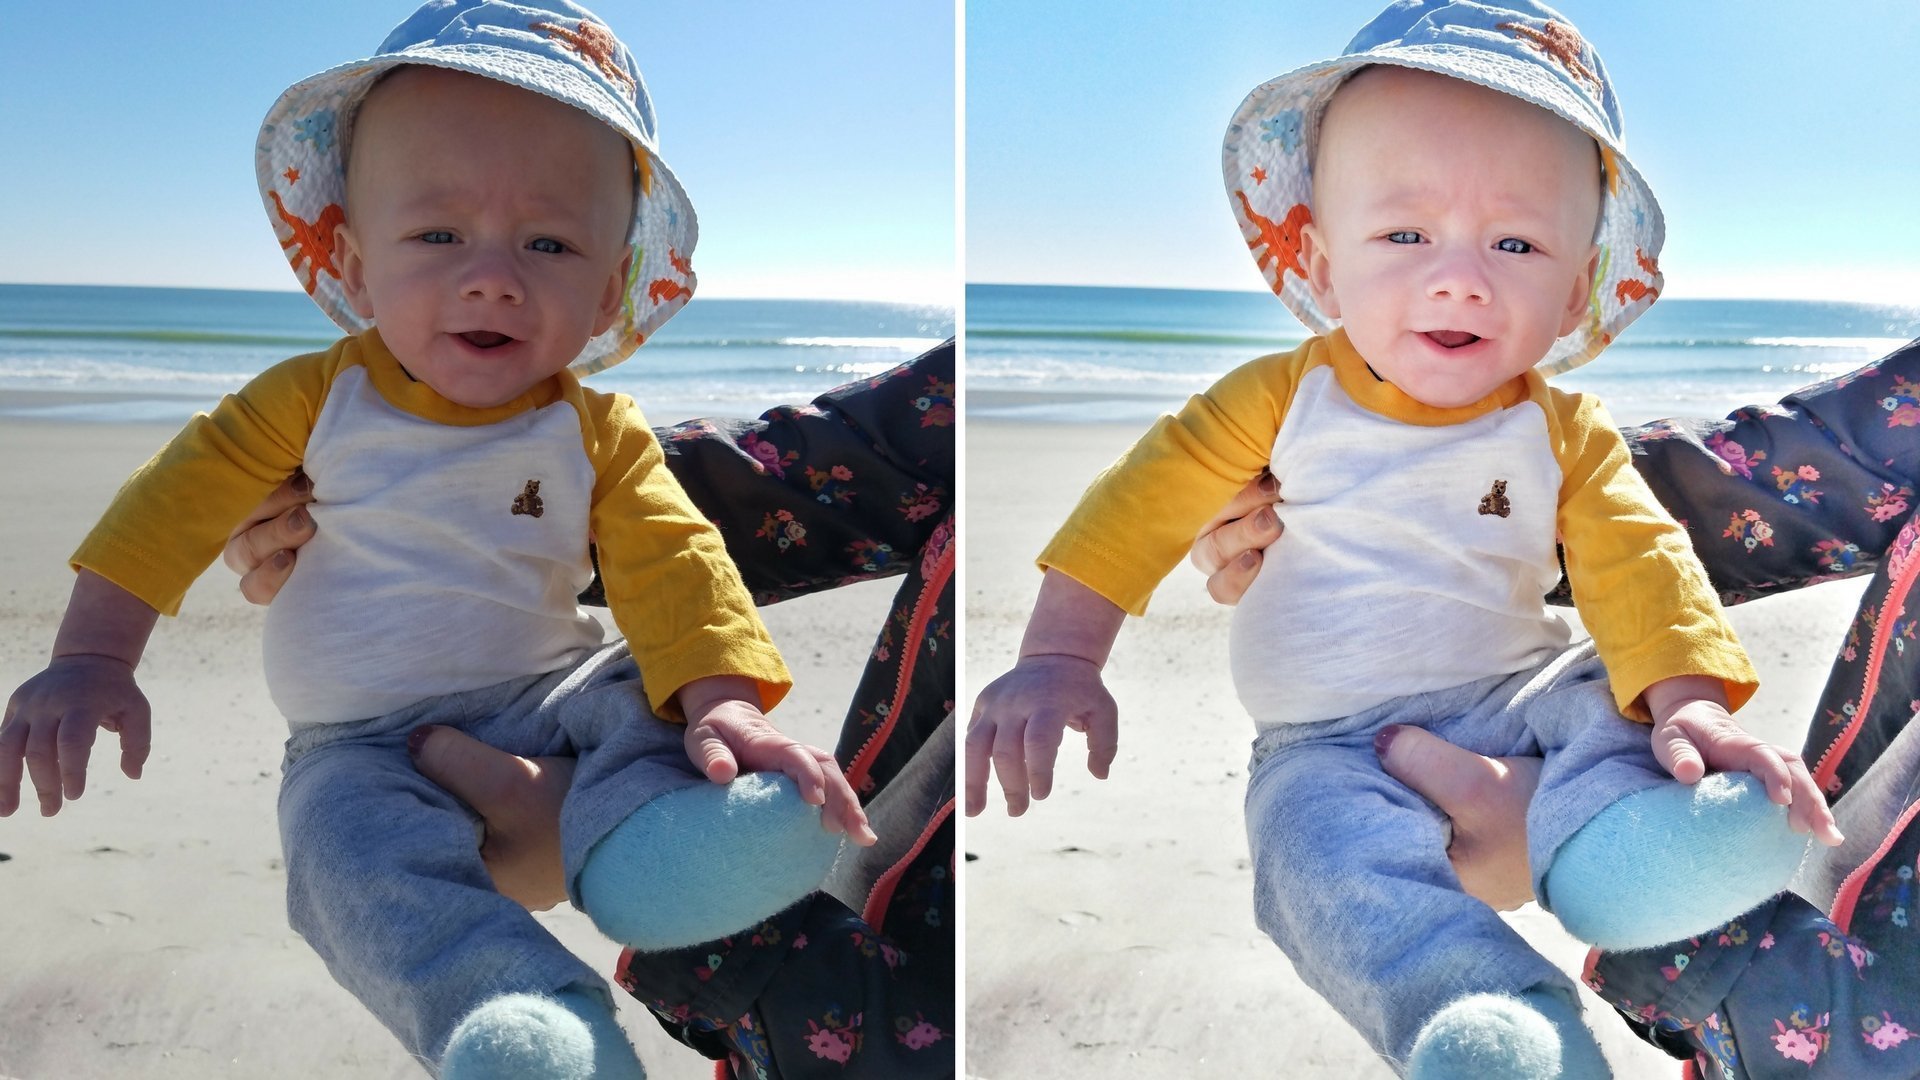
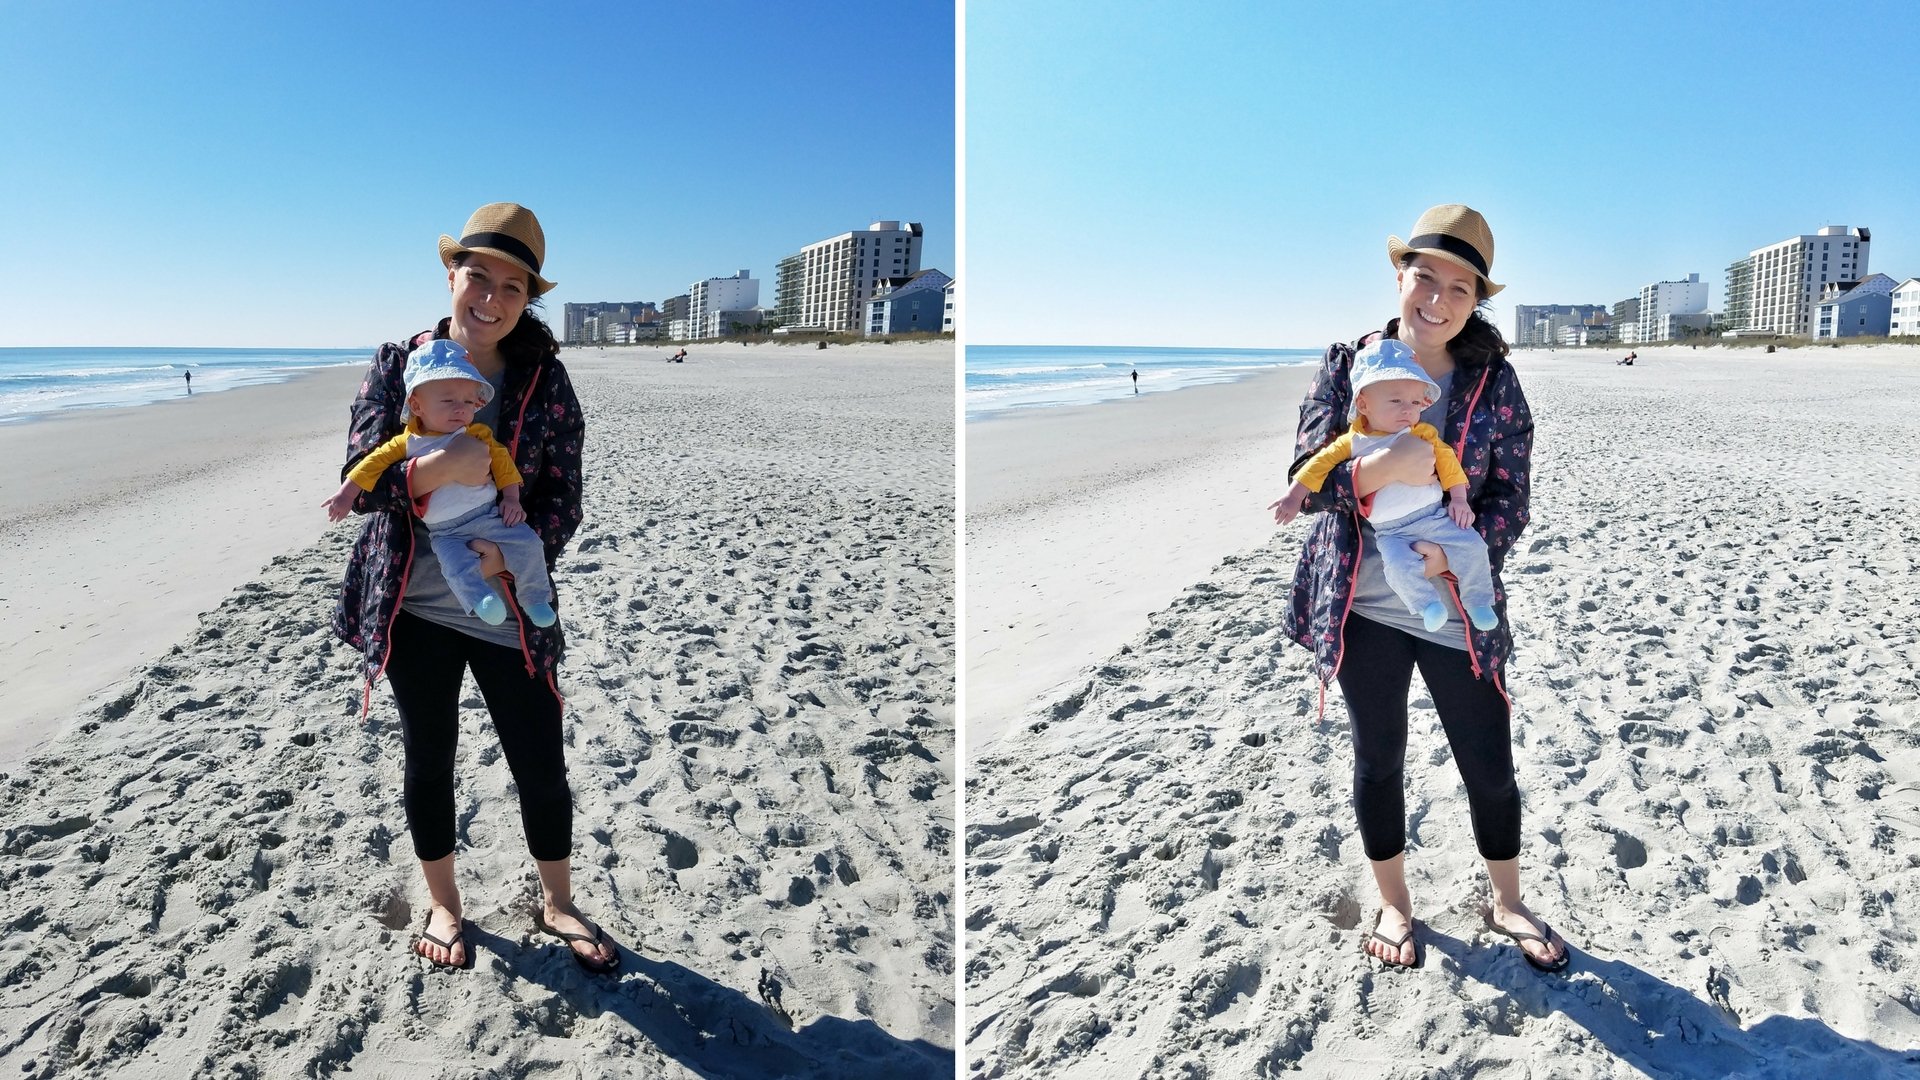
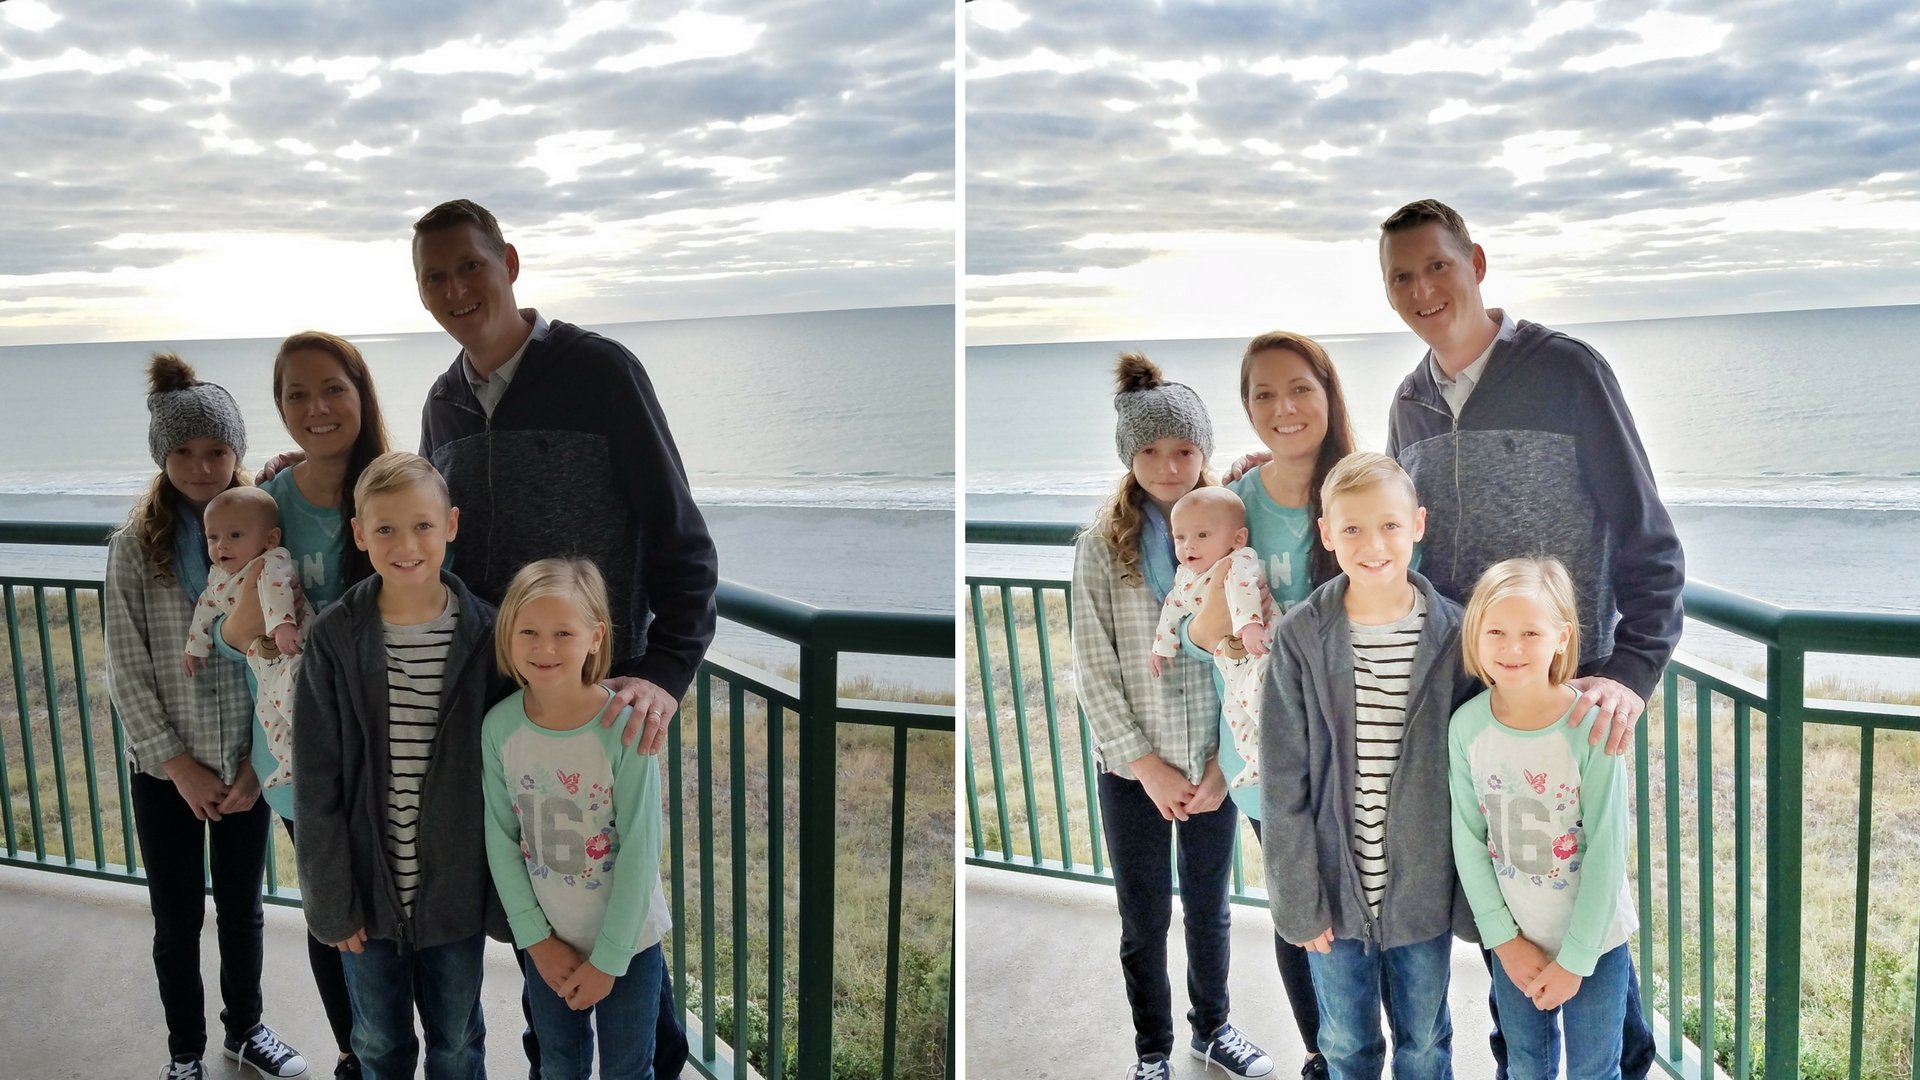
I like bright, vivid photos. I’m not a fan of overly stylized images or heavy filters. To me, the point of an adjustment is to make the recorded photo more closely match reality. Have you ever tried to capture the beautiful colors of an ocean, only to snap a picture and have it appear blah? The colors in a picture are rarely as vivid as the reality you are staring at in person. This is due to a number of reasons; lighting, camera settings or quality of camera to name a few. Your goal is to turn up the brightness and color of an image without jeopardizing the quality or making it appear too stylized.
Using the Snapseed App
Snapseed is a free app by Google that is available on Apple and Android phones. Find it in the App Store here: Snapseed and in the Play store here: Snapseed
I’ve had a quick process for editing pictures using Snapseed and I’m going to break it down into steps for you!
First
- Install the Snapseed app
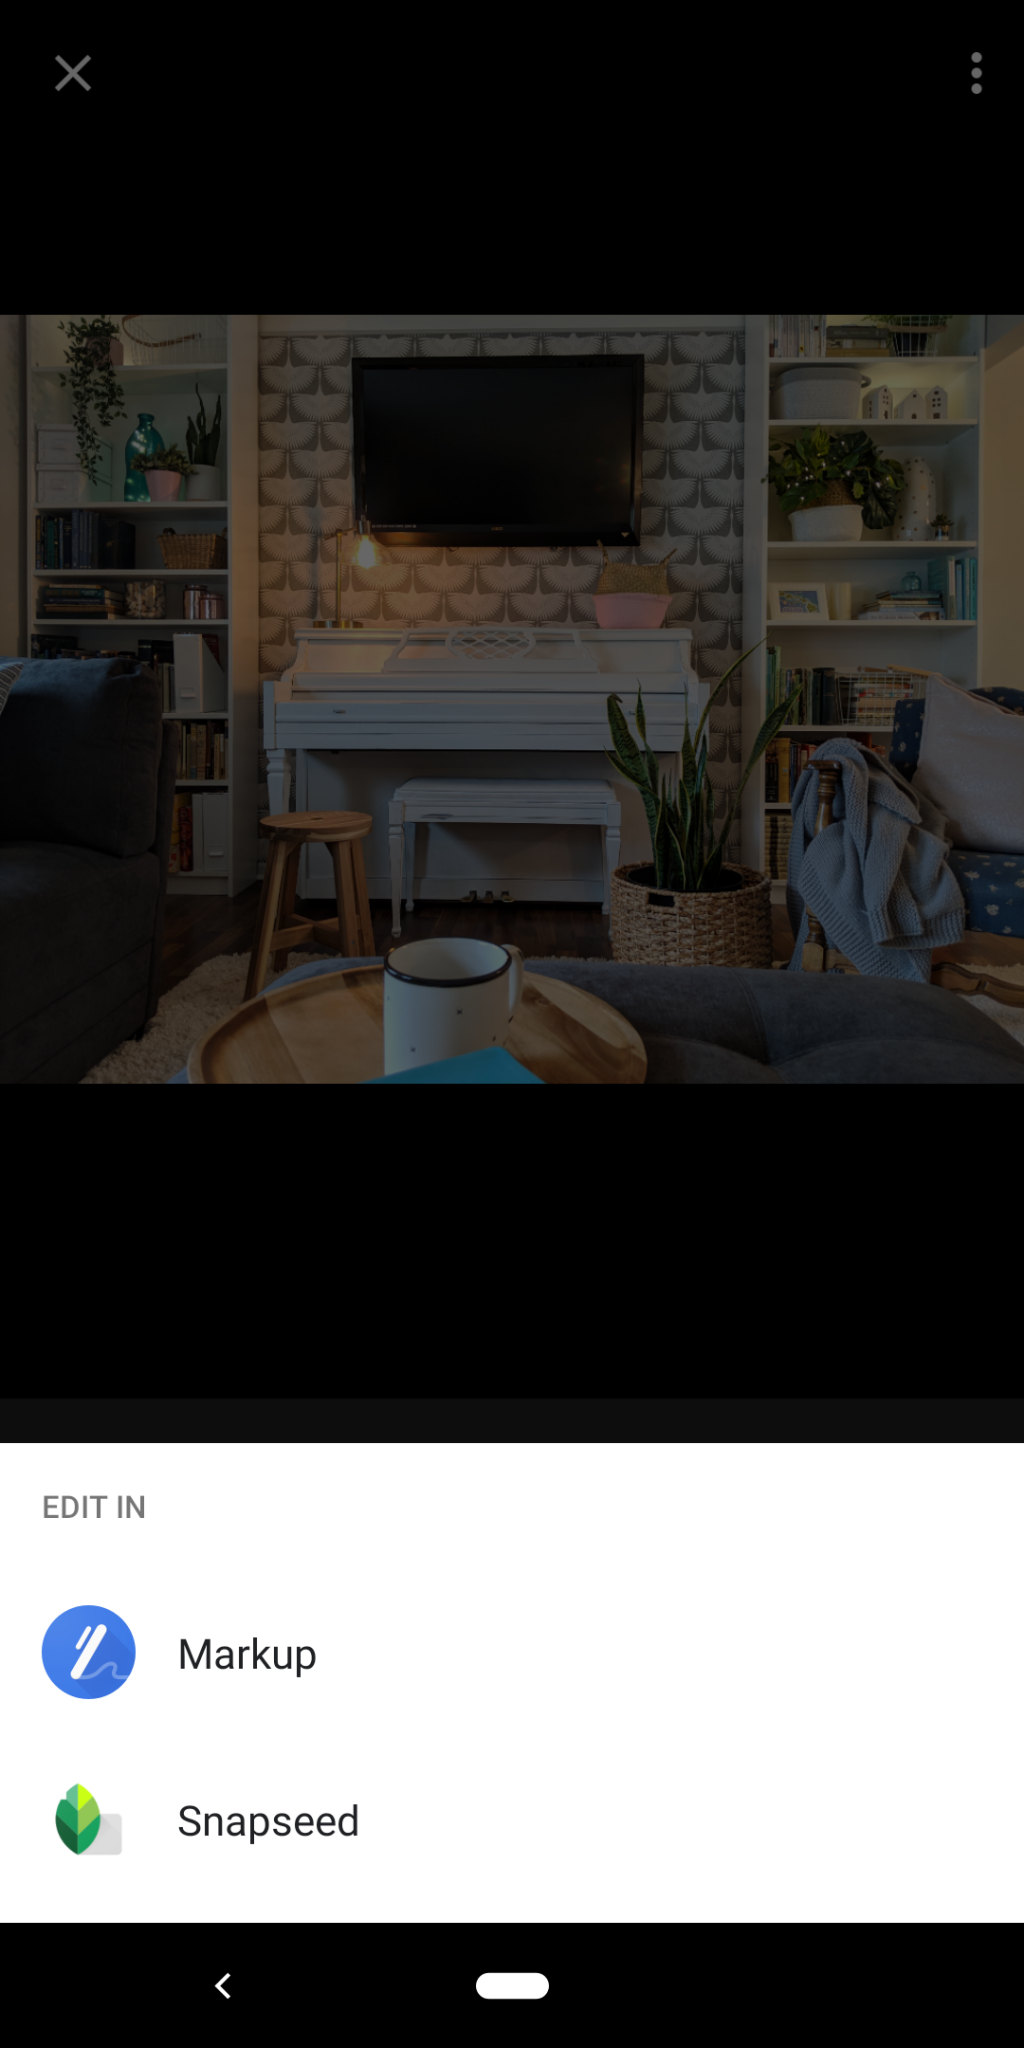
- Open the picture you want to edit and select “share” and then “Open in Snapseed” or some phones will give you an edit option and you would then select Snapseed. Either way, the goal is to open your photo in Snapseed! You can also go directly to the app first and open a photo from there.
Tools
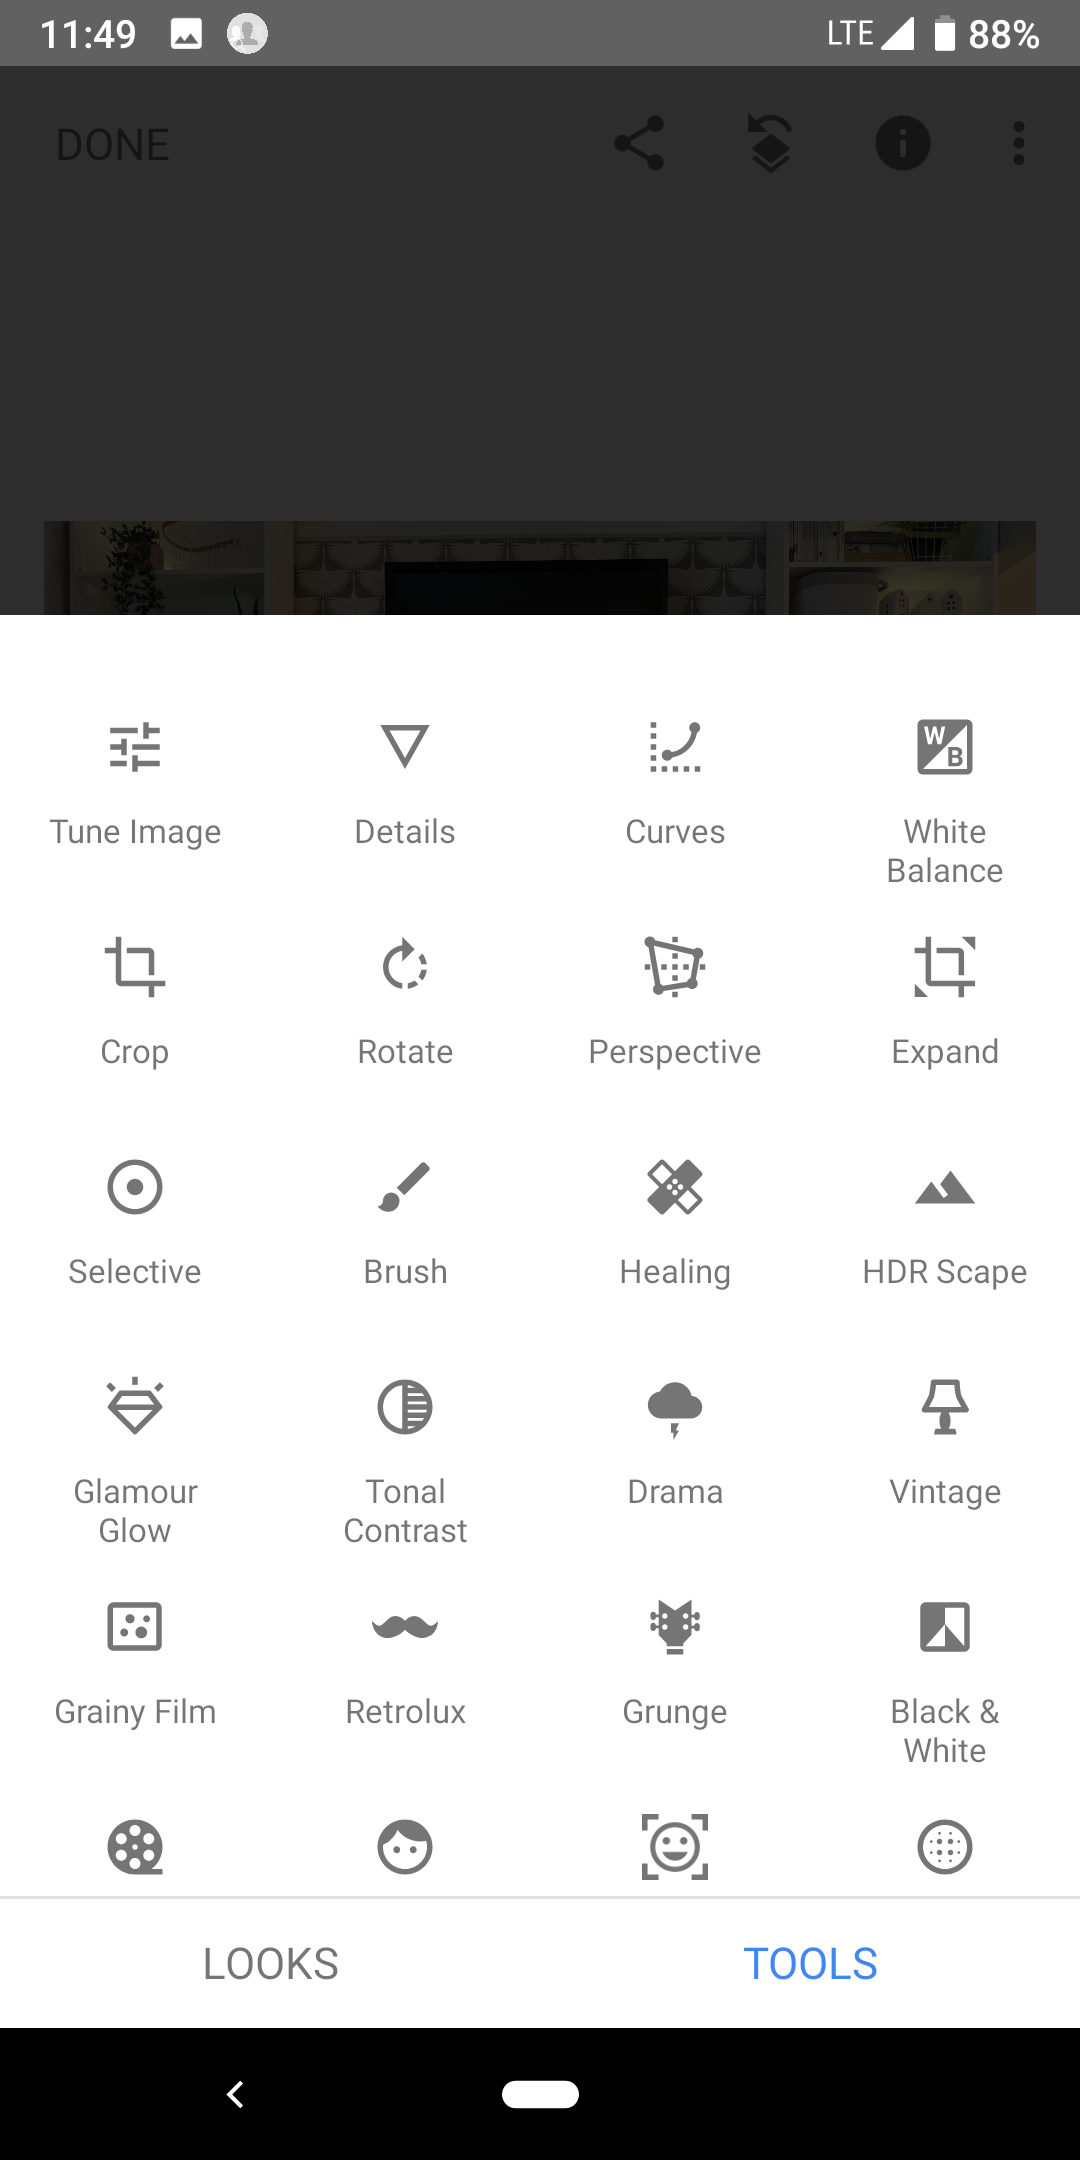
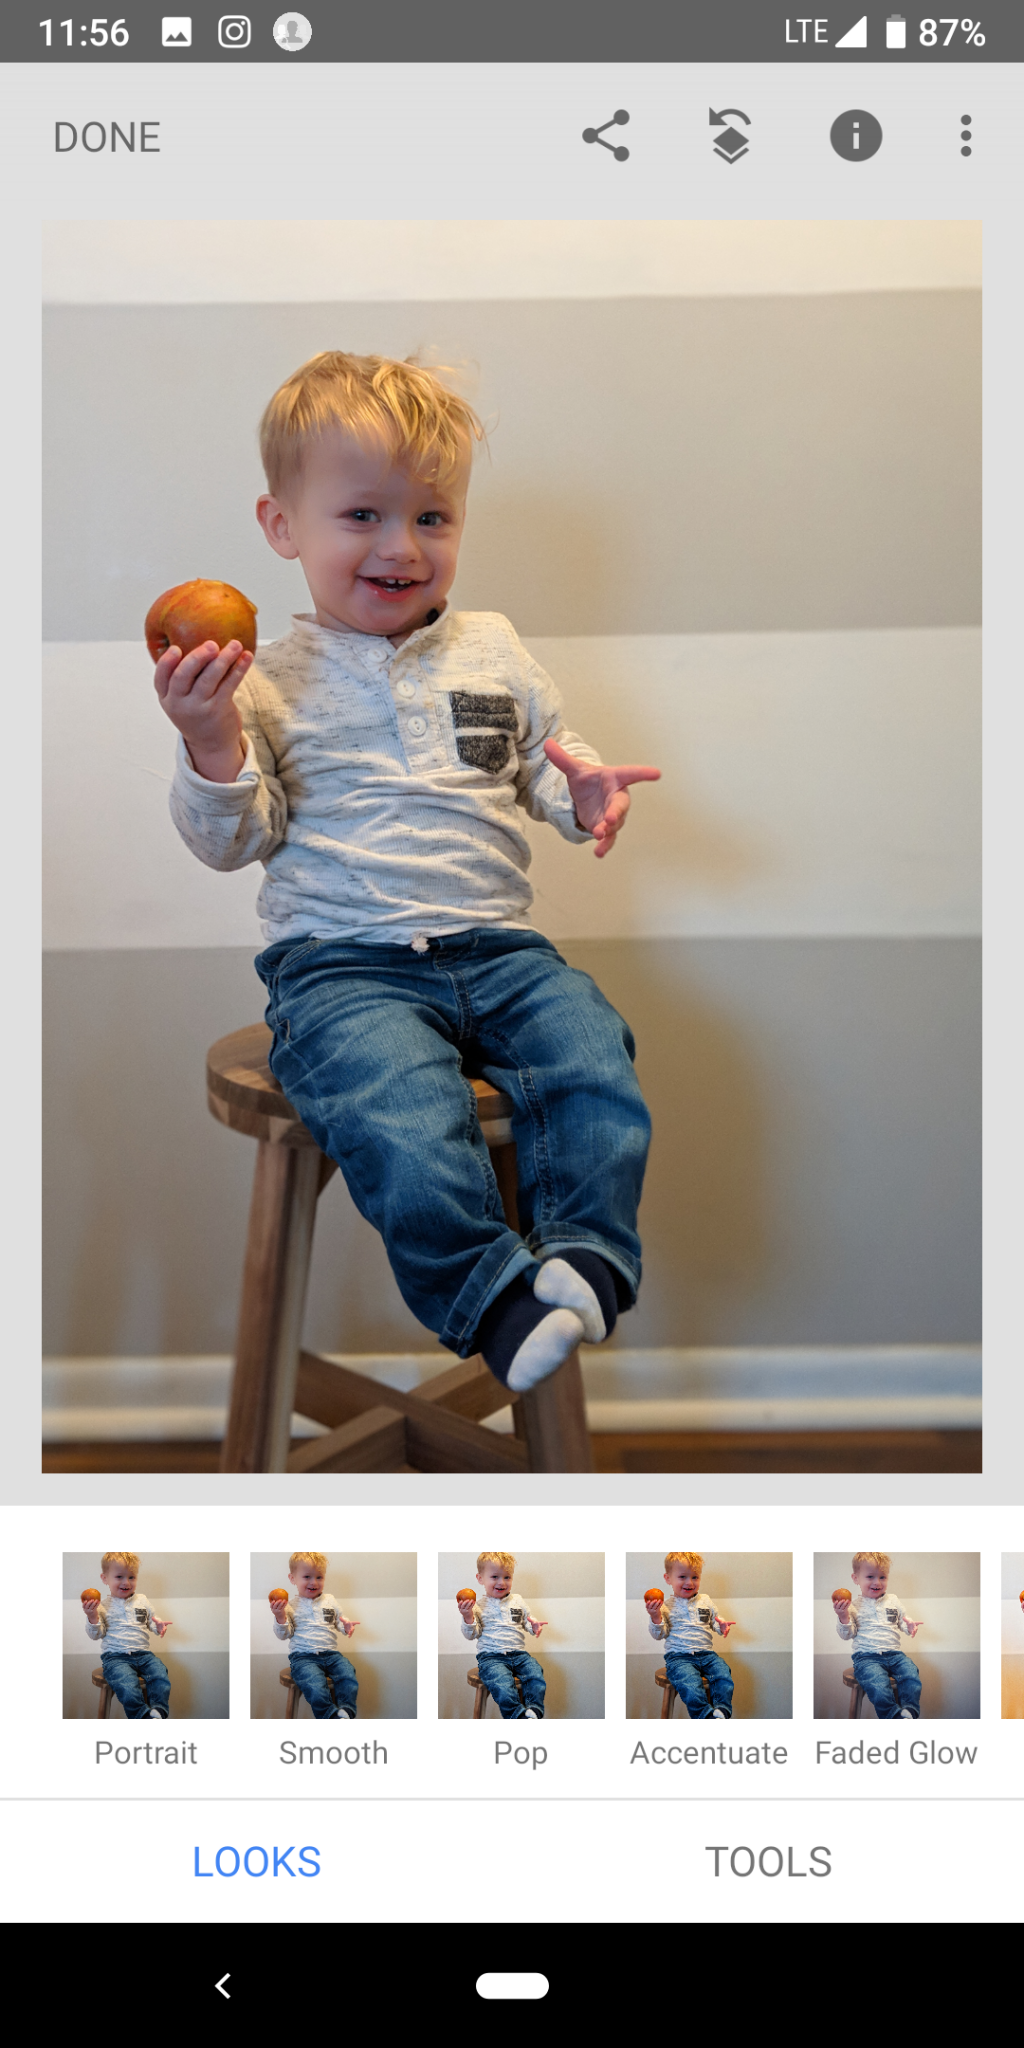
There are two main sections in Snapseed, “Looks” and “Tools.” I hardly ever use “Looks” – I really only use “Tools.”
Once you have selected a tool in Snapseed, many of the options will allow you to swipe up and down or left and right.
Play around with each feature to see what I mean.
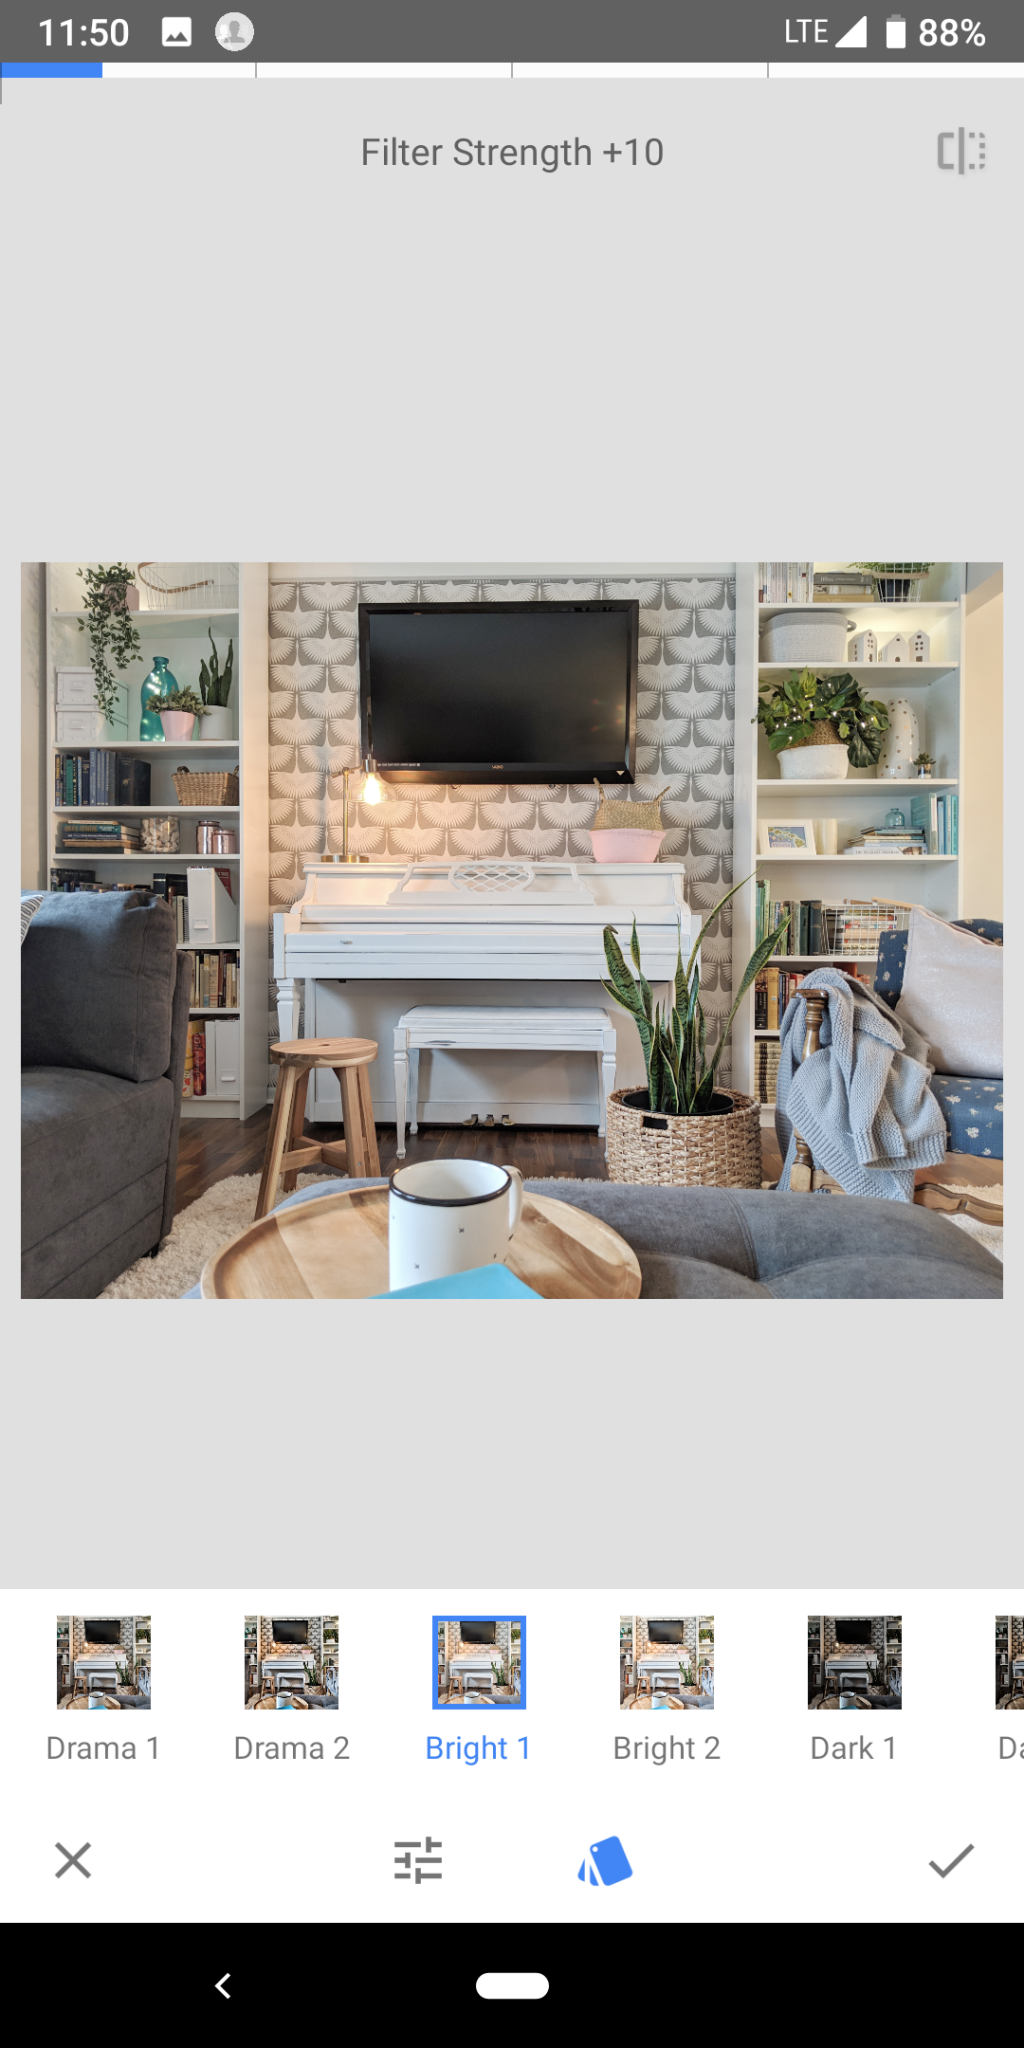
Drama
The first tool I use is called “Drama” – I like use the “Bright 1” setting and will swipe left to dial it down a bit. Swipe up and down to select the saturation level and then left and right to dial up the saturation.
I love how the “Drama” tool brightens things up and gives my photos a POP!
For darker photos taken at night, I’ll use the “Dark 1” setting sometimes.
Adjustments
The next tool I use is almost always the “tune image” tool or on some apps it’s called the “adjustments” which gives you the options of adjusting things like brightness, shadows, contrast, saturation, etc.
Swipe up and down to navigate between these options, then left and right to dial up or down.
I will almost always turn up the brightness, swipe right to lift the shadows, turn down highlights just a bit, sometimes I play with the ambiance or increase saturation.
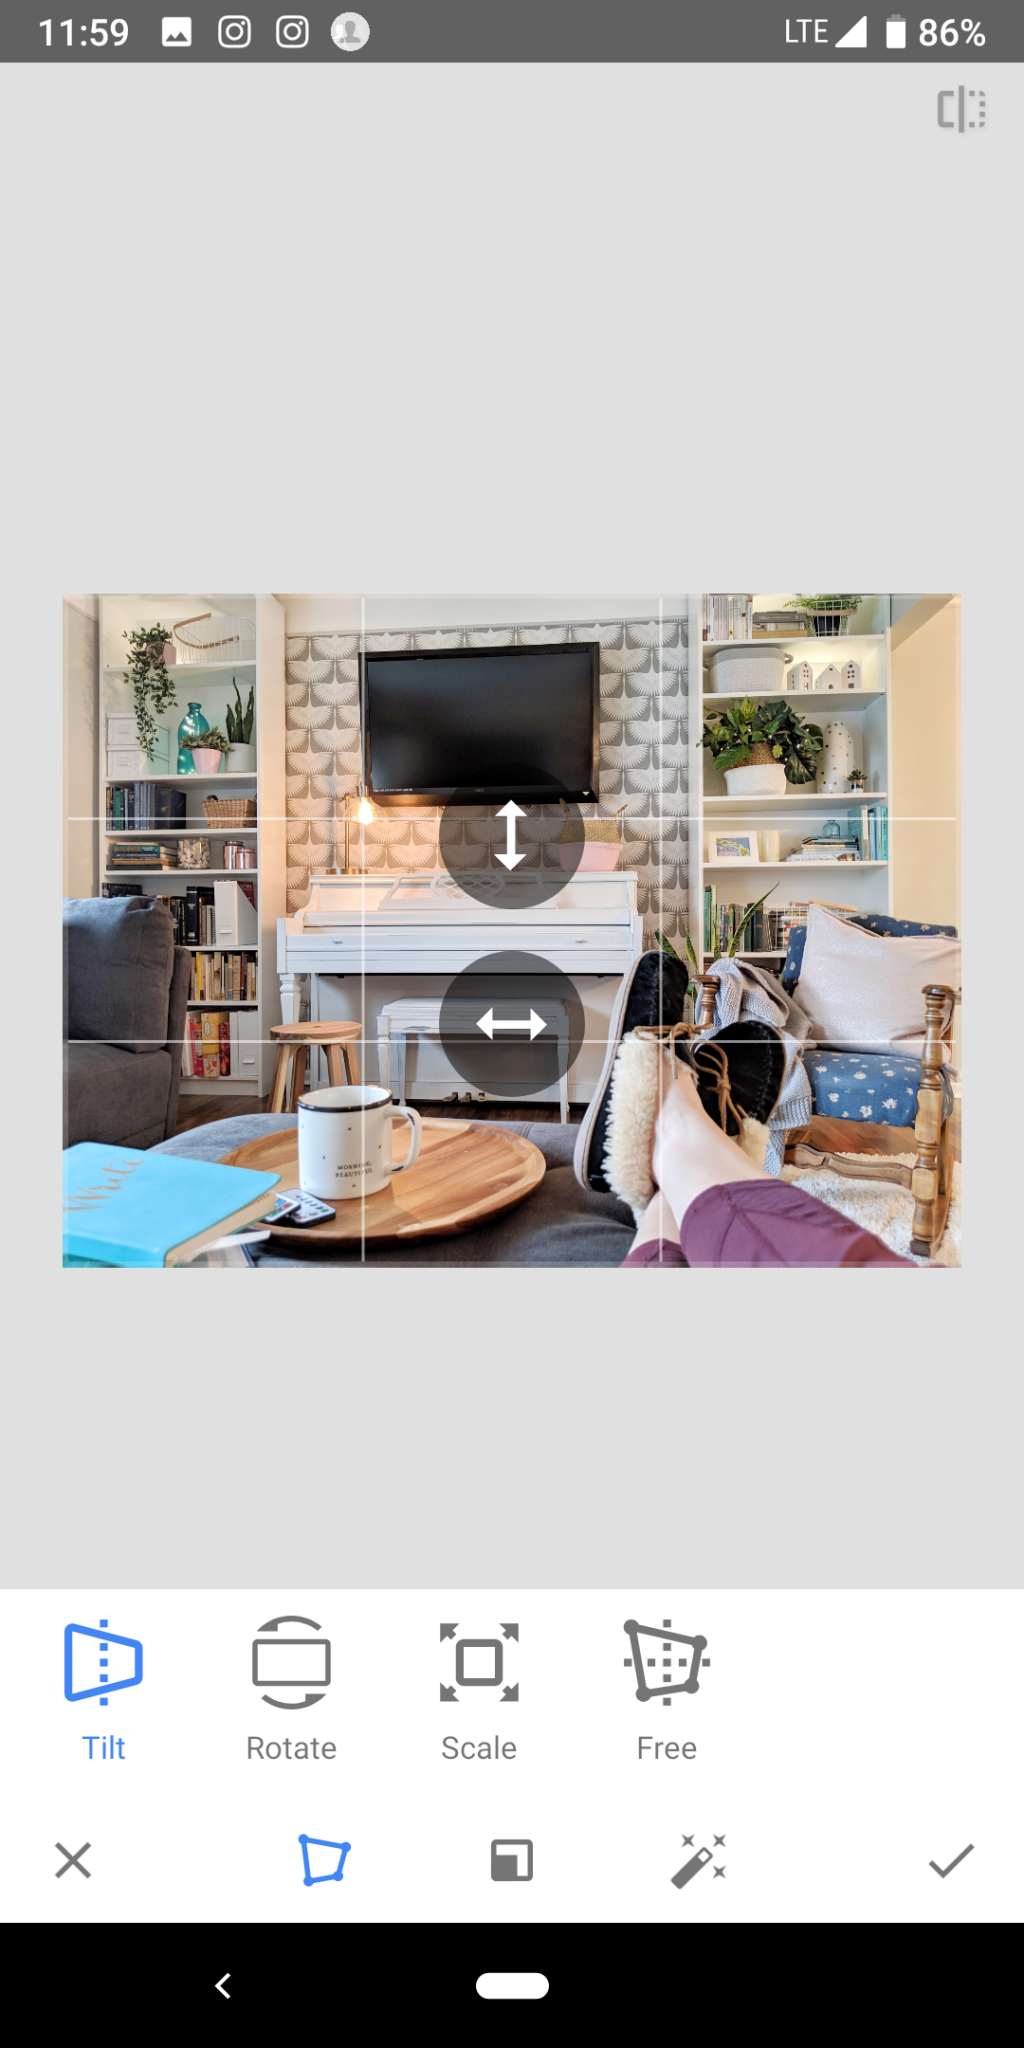
Perspective
I use the perspective options when I have a very geometrically heavy image with lines that are off just slightly. If there are major corrections that need to be made, I’ll usually skip this step and retake the photo. The perspective tool is good for small adjustments, but anything too big will look skewed.
Details
I rarely use the sharpening option. Sometimes I will dial up or down the structure option to either soften or clarify an image.
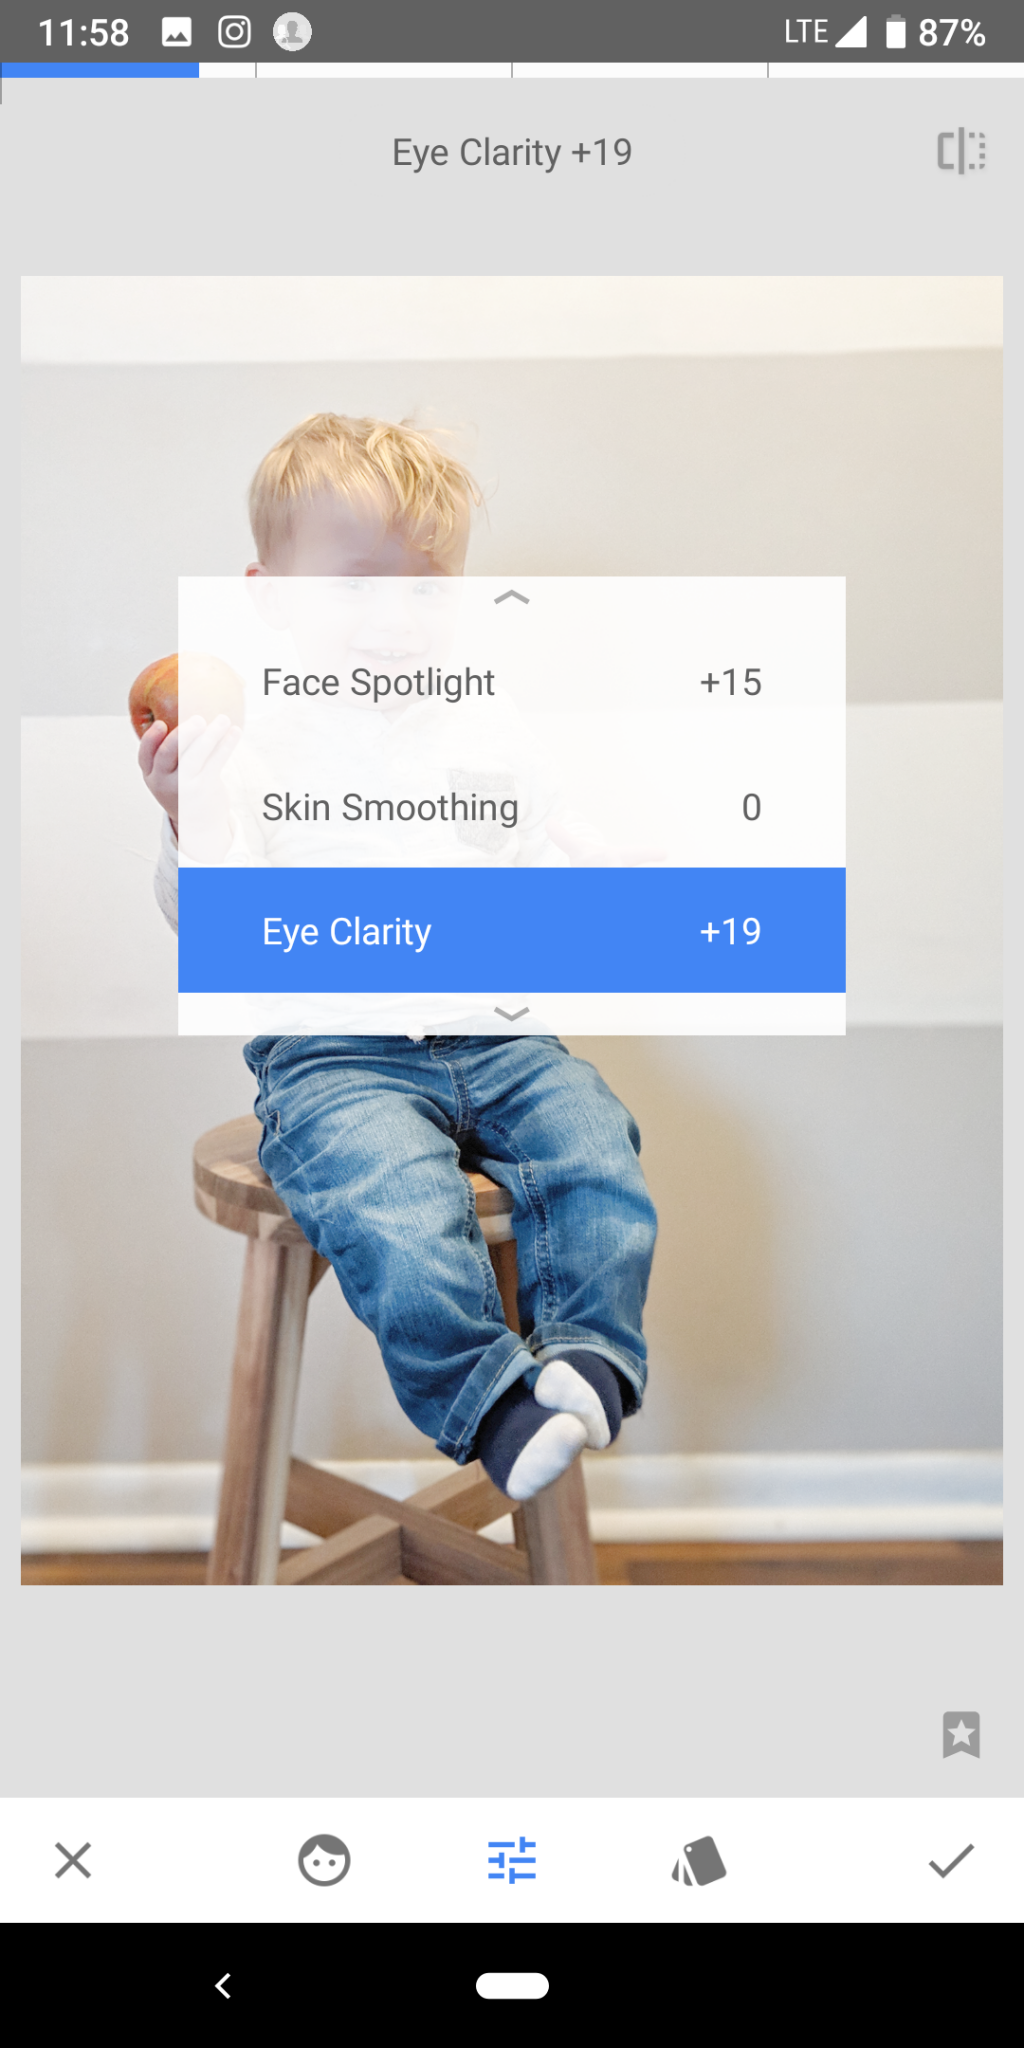
Portrait
For portraits, I like to play with the “portrait” setting. I like to give the “Eye Clarity” a little boost, because eyes can look too shaded and dark in many pictures. Don’t go too crazy with it though, or it will look creepy! A little “Skin Smoothing” didn’t hurt anyone, but too much will look too airbrushed.


Healing
The healing tool is a great for small imperfections! It will take a little practice, but it can be great for fixing small blemishes.
Head Pose
The “head pose” tool can be helpful if someone in your photo is frowning. Use this tool to turn up the corners of their mouth just slightly!
Have fun and pin this post for later!
Leave a Reply