
Painting a Carpeted Ceiling
So much carpet. Carpet on the walls, carpet on the ceiling, carpet around the windows, carpet used as trim and carpet on the floor. If you’ve ever owned or renovated an old motorhome, you’ve probably noticed how common the use of carpet was as an insulator, bumper, noise muffler, decorative accent, you name it. Carpet serves a lot of great purposes in an RV. It does help muffle sound while driving down the road and is also a great insulator!
The problem is, carpet doesn’t wear well, especially when exposed to the kind of abuse an RV gets over time. There are stains from water damage, rain, mud, food, pets, and let’s not forget to mention, kids. I’ve dealt with my fair share of carpet, but this is the first RV I have renovated with a carpeted ceiling! It was in bad shape, and looked worse and worse, the better I made everything else look. So what did I do?
Carpeted Ceiling Options
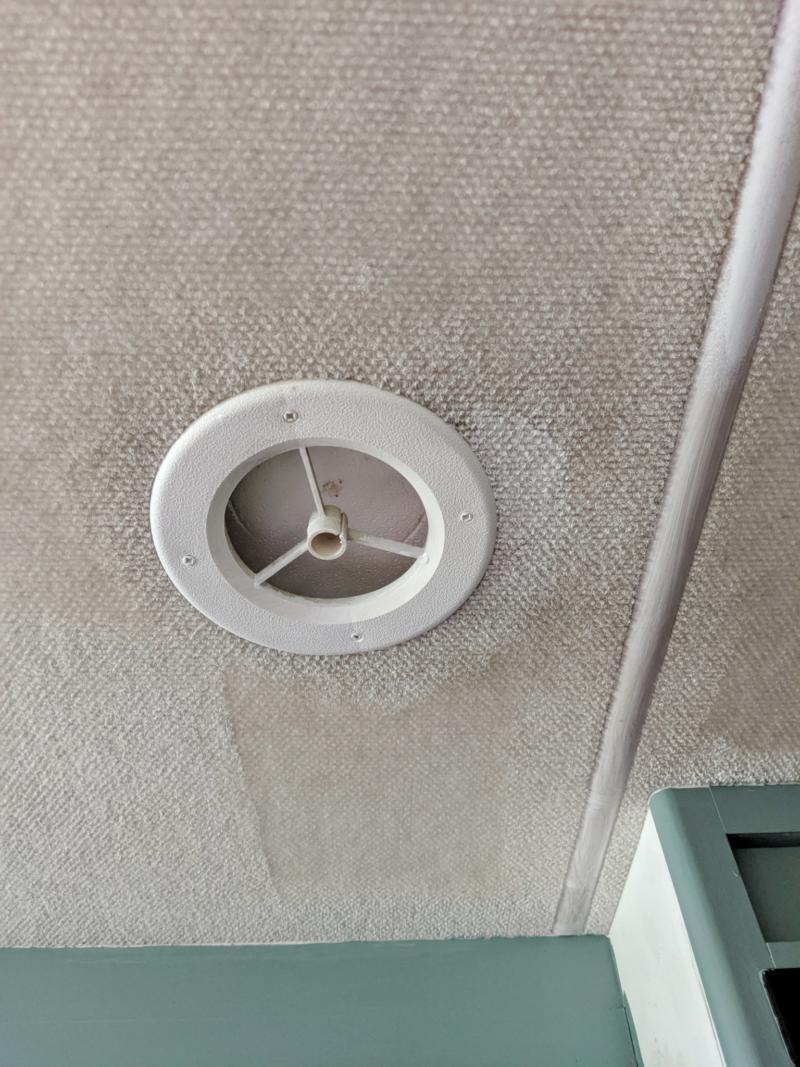
Before doing anything, you need to inspect your ceiling for damage. If there are water stains, it’s very likely there was a leak at some point. Inspect the roof around the spots on the ceiling, check for soft spots and further damage. Seal up any existing leaks or potential problem spots. If you’re sure that the roof and ceiling are structurally sound, then you can move on to the question at hand. What can you do to improve the look of your ceiling? Here are a couple options:
Removing the Carpet
Removing the carpet is obviously an option, but you may want to think twice before taking on such a tiresome project. I’ve never tried to remove the carpet from a ceiling, but I’m going to guess it’s glued up there pretty good and peeling it off would be messy and time consuming. Once it’s off, you’re almost guaranteed to deal with a rough, damaged ceiling that has to be repaired before you can paint it.
Covering the Carpet
Another option would be to hang thin panels of wood or vinyl over top of the carpet. I think this would actually be easier in the long run, than removing the carpet. The cons to this scenario, are that it adds extra weight, can be costly and time consuming.
Cleaning the Carpet
If you are only dealing with a few spots here and there, and the carpet looks pretty good everywhere else, you may want to try cleaning it first. I have seen other people have good success using a baking soda and peroxide mixture. You may also try other carpet cleaning sprays. Be careful not to saturate it too much, and dry everything as best you can. Once the area is fully dry, stand back and see if it blends well or if it’s really obvious.
Painting the Carpet
My ceiling was so dingy over-all and had so many gross looking spots, I decided to paint it! Oh, I stood there for a few days, staring and it and debating weather I really felt like starting this project. I researched it some and asked around. Was I crazy for trying to paint the ceiling? Well, in the end, I went for it and lived to tell the tale. I’m going to share what I did and let you in on a few tips I picked up along the way.
What to Do
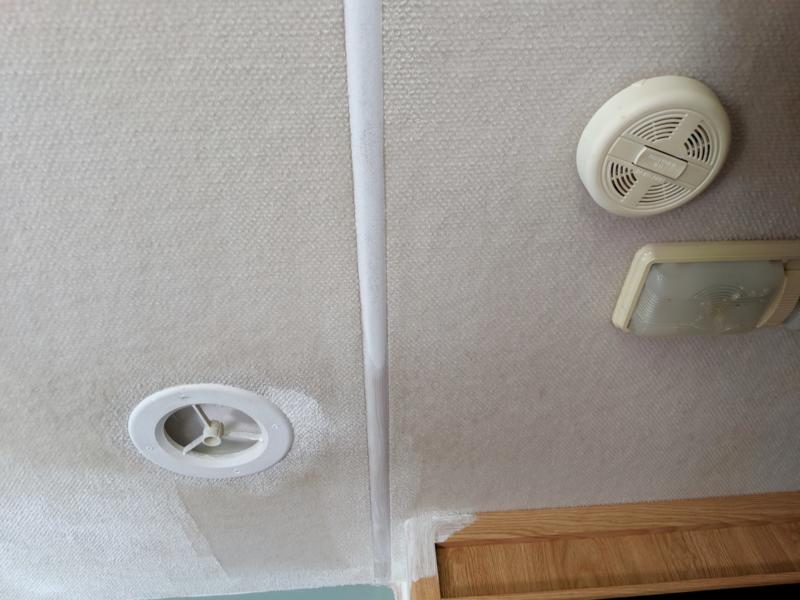
Vacuum your ceiling if there is visible dust or cobwebs present. The type of paint you use for this won’t really matter. Use the cheapest paint you have on hand, or whatever you are already using. I was already painting the walls on my RV white, and I used the same wall paint I already had on hand. I used a brush to get in the corners and rolled on the rest with a thick nap roller. I used Glidden white paint in eggshell finish, but any low luster paint would be fine.
TIP: In the future, I will thin my paint a little bit before starting. The ceiling doesn’t really need a thick coat, it just needs to be cleaned up. Because the carpet is very textured and hard to permeate, a thinner paint would probably go on easier.
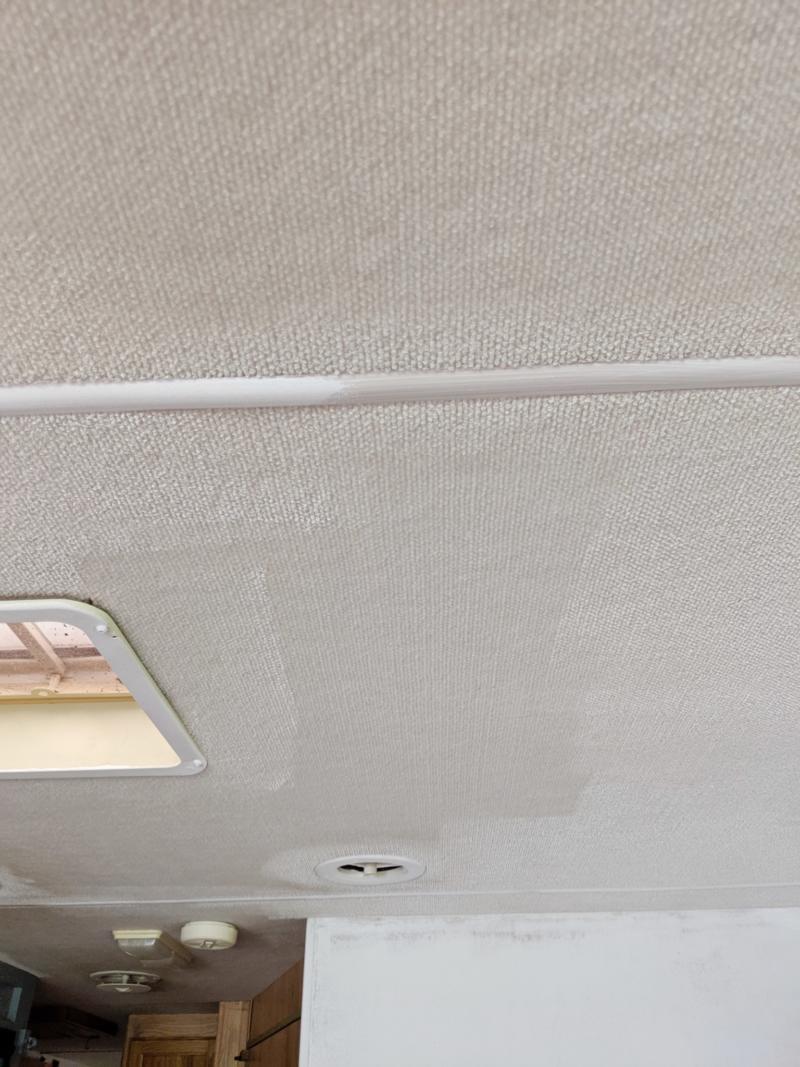
The trick is to use an even and consistent amount of pressure. Carpet is not the easiest thing to paint. You’ll probably have to go over each area a few times before it looks right. I think a thinner paint would spread easier. A thick nap roller that is meant for textured surfaces will be your friend. Be sure to cover everything beneath you, because you will definitely have some paint spatter.
TIP: Take lots of steps back. Up close, you will think things look blotchy. One everything is dry and you stand back, you’ll notice that it all blends together and imperfections are less noticeable.
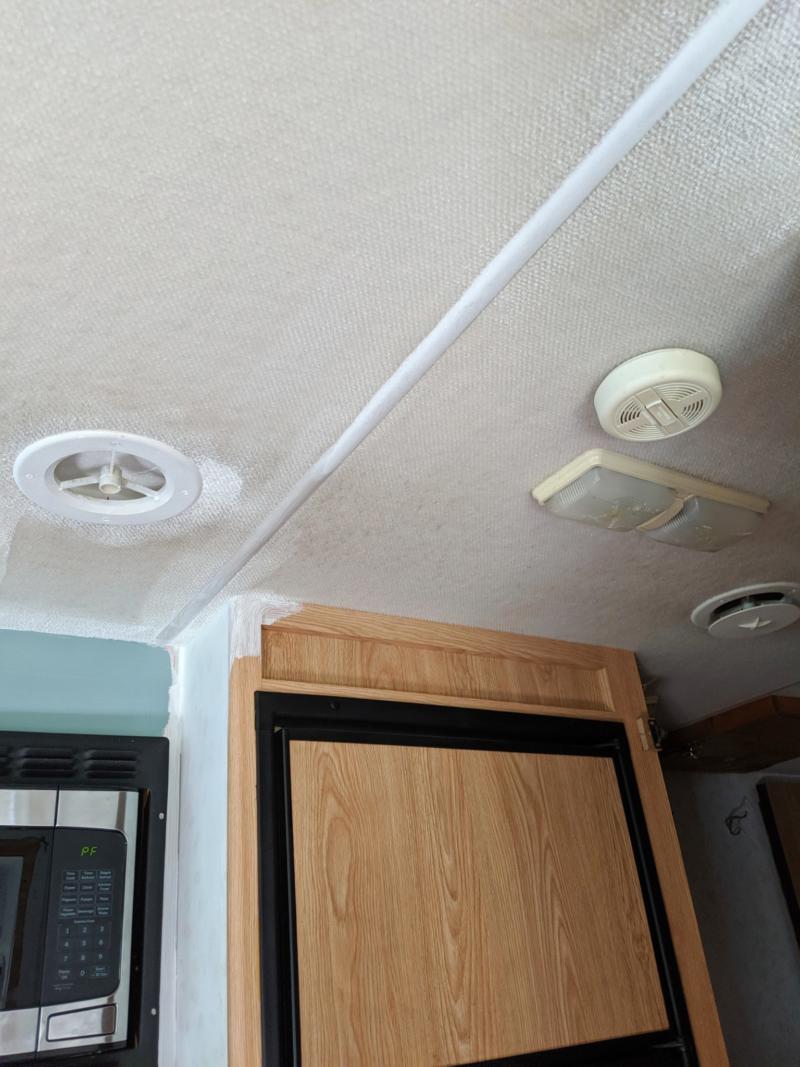
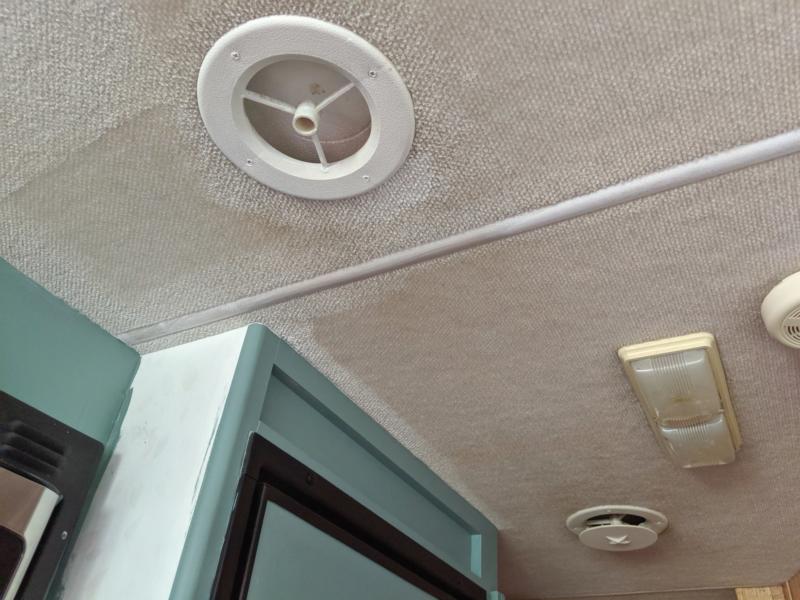
As you go along, you will notice that the nice, white ceiling makes everything else look dirty! Be prepared to take down light fixtures and spray paint them white, or replace. Replace smoke detectors and paint over vents. You’ll be surprised how yellow everything else looks next to a fresh coat of white paint. If you were on the fence about doing this originally, you will be glad you did once you see the difference it makes!

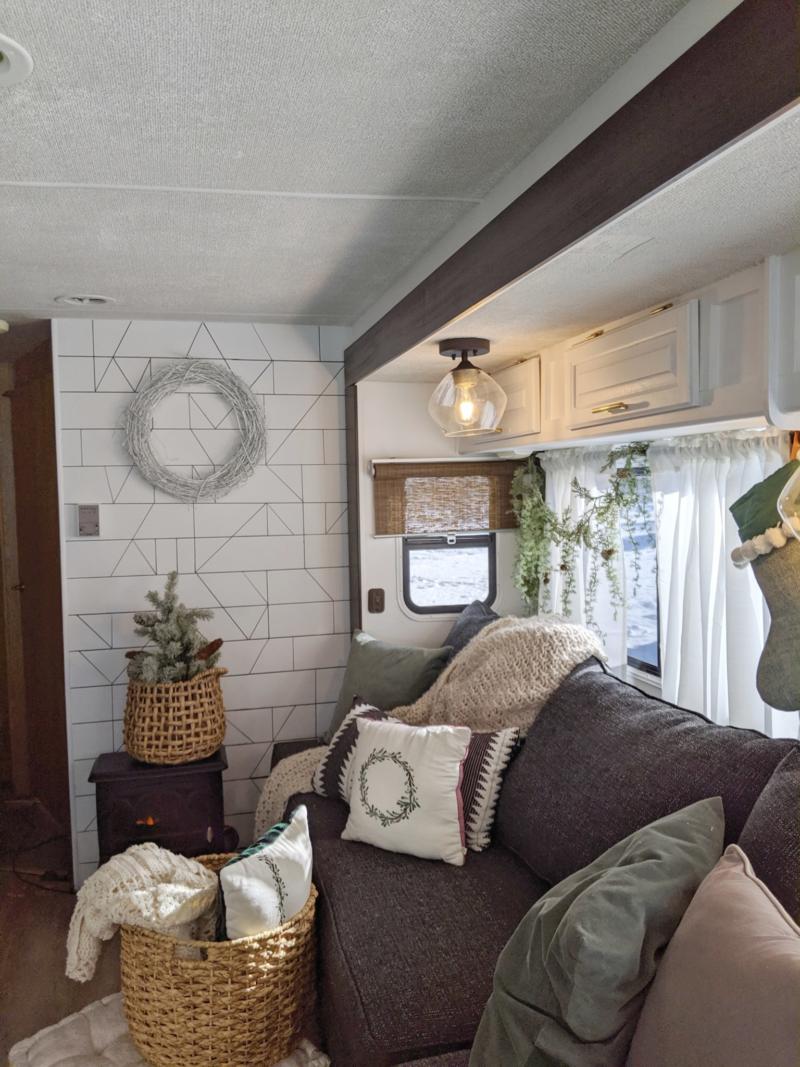
Before and After
Compare the picture above, with the one below! Which do you think looks better?
Pin-It for Later!
Shannon Corcoran
Hello, I am trying to solve carpeted ceiling with huge water stains as well. We have repaired the roof leaks but the stains are awful. Painting might be an option, but the rest of the coach has nice vinyl trim everywhere. Could I hang vinyl over the carpet and install like a headliner; ie. staples and trim?
Tammy
Hi I am wondering if anyone has gotten a reply regarding whether or not the carpeted ceiling still sheds fibers after this painting project??
Amy Anderson
What if there is mold from the ceiling leaking over time? Could you use some kilz over that spot? I’ve spot treated it. But nothing seems to help.
Sarah Lemp
Absolutely! Obviously you’d want to make sure the leak has stopped first and any damage has been repaired. I would clean the area with bleach and allow it to dry thoroughly then cover with a primer that has good stain-blocking power like a Kilz. Cleaning the ceiling is a great first step, but when all else fails, paint it! :)
Paulette Galeener
You’ve encouraged me to take this plunge. Thank you. I used the carpet/upholstery cleaner to do the ceiling in my brothers fifth wheel but I’m currently renovating my folks old motorhome and that’s a lot bigger and the dust and dirt from the Mohave is in it. I think I’m going to use a primer first, then maybe a cream color. Maybe just ceiling bright as my walls are cream and I’m going with the greys. Better get going on it as I need to be careful of the vinyl planks I just installed! Good idea though as scrubbing overhead was way worse than painting! This should seal odors also!
Louise Paris
My question is what is the best way to paint a regular ( not carperted) ceiling in an RV?
Joe F
I have the exact same ceiling carpet and am thinking of spraying on the paint instead of long nap roller. What do you think of this alternate method ( besides extra time needed for masking and taping)? Thanks. Your results look great.
Deb
I tested a corner sprayng rustoleum can paint onto the ozite .
Did not like it ..ozite has fuzzy ends…and those fuzzy parts hung gray and very noticeable….plus can spray spreads allover everything and u..have to wear special mask and suit and toxic smell..is awful..
Im going to try using fuzzy remover as with sweaters in a section then paint…tell ya later
Phyllis colby
Fuzzy remover, what is that? I need it.
Mitchel B Kaufman
How is the ceiling paint holding up?
Sarah Lemp
It’s holding up great!
Wendy Cain
Thank you so much for your article, we’re about to start renovating our Toyota Coaster. The ceiling is yuch.
Wendy
Ebony
OMG your experience is just what I needed to see. I’m renovating a 1992 RV and was dreading removing or covering the carpet with vinyl. I just painted the bathroom to see how it would turn out. I’ll keep you posted as I’m going back in today for inspection of my work! Thanks for sharing your story
Ruth
Hi
was wondering if painting a carpet ceiling would take care of carpet flaking in a motorhome?Tried vacuumning but didn’t work…need help.Don’t want to be breathing this in….
Christine
Ruth did you ever find a solution to the shedding roof carpet? I have the same issue!
Bernadette Macdonald
Thankyou so much for your informative information, my ceiling was exactly the same as yours.
I have been pondering my problem for some time, thanks to you I now know what I am going to do painting the go.
Thanks a million
Regards Bernadette
The book is a must for me I’ll be telling everyone on the road about you.
Oliver Vanhoesen
Emily, I’m restoring and decorating my motorhome things are looking unbelievable and when it comes to the carpeted off brown light tan carpeted ceiling what color do you think I need to use on this off-white bright white what would be the best color I’m thinking an off-white would work well what do you think thanks a lot gorgeous
Oliver Vanhoesen
Ops Sarah
Kori
Hi Sarah, I need some assistance in multiple fileds. I have started remodeling our RV class A while
Living in it with our kids. For now…just the basics like painting, paneling, trim, flooring ect but I have ton of questions. Can you help or offer consulting?
1) my ceiling is a cream leather-ish material but the wall will be white, can I paint it and if so, how?
2) the trim around slide outs are dated and have fabric, what your modernized recommendations?
3) the carpet in the cab area…MUST go! Any suggestions on best practices? I’ve removed carpet before but this is glued down and do I need to remove seats first? Also, huge hump between captain and co-captain…can that be removed for overall even service? What flooring do you recommend for camper?
…..more questions to come …but this is a good start. LOL
Tomiko Radford
I’d like to change the sofa in my rv. Previous owners changed it to a regular let-out. Probably had been a jackknife but I don’t care much for this new one. I’d prefer either another jackknife or a better quality let-out. Any suggestions? Also, do you have to bolt them to the floor or would they be heavy enough to not move? …. and must the veneer and wood be primed first before you paint them? What about removing the outdated but once elegant window treatments and blinds and replacing with curtains? Thanx! Appreciate any tips you have for any of the phases.
BSL
I replaced our RV sofa and used Rec RV. They had a good selection and was exactly what we were looking for. We purchased a jackknife sofa (we use a pool noodle to fill the seam when down for sleeping) and a recliner. When it came to installing, we went to a professional (Hilltop in the Twin Cities of Minnesota. They not only installed both pieces we had them put in seat belts on both pieces. All looks and works great.
Tracy
I am painting my ceiling which is kind of carpeted but patterned so I am using a chalk paint brush and putting it in heavy. I may have to do two coats and hoping the first coat will stiffen it up so I can roll the second coat. Love painting above my head —- joking of course
Emily
Do you think that using spray paint would work too?
dee chadick
ahhh! I thought I was crazy to do this, but yes! Easy fix! Thanks for all the inspiration. Your blog is my manual for my “05 Class C fixer upper. I painted the outside with Behr paint :D