• Menu
  • Skip to left header navigation
  • Skip to right header navigation
  • Skip to primary navigation
  • Skip to secondary navigation
  • Skip to main content
  • Skip to primary sidebar
  • Skip to footer

All Things with Purpose

Travel, Style, Decor and Family

  • Blog
  • Start Here
    • Shop
    • About
    • Contact
    • Work with Me
  • Members
  • Start a Blog
  • My Amazon Store
  • Search
  •  
  • Blog
  • Start Here
    • Shop
    • About
    • Contact
    • Work with Me
  • Members
  • Start a Blog
  • My Amazon Store
  • Search
  •  
  • DIY
  • Travel
  • Motherhood
  • Party
  • Homeschooling
  • Recipes
  • My Account
  • Blog
  • About
  • Work with Me
  • Contributors
  • Privacy Policy
  • DIY
  • Travel
  • Motherhood
  • Party
  • Homeschooling
  • Recipes

Home » Blog » Burlap Wreath Tutorial

Burlap Wreath Tutorial

 March 1, 2012     Sarah Lemp    2 Comments   This post contains affiliate links

Shares29FacebookPinTweetYummlyPrintEmail


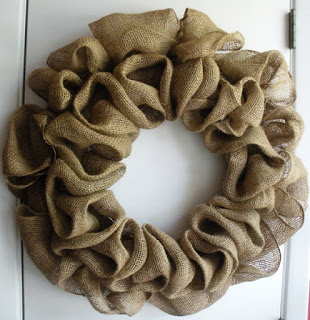
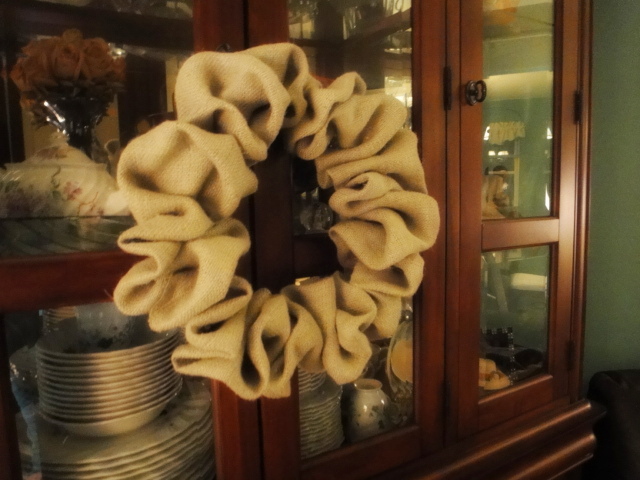
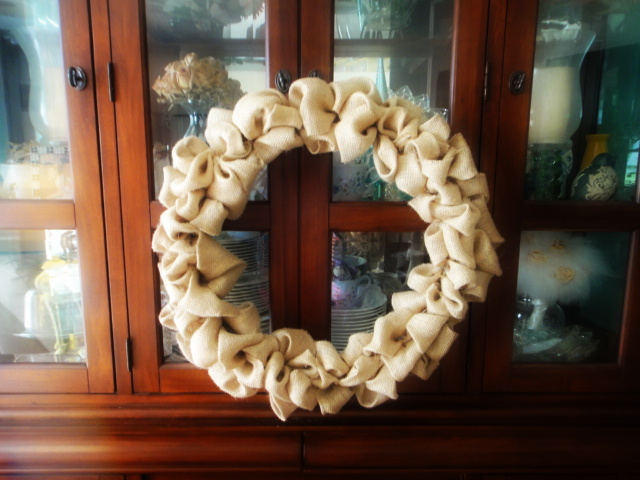
I spent a LONG time trying to recreate an exact replica of this wreath. I figured out in the end, that they must have used a much thinner burlap, and possibly took several extra steps. My way is super easy and I think it turned out pretty nice! I purchased about a yard and a half of burlap from Hobby Lobby. With a 40% off coupon, it ended up being about $2.50 a yard. I used an old metal hanger (literally, one of the last metal hanger in our house), and a couple sticks of hot glue. Total cost for this project: about $3. Now, if you aren’t crafty or just REALLY like this particular wreath, here is the link to the Etsy site where you can buy this one! Burlap Wreath on Etsy Oh, by the way, it’s $65 But hey, it’s super cute!

*Check out my updated tutorial here!


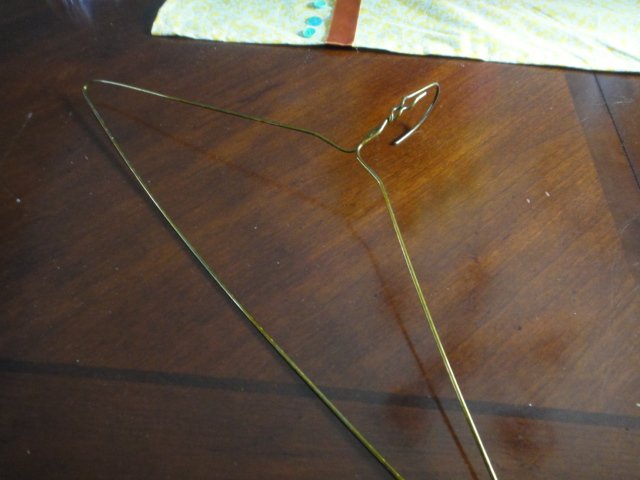
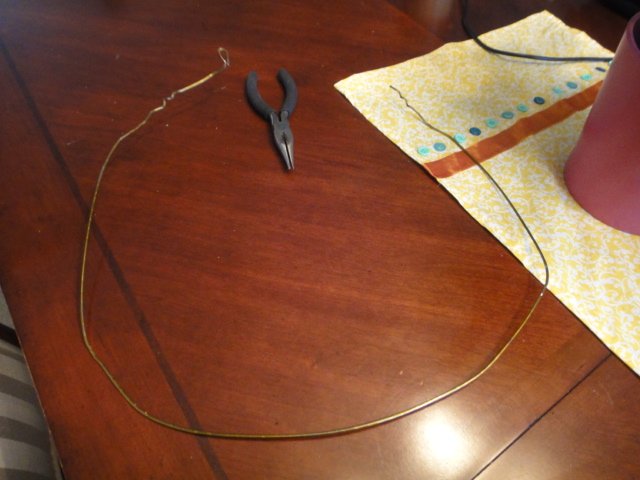
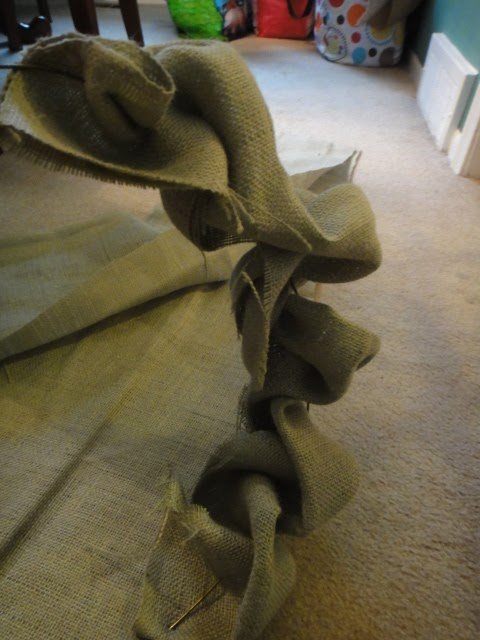
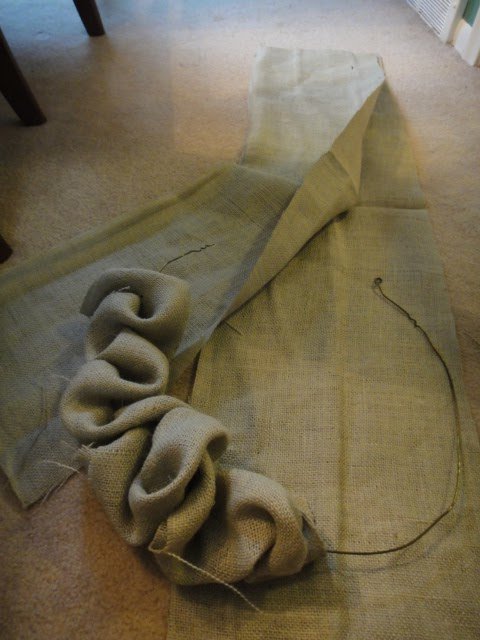
First I formed the hanger into a circle. I cut the burlap into long strips, no more than 12″ wide. Then, I folded these strips in half. I simply fed the metal hanger through the burlap, weaving it up and down, twisting the burlap on occasion to give it a more bunched up look. There really was no clear cut way of doing this. You really just have to play around with it till you get the look you are going for. I used the hot glue to poof certain spots and make it stay exactly where I wanted it. Then, glued the backside in various spots to keep the burlap from sliding around. Have fun!


*Check out my updated tutorial for the wreath below, here!


Shares29FacebookPinTweetYummlyPrintEmail

Category: Crafts

Sarah Lemp

About Sarah Lemp

Sarah is a second generation homeschooling mom. She lives in Metro Detroit with her husband Jay, 5 kids and dog, Edison. They love staying active as a family and going on trips in their renovated RV's. Sarah loves to sing, make pretty things and eat pizza.

Latest Posts

The Friar’s Nook Loaded Buffalo Chicken Tots Recipe

Christmas Home Tour: Rustic Glam Flocked Tree with Pastel Colors

Where to Find Baby Yoda (the Child) Merch

My Microblading Experience 3

My Microblading Experience

Make a Paper House Christmas Village or Ornaments with Free Printable Template

Buddy the Elf Themed Birthday or Christmas Party

Create the Look of Wallpaper or Shiplap Using a Sharpie Paint Pen

Free Things to do At Walt Disney World During the Christmas Season

Previous Post: « Things to Come…
Next Post: Old Ladders and Burlap = Love »

Reader Interactions

Comments

  1. Susan Barton

    November 27, 2013 at 10:15 pm

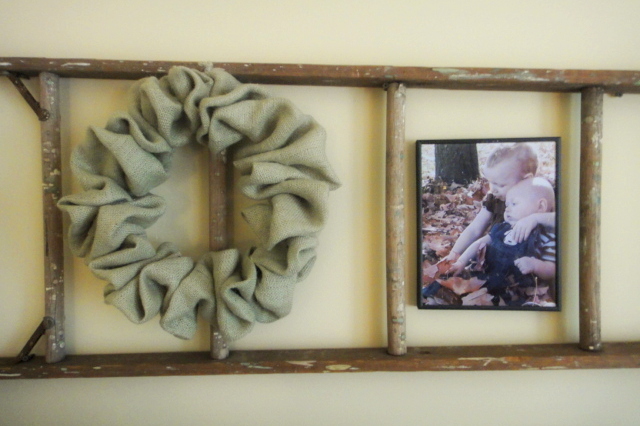
    What a great tutorial! I also appreciate the fact that you’ve shown how to make the wreath as inexpensively as possible. I love the recycled wooden ladder in your photo. I just might have to steal that idea ;-) Thanks for sharing!

    Reply
  2. Anonymous

    April 28, 2013 at 1:04 am

    What a cute wreath! I used your idea to make a wreath for one of our bathrooms which is used mostly by teenage boys. I love that the burlap keeps it from looking to frilly. At hobby lobby I found a red burlap flower with a brown center to use as an accent and added a few brown ribbon streamers to pull it all together. All told it took 30 minutes to complete. Thanks again! I love your site!

    Reply

Leave a Reply Cancel reply

Your email address will not be published. Required fields are marked *

Primary Sidebar

Footer

More about Sarah

Sarah LempSarah is a second generation homeschooling mom. She lives in Metro Detroit with her husband Jay, 5 kids and dog, Edison. They love staying active as a family and going on trips in their renovated camper. Sarah loves to sing, make pretty things and eat pizza.

copyright & disclosure

All content on this site is copyright Sarah Lemp. Many of my posts contain affiliate links. If you click on an affiliate link and buy something, I may receive a small commission. Read more on my disclosure page.

  • Facebook
  • Instagram
  • Pinterest
  • Twitter
  • YouTube
  • My Account
  • Blog
  • About
  • Work with Me
  • Contributors
  • Privacy Policy

Copyright © 2019 All Things with Purpose · All Rights Reserved · Powered by BizBudding Inc

Share this ArticleLike this article? Email it to a friend!

Email sent!