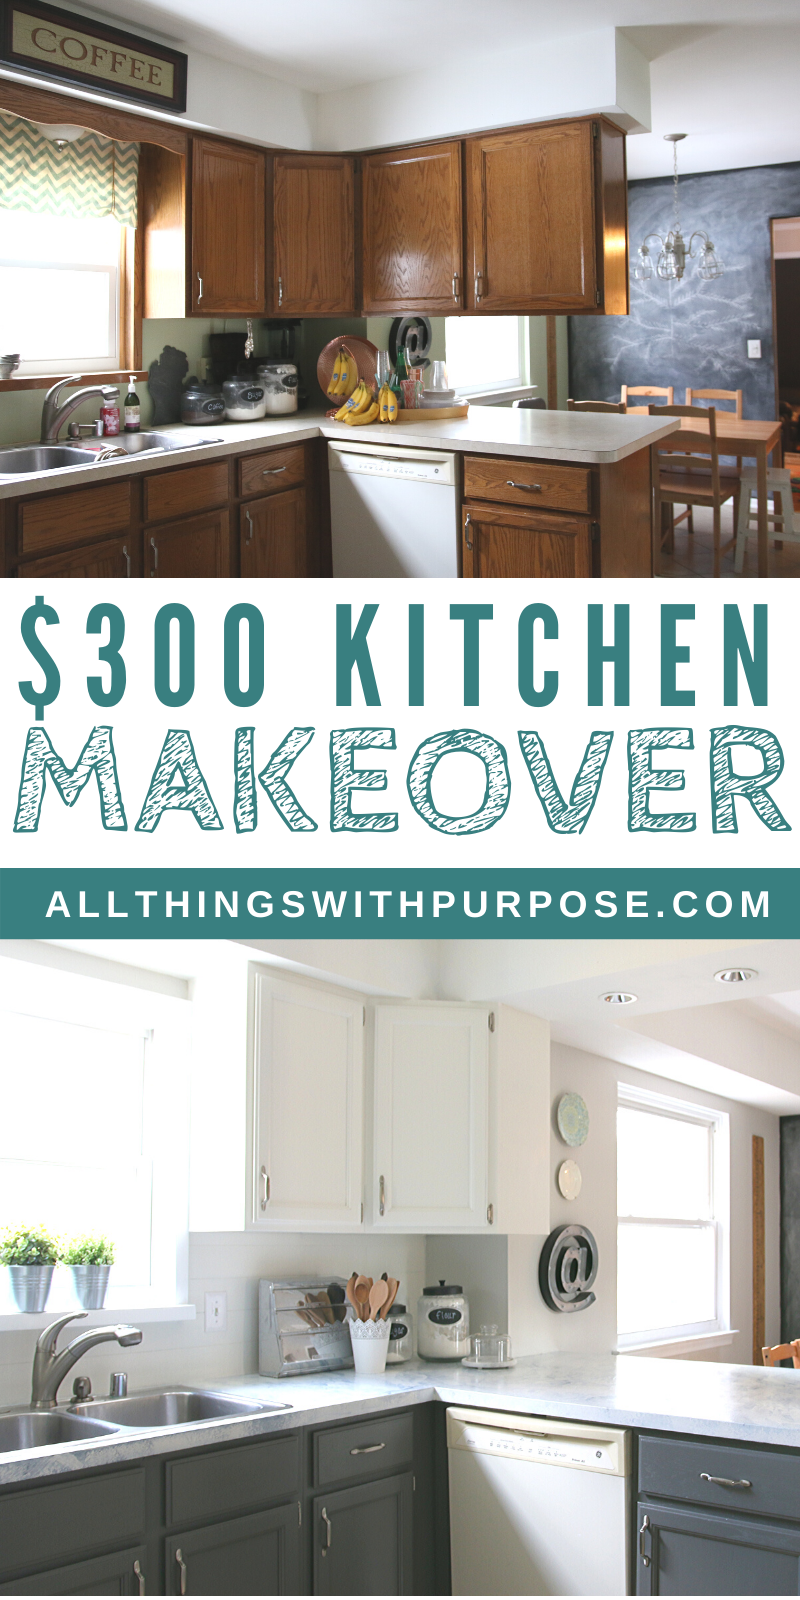
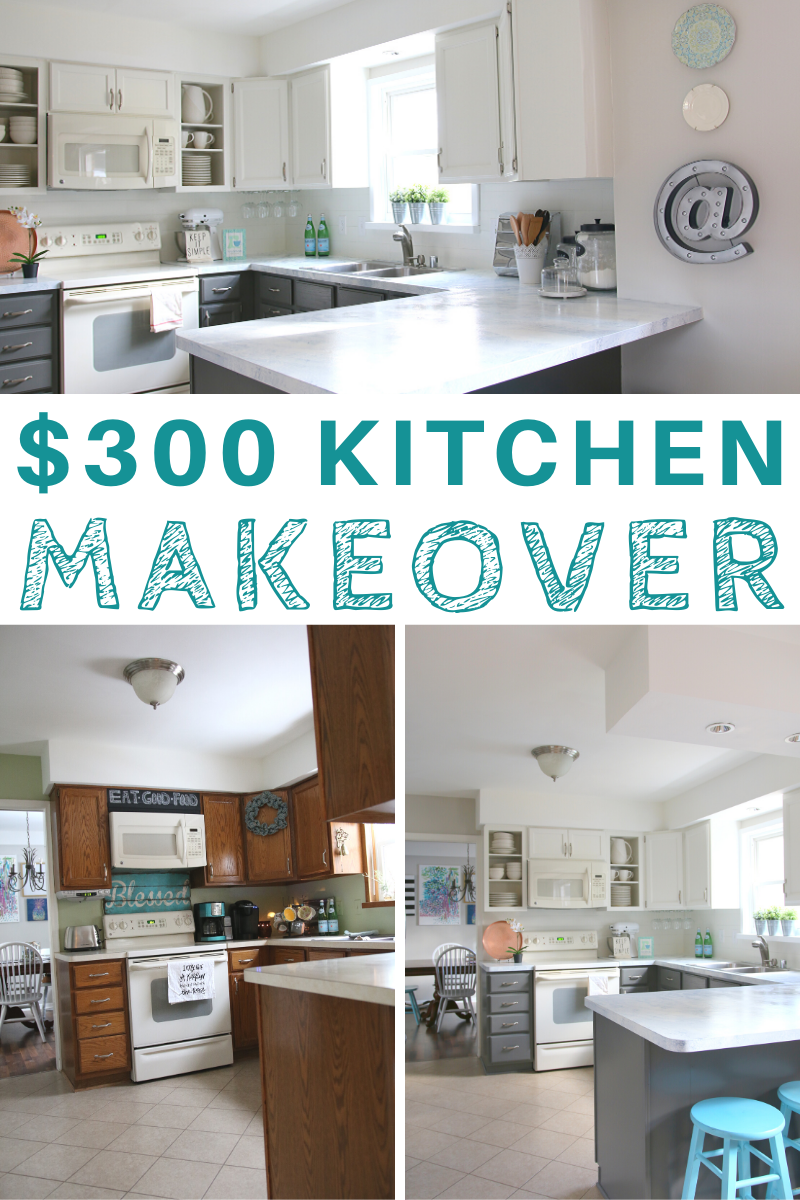
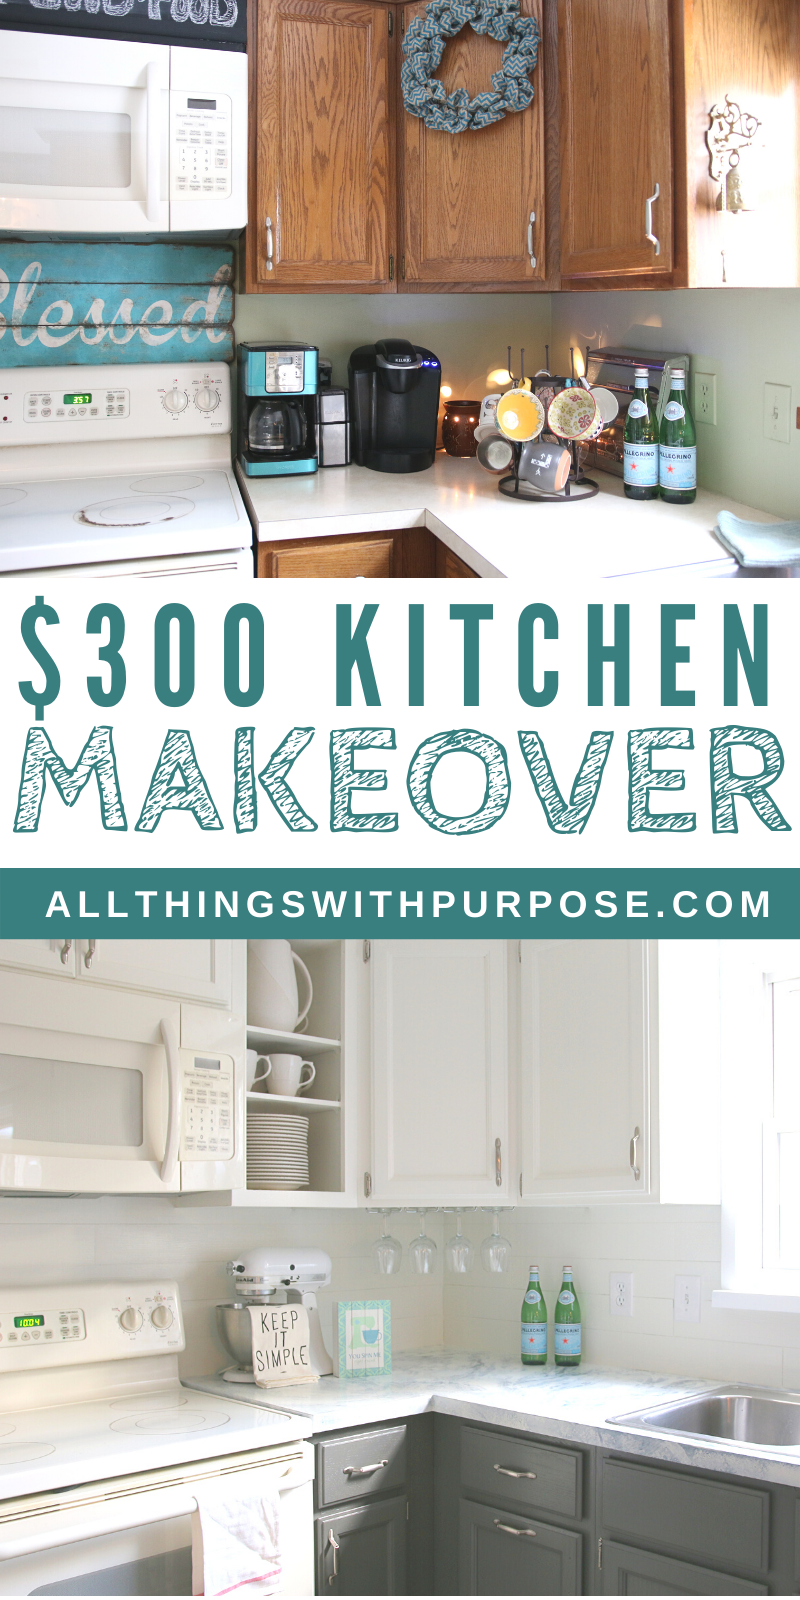
$300 Kitchen Makeover
Do you remember the kitchen makeover I did 4 years ago? It is to date, one of my favorite DIY’s ever. This kitchen remodel is a testimony to the power of paint! With a budget of $300 and a can-do attitude, we transformed this kitchen from drab to fab. From outdated and dark, to clean and modern!
There are a lot of kitchen remodeling tutorials out there, specifically about painting cabinets. If you’re on the fence about painting your cabinets and wonder how well they hold up, wonder no more! After 4 years of constant use and abuse from our family of 7, dogs and guests, these cabinets have held up beautifully! I wouldn’t change one thing about the way we did this remodel, because it has held up so well. I’ll walk you through what we did, so you can replicate this in your own kitchen!
What I did
This is a quick summary of the steps I took to achieve the results I got. I’ll list links to specific products and a more thorough explanation next.
- Removed the upper cabinets from above the bar area
- Removed the doors on two uppers around the stove
- Primed everything using Stix Primer
- Installed a faux shiplap backsplash using peel and stick vinyl floor planks
- Removed the bi-fold doors to the pantry and all the shelves
- Hung the upper cabinet (that was above the bar) in the old pantry
- Bought a used lower cabinet at the Habitat for Humanity ReStore for in the pantry
- Used 2×6 boards to create a faux butchers block counter in the pantry turned coffee bar
- Painted the upper cabinets with Benjamin Moore Advanced paint in Dove White
- Lower cabinets painted with Benjamin Moore Advanced paint in Kendall Charcoal
- Painted the walls with Glidden paint in Smooth Stone
- Created a faux marble finish on the countertops using Stix primer, Glidden flat white paint and charcoal craft paint and a Giani brand Top Coat
- Installed recessed lighting in bulkheads
- New switch plate covers
- Installed a new trash can inside a cabinet
- Clean and organized, decluttered and downsized!!
Price Breakdown of Major Improvements
Here’s the cost breakdown of everything we used for this project:
- Stix Primer – $50
- Benjamin Moore Advanced Paint for Cabinets – $100
- Top Coat for Countertops – $25
- Glidden Wall Paint – $25
- Peel ‘n Stick Vinyl Flooring (for backsplash) – $20
- Used Lower Cabinet – $20
- Recessed Lighting – $60
- 2 4X6 Wood Planks – $8
Things I Already Had
Obviously, the cost could be higher if I didn’t already have many of the tools and supplies needed. If you are about to start a similar project, I suggest making sure you have the proper tools needed or borrowing them from a friend!
- All the tools needed: drill, paint rollers and pans, compound miter saw, etc.
- I had already updated the hardware on the cabinets a few years ago and spent about $40 on the value packs from Home Depot
- The Glidden wall paint and colors I used on the countertops
- Sandpaper
- I updated the flooring a few years ago using groutable vinyl tile

How to Prep and Paint Kitchen Cabinets (Without Sanding)
I’m going to share exactly what I did to prep and paint my cabinets and why they have held up so well. First, I removed all the doors and hardware. Next, I wiped everything down using a Liquid Sander! This product is great because it lightly strips the glossy finish off of any wood, without having to sand anything down. Follow directions on the bottle. I applied this Liquid Sander and allowed them to dry thoroughly.
Next, I painted everything with Stix bonding primer. There are lot of bonding primers out there, and I have used many of them. After doing a ton of research, I found that Stix had rave reviews when it comes to cabinet painting. It can actually stick to anything, including the tile in your bathtub! I figured I would splurge and spend a little more money on a top-of-the-line primer if it would guarantee longer life for my cabinets. I did about 2 light coats of this primer, which I rolled on anywhere I could, using a paintbrush for the corners.
When it came to the actual paint to use, I went with Benjamin Moore. I am normally a Behr paint girl, but I had heard so many good things about Benjamin Moore’s advanced paint for cabinets, that again, I figured the splurge would be well worth it. I chose a dark charcoal color for the lower cabinets, to break up the white and to hide grime from children! The charcoal went on smooth and almost covered in one coat with just a few spots to touch up. The white took 2-3 coats to achieve my desired coverage.
TIP: Painting the insides of your cabinets will easily take 2-3 times longer to paint then the outsides. It is a pain and there are no short-cuts, other than just skipping this step! Because I was painting over dark brown wood, I chose not to paint the insides of my lower cabinets. The dark charcoal on the outside blends well with the dark wood on the inside. For my uppers, I painted the insides because I didn’t want to open my cabinet and see dark wood. I’m not going to lie, painting the insides of cabinets is my least favorite thing in all the world.
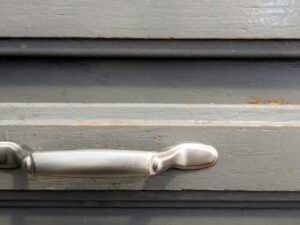
How has it held up?
For the most part, this paint has held up unbelievably well. The only area that has shown any ware, with a few small spots getting scraped off, is around the handle on the trash cabinet. I’m thinking that this particular spot gets the heaviest abuse, and is constantly dirty and greasy. The good thing about this is that it has been pretty easy to break out the paint can and touch it up. The picture on the right is how it looked after a couple of years of wear, before being touched up. Keep in mind, this is the only spot in the whole kitchen that looks like this!
Read: My Fixer-Upper Inspired Kitchen Remodel
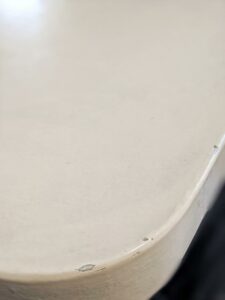
Painted Counter-tops (How They Held Up)
You can find a detailed post I did on how and why I chose to paint my counter-tops here: Painted Countertops
Out of all the things I did in this kitchen, the countertops lasted the shortest amount of time before looking warn. The fancy top coat I used held up for about 2 years before it started to chip off and show signs of abuse. Would I have done this differently? Maybe, maybe not. I wanted a cheap, temporary solution. My dream is to replace the countertops with granite or new laminate, but in the meantime, this made it look a whole lot better! Again, when paint chips, the beauty in it is that you can just touch it up. When things started chipping, I just sanded the spot down a bit and painted over it. After a couple of years, I bought a can of countertop paint and just painted over everything again. Other inexpensive things I may try in the future include contact paper and cement, or a different brand of countertop refinishing paint.
Read: Faux Marble Painted Countertops
Faux Shiplap Backsplash (How It has Held Up)
To save money and time, I used peel ‘n stick vinyl floor planks on my backsplash to create the look of shiplap. If you read the comments section on the original post I did on my faux shiplap backsplash, you’ll see how controversial this has been! Who would have thought? Since doing this, I have heard numerous people share their disastrous results. I don’t know if I just got lucky with the exact floor planks I used, or if I prepped the surface better than anyone else, but my faux shiplap is still hanging and looks good, 4 years later! If you are considering trying this, I would recommend using additional glue, like Liquid Nails, rather than depending on the adhesive already on the flooring.
Read: How to Create a Faux Shiplap Backsplash Using Peel N’ Stick Vinyl Flooring

Supply List and Paint Colors
Here are all the exact products I used:
- Liquid Sander (Deglosser) for the Cabinets: Home Depot or find it on Amazon
- Stix Primer: Amazon
- Benjamin Moore Paint in White Dove (upper cabinets and shiplap)
- Benjamin Moore Paint in Kendall Charcoal (lower cabinets)
- Glidden Paint in Smooth Stone (on walls)
- Wine glass rack (holds 12 glasses): Amazon
- Mug rack: Amazon
- Recessed lights: Home Depot
- “@” sign: Amazon
- Plate holders: Amazon
- Copper tray: Target (Similar)
- Michigan slate board: Bed Bath and Beyond
- Metal buckets and silk plants: IKEA
- “Keep it Simple” tea towel: Target
- White and red tea towel: IKEA
- White scalloped bucket and wooden spoons: IKEA
- Giani top coat for countertops: Amazon
- Turquoise coffee pot: Kohls
- Silk orchid: IKEA
- Table: IKEA
- Chandelier with light cages: find my tutorial here
- Handles for cabinets: Home Depot
- Boxwood wreath: Target (Similar)
- Slide-out trash can: Amazon
Sheri Vickery
I read your post on whitewashing cabinets in your RV using bleach. I began trying to refinish my kitchen cabinets by using a palm sander then a commercial whitewash stain which turned out awful :( I then tried your technique with bleach & sun on the other set of sanded doors and they turned out so much better. I ended up stripping the 1st set and will bleach those, too. BTW I also got the Giani counter top refinishing kit for the counters. Can’t wait to get everything done. Thank you SO much for your help & inspiration.